NO to AI

You will not find AI on my blog!
CT Teams


Sunday, April 24, 2016
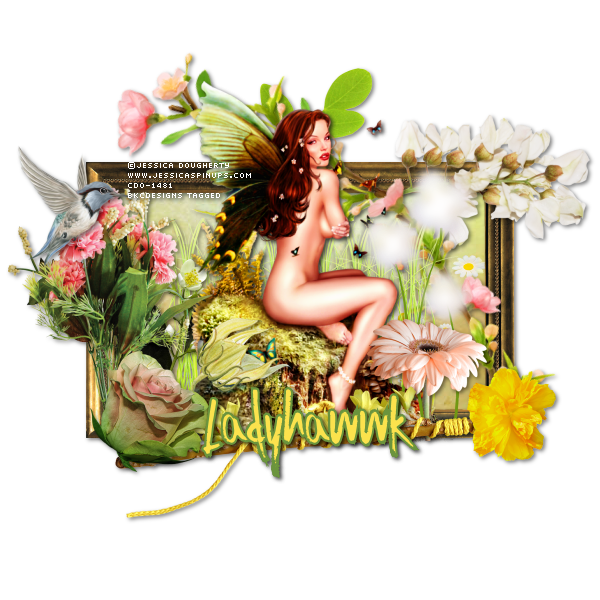
I am using the artwork of Jessica Dougherty. You need a license to use this tube. You can buy the tube at CDO
I am using the PTU kit IB Jessica Dougherty 21-1 by Ladyhawwk Designs. You can find this kit at CDO
Open new image 600 x 600
Edit, Copy Frame 1
Edit, paste, paste as new layer
Image, resize 50%
With your magic wand click inside of the frame
Selections, Modify, Expand by 8
Edit, copy Paper 6
Edit, paste, paste as new layer
Layers, arrange, send to bottom
Selections, Invert
Edit, Clear
Edit, copy Ele23
Edit, paste, paste as new layer
Image, resize 60%
Edit, Clear
Selections, Select None
Select Raster 2
Effects, 3D Effects, Drop Shadow, Settings of:
Vertical : 2
Horizontal: 2
Opacity: 50
Blur: 6
Color: Black
Shadow on new layer NOT Checked
Edit, copy Tube
Edit, paste, paste as new layer
Image, resize to fit your tag
Effects, 3D Effects, Drop Shadow, Same Settings
Edit, Copy Ele18
Edit, paste, paste as new layer
Image, resize 40%
Move behind the tube and to the left
Effects, 3D Effects, Drop Shadow, Same Settings
Layers, Duplicate
Image, Mirror
Select Raster 2
Edit, copy Ele17
Edit, paste, paste as new layer
Image, resize 50%
Image, rotate, free rotate, right 20
Effects, 3D Effects, Drop Shadow, Same Settings
Edit, copy Ele12
Edit, paste, paste as new layer
Layers, arrange, bring to top
Image, resize 40%
Move to the bottom left of the frame
Effects, 3D Effects, Drop Shadow, Same Settings
Edit, copy Ele2
Edit, paste, paste as new layer
Layers, arrange, bring to top
Image,resize 30%
Move to the right side of the tube. See my tag for placement
Effects, 3D Effects, Drop Shadow, Same Settings
Select Raster 2
Edit, copy Ele28
Edit, paste, paste as new layer
Image, resize 50%
Image, Mirror
Move to the right side at the top of the frame
Effects, 3D Effects, Drop Shadow, Same settings
Edit, copy Ele6
Edit, paste, paste as new layer
Image, resize 30%
Move to the left side of the tube. See my tag for placement
Effects, 3D Effects, Drop Shadow, Same settings
Edit, copy Ele3
Edit, paste, paste as new layer
Image, resize 40%
Layers, arrange, bring to top
Move to bottom left and cover up the bottoms of the flower stems
Effects, 3D Effects, Drop Shadow, Same settings
Edit, copy Ele22
Edit, paste, paste as new layer
Image, resize 40%
Move to the left and place in front of the grass and beside the tube
Effects, 3D Effects, Drop Shadow, Same settings
Edit, copy Ele19
Edit, paste, paste as new layer
Image, resize 50%
Move to place at the bottom of the rock of the tube. Making sure it covers the stems of the flowers you have so far
Effects, 3D Effects, Drop Shadow, Same settings
Edit, copy Ele32
Edit, paste, paste as new layer
Image, resize 30%
Move to the left and place near the top of the flowers
Effects, 3D Effects, Drop Shadow, Same Settings
Edit, copy Ele5
Edit, paste, paste as new layer
Image, resize 30%
Move to the left and move down til it is in front of the grass
Effects, 3D Effects, Drop Shadow, Same settings
Edit, Copy Ele27
Edit, paste, paste as new layer
Image, resize 20%
Layers, arrange, bring to top
Move to the bottom right of the frame
Effects, 3D Effects, Drop Shadow, Same Settings
Remember to add your copyright info. Make sure it is plain and legible
Add your name to the tag
Save as PNG
Saturday, April 23, 2016

I am using the artwork of Monte Moore. You need a license to use this tube. You can buy this tube at CDO
I am using the PTU Kit IB Monte Moore 26-3 by Gimptastic Scraps . This kit is exclusive to CDO
Open new image 600 x 600
Edit, Copy Frame 2
Edit, paste, paste as new layer
Image, resize 70%
With your magic wand click inside of the frame
Selections, Modify, Expand by 8
Edit, copy Paper 3
Edit, paste, paste as new layer
Layers, arrange, send to bottom
Selections, Invert
Edit, Clear
Edit, copy Ele 17
Edit, paste, paste as new layer
Move over to the left just a bit
Edit, Clear
Selections, Select None
Effects, 3D Effects, Drop Shadow, Settings of:
Vertical : 2
Horizontal: 2
Opacity: 65
Blur: 5
Color: Black
Shadow on new layer NOT Checked
Edit, copy Tube
Edit, paste, paste as new layer
Image, resize to fit your tag
Effects, 3D Effects, Drop Shadow, Same settings
Edit, copy Ele 12
Edit, paste, paste as new layer
Layers, arrange, send to bottom
Move over to the right and up some
Effects, 3D Effects, Drop Shadow, Same Settings
Edit, copy Ele 11
Edit, paste, paste as new layer
Image, resize 70%
Move to the bottom of Raster 2. See my tag for placement
Effects, 3D Effects, Drop Shadow, same Settings
Select Raster 2
Edit, copy Ele 6
Edit, paste, paste as new layer
Image, resize 70%
Move to the bottom left of the frame
Effects, 3D Effects, Drop Shadow, Same Settings
Layers, Duplicate
Image, Mirror
Edit, copy Ele 21
Edit, paste, paste as new layer
Image, Resize 70%
Move to the right side of the frame on Raster 2
Effects, 3D Effects, Drop Shadow, Same settings
Edit, Copy Ele 20
Edit, paste, paste as new layer
Image, resize 70%
Image, Mirror
Image, Flip
Move to place on the boat. See my tag for placement
Effects, 3D Effects, Drop Shadow, same Settings
Edit, copy Ele 4
Edit, paste, paste as new layer
Image, resize 40%
Move to the left placing behind the fishing pole
Effects, 3D Effects, Drop Shadow, Same Settings
Edit, copy Ele 14
Edit, paste, paste as new layer
Image, resize 50%
Move to the bottom left placing in front of the greenery
Effects, 3D Effects, Drop Shadow, Same Settings
Edit, copy Ele 8
Edit, paste, paste as new layer
Move down to above the spray of the water on the left side
Image, rotate, free rotate, left, 20
Image, resize 50%
Effects, 3D Effects, Drop Shadow, Same Settings
Remember to add your copyright info. Make sure it is plain and legible
Add your name to the tag
Save as PNG
Wednesday, April 20, 2016

I am using the artwork of Enys Guerrero. You need a license to use this tube. You can buy this tube at CDO
I am using the PTU Kit IB Enys Guerrero 21-2 by Gimptastic Scraps . This kit is exclusive to CDO
Open new image 600 x 600
Edit, Copy Frame 1
Edit, paste, paste as new layer
Image, resize 75%
With your magic wand click inside of the frame
Selections, Modify, Expand by 8
Edit, copy Paper 6
Edit, paste, paste as new layer
Layers, arrange, send to bottom
Selections, Invert
Edit, Clear
Selections, Select None
Effects, 3D Effects, Drop Shadow, Settings of:
Vertical : 2
Horizontal: 2
Opacity: 65
Blur: 5
Color: Black
Shadow on new layer NOT Checked
Edit, copy Tube
Edit, paste, paste as new layer
Image, resize 60%
Effects, 3D Effects, Drop Shadow, Same settings
Select Raster 2
Layers, Duplicate
Layers, arrange, bring to top
Using your eraser tool erase the top of the frame from around the tube
Than go to the tube layer and eraser the tube at the bottom that you can see it hanging below the frame in the back
Edit, copy Ele 15
Edit, paste, paste as new layer
Layers, arrange, send to bottom
Move over to the left some and up
Effects, 3D Effects, Drop Shadow, Same Settings
Layers, Duplicate
Image, Mirror
Edit, copy Ele 12
Edit, paste, paste as new layer
Image, resize 60%
Layers, arrange, bring to top
Move to bottom left of the frame
Effects, 3D Effects, Drop Shadow, same Settings
Layers, Duplicate
Image, Mirror
Edit, copy Ele 5
Edit, paste, paste as new layer
Image, resize 60%
Move to the bottom of the frame
Effects, 3D Effects, Drop Shadow, Same Settings
Edit, copy Ele 22
Edit, paste, paste as new layer
Image, Mirror
Move to the right side of the frame placing behind the copied frame. See my tag for placement
Effects, 3D Effects, Drop Shadow, Same settings
Edit, Copy Ele 9
Edit, paste, paste as new layer
Image, resize 60%
Image, Flip
Move behind the flowers at the bottom of the frame
Effects, 3D Effects, Drop Shadow, same Settings
Edit, copy Ele 8
Edit, paste, paste as new layer
Layers, arrange, send to bottom
Move to the left and move down
Effects, 3D Effects, Drop Shadow, Same Settings
Layers, Duplicate
Image, Mirror
Edit, copy Ele 17
Edit, paste, paste as new layer
Layers, arrange, bring to top
Move to the far right placing on one of the branches
Image, resize 40%
Effects, 3D Effects, Drop Shadow, Same Settings
Edit, copy Ele 21
Edit, paste, paste as new layer
Move down to raster 2
Effects, 3D Effects, Drop Shadow, Same Settings
Edit, copy Ele 1
Edit, paste, paste as new layer
Move to the bottom left
Layers, arrange, send to bottom
Move below the flowers
Effects, 3D Effects, Drop Shadow, Same Settings
Layers, Duplicate
Image, Mirror
Remember to add your copyright info. Make sure it is plain and legible
Add your name to the tag
Save as PNG
Tuesday, April 19, 2016

I am using the artwork of Dirk Richter. You need a license to use this tube. You can buy this tube at CDO
I am using the PTU Kit IB Dirk Richter 18-3 by Gimptastic Scraps . This kit is exclusive to CDO
Open new image 600 x 600
Edit, Copy Frame 1
Edit, paste, paste as new layer
Image, resize 70%
With your magic wand click inside of the frame
Selections, Modify, Expand by 8
Edit, copy Paper 6
Edit, paste, paste as new layer
Layers, arrange, send to bottom
Selections, Invert
Edit, Clear
Selections, Select None
Select Raster 2
Effects, 3D Effects, Drop Shadow, Settings of:
Vertical : 2
Horizontal: 2
Opacity: 65
Blur: 5
Color: Black
Shadow on new layer NOT Checked
Edit, Copy Tube
Edit, paste, paste as new layer
Image, resize to fit your tag
Effects, 3D Effects, Drop Shadow, Same settings
Select Raster 2
Edit, copy Ele 3
Edit, paste, paste as new layer
Move to the bottom left of the frame
Image, resize 60%
Effects, 3D Effects, Drop Shadow, Same Settings
Edit, copy Ele 18
Edit, paste, paste as new layer
Image, resize 60%
Layers, arrange, bring to top
Move to place in front of the tube
Effects, 3D Effects, Drop Shadow, same Settings
Edit, copy Ele 4
Edit, paste, paste as new layer
Image, resize 50%
Move to the left side and place it on the box
Effects, 3D Effects, Drop Shadow, Same Settings
Edit, copy Ele 19
Edit, paste, paste as new layer
Image, resize 70%
Move to the bottom right placing on Raster 2
Effects, 3D Effects, Drop Shadow, Same settings
Edit, Copy Ele 16
Edit, paste, paste as new layer
Image, resize 40%
Move to the left side placing in front of the box on the left side
Effects, 3D Effects, Drop Shadow, same Settings
Edit, copy Ele 5
Edit, paste, paste as new layer
Image, resize 60%
Move to the left placing behind the box and tube
Effects, 3D Effects, Drop Shadow, Same Settings
Select Raster 2
Edit, copy Ele 21
Edit, paste, paste as new layer
Move to the bottom right of the frame and move over
Image, resize 60%
Effects, 3D Effects, Drop Shadow, Same Settings
Select Raster 2
Edit, copy Ele 20
Edit, paste, paste as new layer
Image, resize 70%
Move behind the tube and a little to the right. Move below the previous element
Effects, 3D Effects, Drop Shadow, Same Settings
Edit, copy Ele 8
Edit, paste, paste as new layer
Image, resize 50%
Move down and behind the tube but move over so it is sitting on her right side
Effects, 3D Effects, Drop Shadow, Same Settings
Remember to add your copyright info. Make sure it is plain and legible
Add your name to the tag
Save as PNG
Sunday, April 17, 2016

I am using the artwork of Cartoon Pink. You need a license to use this tube. You can buy the tube at CDO
I am using the PTU kit IB Cartoon Pink 43-1 by Ladyhawwk Designs. You can find this kit at CDO
Open new image 600 x 600
Edit, Copy Frame 3
Edit, paste, paste as new layer
Image, resize 50%
With your magic wand click inside of the frame
Selections, Modify, Expand by 8
Edit, copy Paper 1
Edit, paste, paste as new layer
Layers, arrange, send to bottom
Selections, Invert
Edit, Clear
Edit, copy Ele 28
Edit, paste, paste as new layer
Edit, Clear
Selections, Select None
Select Raster 2
Effects, 3D Effects, Drop Shadow, Settings of:
Vertical : 2
Horizontal: 2
Opacity: 50
Blur: 6
Color: Black
Shadow on new layer NOT Checked
Edit, copy Tube
Edit, paste, paste as new layer
Image, resize to fit your tag
Effects, 3D Effects, Drop Shadow, Same Settings
Edit, Copy Ele1
Edit, paste, paste as new layer
Image, resize 40%
Move to the bottom left of the frame
Effects, 3D Effects, Drop Shadow, Same Settings
Select Raster 2
Edit, copy Ele2
Edit, paste, paste as new layer
Image, resize 40%
Move to the right side of the frame
Effects, 3D Effects, Drop Shadow, Same Settings
Select Raster 2
Edit, copy Ele28
Edit, paste, paste as new layer
Move to the top right of the frame
Image, resize 40%
Effects, 3D Effects, Drop Shadow, Same Settings
Edit, copy Ele19
Edit, paste, paste as new layer
Layers, arrange, bring to top
Image, Mirror
Move to bottom placing in front of the cut off tube
Image, resize 50%
Effects, 3D Effects, Drop Shadow, Same Settings
Edit, copy Ele9
Edit, paste, paste as new layer
Image, resize 50%
Move to the left side of the plate. See my tag for placement
Effects, 3D Effects, Drop Shadow, Same settings
Select Raster 2
Edit, copy Ele18
Edit, paste, paste as new layer
Image, resize 60%
Move to the left side of the frame
Effects, 3D Effects, Drop Shadow, Same settings
Edit, copy Ele8
Edit, paste, paste as new layer
Image, resize 40%
Move in front of the cup of coffee
Effects, 3D Effects, Drop Shadow, Same settings
Edit, copy Ele20
Edit, paste, paste as new layer
Image, resize 40%
Move to the left and place in front of the plate
Effects, 3D Effects, Drop Shadow, Same settings
Edit, copy Ele5
Edit, paste, paste as new layer
Image, rotate, free rotate, left 40
Image, resize 80%
Layers, arrange, send to bottom
Effects, 3D Effects, Drop Shadow, Same settings
Edit, copy Ele7
Edit, paste, paste as new layer
Image, resize 40%
Move to place in front of the coffee cup but behind the kiwi
Effects, 3D Effects, Drop Shadow, Same Settings
Edit, copy Ele29
Edit, paste, paste as new layer
Image, resize 40%
Layers, arrange, bring to top
Move to place in front of the kiwi and to the right some
Effects, 3D Effects, Drop Shadow, Same settings
Edit, Copy Ele12
Edit, paste, paste as new layer
Image, resize 40%
Move to the left and place on the flower bush
Effects, 3D Effects, Drop Shadow, Same Settings
Remember to add your copyright info. Make sure it is plain and legible
Add your name to the tag
Save as PNG

I am using the artwork of Joan Pelaez. You need a license to use this tube. You can buy the tube at CDO
I am using the PTU kit IB Joan Pelaez 14-2 by Ladyhawwk Designs. You can find this kit at CDO
Open new image 600 x 600
Edit, Copy Frame 1
Edit, paste, paste as new layer
Image, resize 70%
With your magic wand click inside of the frame
Selections, Modify, Expand by 8
Edit, copy Paper 3
Edit, paste, paste as new layer
Layers, arrange, send to bottom
Selections, Invert
Edit, Clear
Edit, copy Ele 28
Edit, paste, paste as new layer
Edit, Clear
Selections, Select None
Select Raster 2
Effects, 3D Effects, Drop Shadow, Settings of:
Vertical : 2
Horizontal: 2
Opacity: 50
Blur: 6
Color: Black
Shadow on new layer NOT Checked
Edit, copy Tube
Edit, paste, paste as new layer
Image, resize to fit your tag
Effects, 3D Effects, Drop Shadow, Same Settings
Edit, Copy Ele30
Edit, paste, paste as new layer
Image, resize 75%
Layers, arrange, send to bottom
Effects, 3D Effects, Drop Shadow, Same Settings
Edit, copy Ele26
Edit, paste, paste as new layer
Layers, arrange, Send to bottom
Effects, 3D Effects, Drop Shadow, Same Settings
Select Raster 2
Edit, copy Ele9
Edit, paste, paste as new layer
Move to the left side of the frame
Image, resize 70%
Effects, 3D Effects, Drop Shadow, Same Settings
Edit, copy Ele27
Edit, paste, paste as new layer
Move to the right side of the frame
Image, resize 50%
Effects, 3D Effects, Drop Shadow, Same Settings
Edit, copy Ele22
Edit, paste, paste as new layer
Image, resize 20%
Image, Mirror
Layers, arrange, bring to top
Move to the right side of the frame placing on the edge of the previous element
Effects, 3D Effects, Drop Shadow, Same settings
Select The Frame
Layers, Duplicate
Layers, arrange, bring to top
Use your eraser tool to get rid of the excess frame. I just kept a little at the bottom of the cut off leg of the tube
Edit, copy Ele13
Edit, paste, paste as new layer
Image, resize 40%
Move to the bottom left placing at the bottom and in front of the flower
Effects, 3D Effects, Drop Shadow, Same settings
Edit, copy Ele28
Edit, paste, paste as new layer
Image, resize 50%
Move to the left and move below the other flower. Move to the right some
Effects, 3D Effects, Drop Shadow, Same settings
Edit, copy Ele1
Edit, paste, paste as new layer
Image, resize 30%
Move to the bottom right placing at the bottom of the water fountain
Effects, 3D Effects, Drop Shadow, Same settings
Select Your Tube
Edit, copy Ele24
Edit, paste, paste as new layer
Image, resize 40%
Image, mirror
Move to place a little bit on the wand. See my tag for placement
Effects, 3D Effects, Drop Shadow, Same settings
Edit, copy Ele2
Edit, paste, paste as new layer
Image, resize 40%
Move to the bottom right placing behind the water fountain
Effects, 3D Effects, Drop Shadow, Same Settings
Edit, copy Ele15
Edit, paste, paste as new layer
Image, resize 30%
Layers, arrange, bring to top
Move to the bottom right. See my tag for placement
Effects, 3D Effects, Drop Shadow, Same settings
Remember to add your copyright info. Make sure it is plain and legible
Add your name to the tag
Save as PNG
Saturday, April 16, 2016

I am using the artwork of Arthur Crowe. You must have a license to use this tube. You can buy the tube at his store HERE
I am using the kit Spring Burst by Manipulated by Magik. You can buy this kit only at the new site store found HERE
Open new image 600 x 600
Edit, Copy Shadow box
Edit, paste, paste as new layer
With your magic wand click inside each of the frames
Selections, Modify, Expand by 8
Edit, copy Paper 1
Edit, paste, paste as new layer
Layers, arrange, send to bottom
Selections, Invert
Edit, Clear
Selections, Select None
Select Raster 2
Effects, 3D Effects, Drop Shadow, Settings of:
Vertical : 2
Horizontal: 2
Opacity: 50
Blur: 6
Color: Black
Shadow on new layer NOT Checked
Edit, copy Tree
Edit, paste, paste as new layer
Image, resize 80%
Move to the left side of the frame
Effects, 3D Effects, Drop Shadow, Same Settings
Edit, copy Light Ball
Edit, paste, paste as new layer
Move to the top left of the frame moving behind the tube
Image, resize 50%
Effects, 3D Effects, Drop Shadow, Same Settings
Edit, copy Tulips
Edit, paste, paste as new layer
Move down to bottom left in front of the tree
Image, resize 50%
Effects, 3D Effects, Drop Shadow, Same Settings
Edit, copy Calla Lilies
Edit, paste, paste as new layer
Image, resize 50%
Move to the bottom right of the frame
Effects, 3D Effects, Drop Shadow, Same Settings
Edit, Copy Flower 1
Edit, paste, paste as new layer
Image, resize 40%
Move to the bottom right of the frame in front of the calla lilies
Effects, 3D Effects, Drop Shadow, Same Settings
Edit, copy Tube
Edit, paste, paste as new layer
Layers, arrange, bring to top
Image, resize to fit your tag
Move to the bottom of the frame
Effects, 3D Effects, Drop Shadow, Same Settings
Edit, copy Berry Branch
Edit, paste, paste as new layer
Image, resize 80%
Move to the bottom right of the frame
Layers, arrange, send to bottom
Effects, 3D Effects, Drop Shadow, Same Settings
Layers, Duplicate
Image, Mirror
Select Raster 2
Edit, copy Flower Bush
Edit, paste, paste as new layer
Image, resize 50%
Move to bottom right of the frame behind the other flowers. See my tag for placement
Effects, 3D Effects, Drop Shadow, Same Settings
Still on Raster 2
Edit, copy Rainbow
Edit, paste, paste as new layer
Move to the top of the frame
Image, rotate, free rotate, left, 20
Effects, 3D Effects, Drop Shadow, same settings
Edit, copy Flower 5
Edit, paste, paste as new layer
Image, resize 30%
Move down to the left placing behind the tulips
Effects, 3D Effects, Drop Shadow, Same settings
Edit, copy Balloons
Edit, Paste, paste as new layer
Image, resize 60%
Move up above the rainbow and to the right side of the frame
Image, rotate, free rotate, right, 20
Effects, 3D Effects, Drop Shadow, Same Settings
Select Raster 2
Edit, copy Butterfly Scatter
Edit, paste, paste as new layer
Move up and to the right some
Effects, 3D Effects, Drop Shadow, Same Settings
Edit, copy Flower Deco
Edit, paste, paste as new layer
Image, resize 40%
Image, Mirror
Move to the far right in front of the other flowers
Effects, 3D Effects, Drop Shadow, Same Settings
Edit, copy Flowers
Edit, paste, paste as new layer
Image, resize 40%
Move to the far left and place in front of the tulips
Effects, 3D Effects, Drop Shadow, Same Settings
Select Raster 2
Edit, copy Rose Blossoms
Edit, paste, paste as new layer
Image, resize 50%
Move to place behind the tube. See my tag for placement
Effects, 3D Effects, Drop Shadow, Same Settings
Remember to add your copyright info. Make sure it is plain and legible
Add your name to the tag
Save as PNG
Subscribe to:
Posts
(Atom)