NO to AI

You will not find AI on my blog!
CT Teams


Tuesday, January 30, 2018

I am using the artwork of Abranda Icle Flaminio. You need a license to use this tube. You can buy this tube at CDO
I am using the PTU Kit IB Abranda Icle Flaminio 16-2 by Schnegge’s Scraps. This kit is sold at CDO
Open new image 600 x 600
Edit, copy Frame 02
Edit, paste, paste as new layer
Image, resize 70%
With your magic wand click inside of the frame
Selections, Modify, Expand by 8
Edit, copy Paper 06
Edit, paste, paste as new layer
Layers, arrange, send to bottom
Selections, Invert
Edit, Clear
Edit, copy Element 02
Edit, paste, paste as new layer
Image, resize 70%
Edit, Clear
Selections, Select None
Select Raster 2
Effects, 3D Effects, Drop Shadow, Settings of:
Vertical : 2
Horizontal: 2
Opacity: 65
Blur: 5
Color: Black
Shadow on new layer NOT Checked
Edit, copy Element 09
Edit, paste, paste as new layer
Image, resize 80%
Move up just a tad
Effects, 3D Effects, Drop Shadow, Same settings
Edit, Copy Tube
Edit, paste, paste as new layer
Image, resize 80%
Effects, 3D Effects, Drop Shadow, same Settings
Edit, copy Element 08
Edit, paste, paste as new layer
Image, resize 60%
Image, Mirror
Move to the left and place behind the tube and in front of the arch
Effects, 3D Effects, Drop Shadow, Same Settings
Edit, copy Element 17
Edit, paste, paste as new layer
Image, resize 60%
Move to the left behind the statue
Effects, 3D Effects, Drop Shadow, Same Settings
Edit, copy Element 18
Edit, paste, paste as new layer
Image, Mirror
Move place in front of the other flower
Image, resize 60%
Effects, 3D Effects, Drop Shadow, Same Settings
Edit, copy Element 06
Edit, paste, paste as new layer
Image, resize 60%
Move to the right in front of the arch but behind the tube
Effects, 3D Effects, Drop Shadow, Same Settings
Edit, copy Element 07
Edit, paste, paste as new layer
Image, resize 40%
Move to place in front of the birdcage
Effects, 3D Effects, Drop Shadow, Same Settings
Edit, Copy Element 03
Edit, paste, paste as new layer
Image, resize 40%
Move to the top right of the frame
Layers, arrange, send to bottom
Effects, 3D effects, Drop Shadow, Same Settings
Edit, copy Element 13
Edit, paste, paste as new layer
Image, resize 70%
Move above the sun and over some
Effects, 3D Effects, Drop Shadow, Same settings
Layers, Duplicate
Image, Mirror
Move up toward the top of the image
Edit, copy Element 16
Edit, paste, paste as new layer
Layers, arrange, bring to top
Image, resize 40%
Move to the right and place on the birdcage
Effects, 3D effects, Drop Shadow, Same Settings
Edit, copy Element 11
Edit, paste, paste as new layer
Image, resize 40%
Move in front of the arch and to the far right
Effects, 3D Effects, Drop Shadow, Same Settings
Remember to add your copyright info. Make sure it is plain and legible
Add your name to the tag
Save as PNG
Monday, January 22, 2018
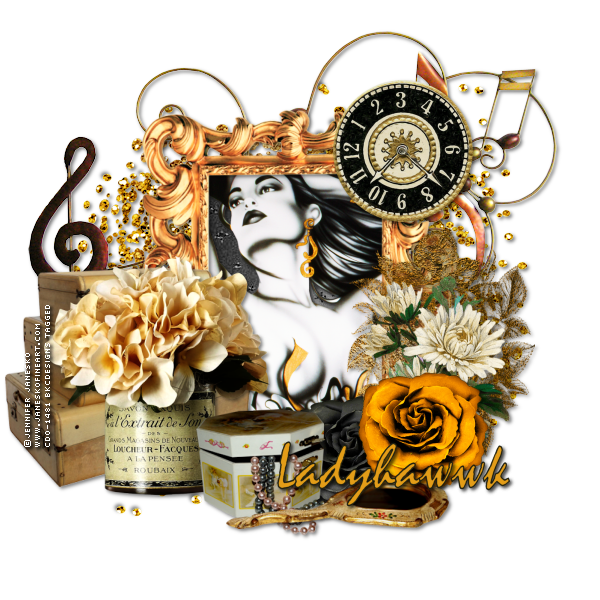
I am using the artwork of Jennifer Janesko. You need a license to use this tube. You can purchase this tube at CDO
I am using the PTU kit IB Jennifer Janesko 120-3 by Ladyhawwk Designs. You can find this kit at CDO
Open new image 600 x 600
Edit, copy Frame 2
Edit, paste, paste as new layer
Image, resize 70%
Image, rotate, free rotate, right 90
With your magic wand click inside of the frame
Selections, Modify, Expand by 8
Edit, copy Paper 1
Edit, paste, paste as new layer
Layers, arrange, send to bottom
Selections, Invert
Edit, Clear
Edit, copy Tube
Edit, paste, paste as new layer
Image, resize 70%
Move around til you have it in the frame as you wish
Edit, clear
Selections, Select None
Effects, 3D Effects, Drop Shadow, Settings of:
Vertical : 2
Horizontal: 2
Opacity: 50
Blur: 6
Color: Black
Shadow on new layer NOT Checked
Select Raster 2
Effects, 3D Effects, Drop Shadow, Same Settings
Edit, copy Ele 21
Edit, paste, paste as new layer
Image, resize 60%
Move to the bottom left of the frame
Effects, 3D Effects, Drop Shadow, Same Settings
Edit, copy Ele 1
Edit, paste, paste as new layer
Layers, arrange, send to bottom
Effects, 3D Effects, Drop Shadow, Same Settings
Layers. Duplicate
Image, Mirror
Image, Flip
Select Raster 2
Edit, copy Ele 3
Edit, paste, paste as new layer
Move to the top right of the frame
Image, resize 40%
Effects, 3D Effects, Drop Shadow, Same Settings
Edit, copy Ele 22
Edit, paste, paste as new layer
Image, resize 70%
Move to the left and place behind the flower can
Effects, 3D Effects, Drop Shadow, Same Settings
Edit, copy Ele 11
Edit, paste, paste as new layer
Image, resize 40%
Move to the bottom right side of the frame
Effects, 3D Effects, Drop Shadow, Same settings
Edit, copy Ele 12
Edit, paste, paste as new layer
Image, resize 40%
Move to the bottom right and place below the yellow rose and move to the left
Effects, 3D Effects, Drop Shadow, Same Settings
Edit, copy Ele 5
Edit, paste, paste as new layer
Layers, arrange, bring to top
Image, resize 60%
Move to the bottom and place beside the rose and flower can
Effects, 3D Effects, Drop Shadow, Same Settings
Edit, copy Ele 4
Edit, paste, paste as new layer
Layers, arrange, send to bottom
Move up above the glitter layer
Move toward the top of the frame. See my tag for placement
Effects, 3D Effects, Drop Shadow, Same settings
Edit, copy Ele 8
Edit, paste, paste as new layer
Layers, arrange, bring to top
Image, Mirror
Image, resize 70%
Move to place in front of the flowers and jewelry box
Effects, 3D Effects, Drop Shadow, Same settings
Select Raster 2
Edit, copy Ele 15
Edit, paste, paste as new layer
Image, Mirror
Image, resize 50%
Move to the right side of the frame. See my tag for placement
Effects, 3D Effects, Drop Shadow, Same settings
Remember to add your copyright info. Make sure it is plain and legible
Add your name to the tag
Save as PNG
Sunday, January 21, 2018

I am using the artwork of Elias Chatzoudis. You need a license to use this tube. The tube can be purchased at CDO
I am using the PTU Kit Bad Bitch by Gimptastic Scraps . This kit is sold at CDO
Open new image 600 x 600
Edit, copy Frame 5
Edit, paste, paste as new layer
Image, resize 70%
With your magic wand click inside of the frame
Selections, Modify, Expand by 8
Edit, copy Paper 7
Edit, paste, paste as new layer
Layers, arrange, send to bottom
Selections, Invert
Edit, Clear
Selections, Select None
Select Raster 2
Effects, 3D Effects, Drop Shadow, Settings of:
Vertical : 2
Horizontal: 2
Opacity: 65
Blur: 5
Color: Black
Shadow on new layer NOT Checked
Edit, copy Tube
Edit, paste, paste as new layer
Image, resize 85%
Effects, 3D Effects, Drop Shadow, Same setting
Duplicate Raster 2
Layers, arrange, bring to top
Using your eraser tool erase all of the frame except for what is covering the bottom of the cut off tube
Edit, Copy Ele 50
Edit, paste, paste as new layer
Move to the left side of the frame
Layers, arrange, send to bottom
Effects, 3D Effects, Drop Shadow, same Settings
Layers, Duplicate
Image, Mirror
Image, Flip
Edit, copy Ele 23
Edit, paste, paste as new layer
Image, resize 85%
Layers, arrange, send to bottom and move to the top of the frame some
Effects, 3D Effects, Drop Shadow, Same Settings
Layers, Duplicate
Image, Flip
Pull down some
Select Raster 2
Edit, copy Ele 35
Edit, paste, paste as new layer
Image, resize 70%
Move to the top of the frame
Effects, 3D Effects, Drop Shadow, Same Settings
Select Raster 3
Edit, copy Ele 43
Edit, paste, paste as new layer
Image, rotate, free rotate, 40 left
Effects, 3D Effects, Drop Shadow, Same Settings
Layers, Duplicate
Image, Mirror
Edit, copy Ele 27
Edit, paste, paste as new layer
Image, resize 60%
Move to the bottom left of the frame behind the tube
Effects, 3D Effects, Drop Shadow, Same Settings
Edit, copy Ele 12
Edit, paste, paste as new layer
Image, resize 60%
Move behind the backpack and move to the left some. See my tag for placement
Effects, 3D Effects, Drop Shadow, Same Settings
Edit, copy Ele 4
Edit, paste, paste as new layer
Layers, Arrange, bring to top
Move to place in front of the cut off tube and over some
Effects, 3D Effects, Drop Shadow, Same Settings
Edit, copy Ele 42
Edit, paste, paste as new layer
Image, resize 40%
Move to the left side of the tube and place behind the belt and in front of the backpack
Image, rotate, free rotate, left 40
Effects, 3D Effects, Drop Shadow, Same settings
Edit, copy Ele 46
Edit, paste, paste as new layer
Layers, arrange, bring to top
Image, Resize 60%
Image, Mirror
Move to the bottom right of the frame
Effects, 3D Effects, Drop Shadow, Same settings
Edit, copy Ele 45
Edit, paste, paste as new layer
Image, resize 50%
Move to the right and move below the shoe and over some
Effects, 3D Effects, Drop Shadow, Same Settings
Edit, copy Ele 39
Edit, paste, paste as new layer
Image, resize 40%
Move to the left and place in front of the belt at the bottom of the backpack. See my tag for placement
Effects, 3D effects, Drop shadow, same settings
Edit, copy Ele 34
Edit, paste, paste as new layer
Layers, arrange, bring to top
Move to the left and place in front of the lipstick
Effects, 3D Effects, Drop Shadow, Same Settings
Edit, copy Ele 21
Edit, paste, paste as new layer
Image, resize 50%
Move to the left behind the lipstick
Effects, 3D Effects, Drop Shadow, Same Settings
Edit, copy Ele 28
Edit, paste, paste as new layer
Image, resize 60%
Move to the right and place behind the tubes arm. See my tag for placement
Effects, 3D Effects, Drop Shadow, Same settings
Edit, copy Ele 16
Edit, paste, paste as new layer
Image, resize 40%
Move to the right and place behind the front of the shoe and in front of the box
Effects, 3D Effects, Drop Shadow, Same Settings
Edit, copy Ele 30
Edit, paste, paste as new layer
Image, resize 60%
Move to the top right of the frame
Layers, arrange, send to bottom
Effects, 3D Effects, Drop Shadow, Same settings
Layers, Duplicate
Image, Mirror
Image, Flip
Edit, copy Ele 25
Edit, paste, paste as new layer
Image, resize 60%
Layers, arrange, bring to top
Move to the top left of the frame
Effects, 3D Effects, Drop Shadow, Same Settings
Remember to add your copyright info. Make sure it is plain and legible
Add your name to the tag
Save as PNG
Friday, January 19, 2018

I am using the artwork of Barbara Jensen. You need a license to use this tube. You can purchase the tube at her store HERE
I am using the PTU kit St Pat’s by Ladyhawwk Designs You can find this kit exclusively at Barbara Jensen’s store HERE
Open new image 600 x 600
Edit, Copy Frame 5
Edit, paste, paste as new layer
Image, rotate, free rotate, left 90
Image, resize 50%
With your magic wand click inside of the frame
Selections, Modify, Expand by 8
Edit, copy Paper 4
Edit, paste, paste as new layer
Layers, arrange, send to bottom
Selections, Invert
Edit, Clear
Edit, copy Ele 20
Image, resize 50%
Edit, Clear
Selections, Select None
Select Raster 2
Effects, 3D Effects, Drop Shadow, Settings of:
Vertical : 2
Horizontal:2
Opacity: 50
Blur: 6
Color: Black
Shadow on new layer NOT Checked
Edit, Copy Ele 39
Edit, paste, paste as new layer
Image, resize 60%
Move to the bottom left of the frame
Effects, 3D Effects, Drop Shadow, Same Settings
Edit, copy Ele 42
Edit, paste, paste as new layer
Image, resize 50%
Move to the bottom left of the frame
Effects, 3D Effects, Drop Shadow, Same Settings
Layers, Duplicate
Image, Mirror
Edit, copy Tube
Edit, paste, paste as new layer
Image, resize 60%
Effects, 3D Effects, Drop Shadow, Same Settings
Edit, copy Ele 40
Edit, paste, paste as new layer
Image, resize 40%
Move to the left and place in front of the pot of gold
Effects, 3D Effects, Drop Shadow, Same Settings
Select Raster 2
Edit, Copy Ele 34
Edit, paste, paste as new layer
Image, resize 50%
Move to the far right and move up some. See my tag for placement
Effects, 3D Effects, Drop Shadow, Same Settings
Edit, copy Ele 27
Edit, paste, paste as new layer
Image, resize 30%
Move to the right and place in front of the sign and move below the grass layer
Effects, 3D Effects, Drop Shadow, Same Settings
Select Raster 2
Edit, copy Ele 7
Edit, paste, paste as new layer
Image, resize 50%
Move to the bottom of the frame
Effects, 3D Effects, Drop Shadow, Same Settings
Edit, copy Ele 18
Edit, paste, paste as new layer
Move behind the grass of the pot of gold and put on top of the duplicated grass than move down so you can see some of it beneath the tubes knees
Image, resize 50%
Effects, 3D Effects, Drop Shadow, Same Settings
Edit, copy Ele 35
Edit, paste, paste as new layer
Image, Mirror
Image, resize 50%
Move to the right and place behind the clover and in front of the sign
Effects, 3D effects, Drop Shadow, Same Settings
Edit, copy Ele 38
Edit, paste, paste as new layer
Image, resize 50%
Move to the right and place behind the grass and clover..See my tag for placement
Effects, 3D Effects, Drop Shadow, Same Settings
Edit, copy Ele 26
Edit, paste, paste as new layer
Image, resize 50%
Move to the left behind the tube and on the grass of the pot of gold
Effects, 3D Effects, Drop Shadow, Same Settings
Edit, copy Ele 16
Edit, paste, paste as new layer
Image, resize 30%
Move to the top left placing on the rainbow
Image, rotate, free rotate, left 20
Effects, 3D Effects, Drop Shadow, Same settings
Remember to add your copyright info. Make sure it is plain and legible
Add your name to the tag
Save as PNG
Tuesday, January 16, 2018

I am using the artwork of Barbara Jensen. You need a license to use this tube. You can purchase the tube at her store HERE
I am using the PTU kit Sweet Love by Ladyhawwk Designs You can find this kit exclusively at Barbara Jensen’s store HERE
Open new image 600 x 600
Edit, Copy Frame 1
Edit, paste, paste as new layer
Image, rotate, free rotate, left 90
Image, resize 70%
With your magic wand click inside of the frame
Selections, Modify, Expand by 8
Edit, copy Paper 8
Edit, paste, paste as new layer
Layers, arrange, send to bottom
Selections, Invert
Edit, Clear
Edit, copy Ele 22
Edit, Clear
Selections, Select None
Select Raster 2
Effects, 3D Effects, Drop Shadow, Settings of:
Vertical : 2
Horizontal:2
Opacity: 50
Blur: 6
Color: Black
Shadow on new layer NOT Checked
Edit, Copy Tube
Edit, paste, paste as new layer
Move to the bottom of the frame
Effects, 3D Effects, Drop Shadow, same Settings
Select Raster 2
Edit, Copy Ele 33
Edit, paste, paste as new layer
Image, resize 50%
Image, Mirror
Move to the right side of the frame behind the tubes legs
Effects, 3D Effects, Drop Shadow, Same Settings
Edit, copy Ele 16
Edit, paste, paste as new layer
Image, resize 50%
Move to the left of the previous flowers. So it is behind the tube. See my tag for placement
Effects, 3D Effects, Drop Shadow, Same Settings
Edit, copy Ele 14
Edit, paste, paste as new layer
Image, resize 60%
Move to the left side of the frame behind the tube
Effects, 3D Effects, Drop Shadow, Same Settings
Select Raster 2
Edit, copy Ele 21
Edit, paste, paste as new layer
Image, resize 60%
Move to the top of the frame
Effects, 3D Effects, Drop Shadow, Same Settings
Edit, copy Ele 1
Edit, paste, paste as new layer
Image, resize 60%
Move to the left and place in front of the flowers some and behind the tubes hand
Effects, 3D Effects, Drop Shadow, same Settings
Edit, Copy Ele 11
Edit, paste, paste as new layer
Image, resize 40%
Move to the left and place in front of the wine bottle
Effects, 3D Effects, Drop Shadow, Same Settings
Edit, copy Ele 28
Edit, paste, paste as new layer
Image, resize 50%
Move to the right and place behind the tubes legs and over to the right some in front of the flowers
Effects, 3D Effects, Drop Shadow, Same Settings
Edit, copy Ele 13
Edit, paste, paste as new layer
Image, resize 50%
Move behind the tubes butt and in front of the white flowers
Effects, 3D Effects, Drop Shadow, Same Settings
Edit, copy Ele 27
Edit, paste, paste as new layer
Move in between the two flowers on the right
Image, resize 50%
Effects, 3D Effects, Drop Shadow, Same Settings
Remember to add your copyright info. Make sure it is plain and legible
Add your name to the tag
Save as PNG
Sunday, January 14, 2018

I am using the artwork of Dean Yeagle. You need a license to use this tube. I received this tube in December 2017 for being in the CDO Diamond Club as a tube of the month. You can buy Dean’s tube at CDO
I am using the PTU kit IB Dean Yeagle Jan 2018bt by Tasha's Playground. You can find this kit at CDO
Open new image 600 x 600
Edit, Copy F02
Edit, paste, paste as new layer
Image, resize 80%
With your magic wand click inside of the frame
Selections, Modify, Expand by 8
Edit, copy P05
Edit, paste, paste as new layer
Layers, arrange, send to bottom
Selections, Invert
Edit, Clear
Selections, Select None
Select Raster 2
Effects, 3D Effects, Drop Shadow, Settings of:
Vertical : 2
Horizontal: 2
Opacity: 50
Blur: 6
Color: Black
Shadow on new layer NOT Checked
Edit, copy Tube
Edit, paste, paste as new layer
Image, resize 70%
Effects, 3D Effects, Drop Shadow, same Settings
Edit, Copy Ele 20
Edit, paste, paste as new layer
Image, rotate, free rotate, left 90
Move to place on the bottom left of the tube to cover up the cut off
Image, resize 40%
Effects, 3D Effects, Drop Shadow, Same Settings
Layers, Duplicate
Image, Mirror
Select Raster 2
Edit, copy e15
Edit, paste, paste as new layer
Move up toward the top and over some to make it look like the tube is holding the string
Effects, 3D Effects, Drop Shadow, same settings
Edit, copy e12
Edit, paste, paste as new layer
Image, resize 70$
Move to the bottom behind the flowers
Effects, 3D Effects, Drop Shadow, same Settings
Layers, Duplicate
Image, Mirror
Select Raster 2
Edit, Copy e08
Edit, paste, paste as new layer
Image, resize 50%
Move to the left behind the tube and over some. See my tag for placement
Effects, 3D Effects, Drop Shadow, Same Settings
Edit, copy e16
Edit, paste, paste as new layer
Image, resize 70%
Move to the left side of the frame
Effects, 3D Effects, Drop Shadow, same settings
Layers, Duplicate
Image, Mirror
Select Raster 2
Edit, copy e09
Edit, paste, paste as new layer
Image, resize 50%
Move behind the tube and to the right. See my tag for placement
Effects, 3D Effects, Drop Shadow Same Settings
Edit, copy e17
Edit, paste, paste as new layer
Move to the right and place in the flower
Image, resize 30%
Effects,3D Effects, Drop Shadow, Same settings
Remember to add your copyright info. Make sure it is plain and legible
Add your name to the tag
Save as PNG
Thursday, January 11, 2018

I am using the artwork of Pinuptoons. You need a license to use this tube. The tube can be purchased at CDO
I am using the PTU Kit Winter Moment by Gimptastic Scraps . This kit is sold at CDO
Open new image 600 x 600
Edit, copy Frame 2
Edit, paste, paste as new layer
Image, rotate, free rotate, left 9
Image, resize 70%
With your magic wand click inside of the frame
Selections, Modify, Expand by 8
Edit, copy Paper 2
Edit, paste, paste as new layer
Layers, arrange, send to bottom
Selections, Invert
Edit, Clear
Selections, Select None
Select Raster 2
Effects, 3D Effects, Drop Shadow, Settings of:
Vertical : 2
Horizontal: 2
Opacity: 65
Blur: 5
Color: Black
Shadow on new layer NOT Checked
Edit, copy Ele 44
Edit, paste, paste as new layer
Image, resize 75%
Move to the left side of the frame
Effects, 3D Effects, Drop Shadow, Same setting
Edit, Copy Ele 23
Edit, paste, paste as new layer
Move to the bottom of the frame and down some
Effects, 3D Effects, Drop Shadow, same Settings
Layers, Duplicate
Image, Mirror
Edit, copy Ele
Edit, paste, paste as new layer
Image, resize 40%
Move to the left and place in front of the tree
Effects, 3D Effects, Drop Shadow, Same Settings
Edit, copy Tube
Edit, paste, paste as new layer
Image, resize 80%
Effects, 3D Effects, Drop Shadow, Same Settings
Edit, copy Ele 13
Edit, paste, paste as new layer
Image, resize 30%
Move to place on the tree branches
Effects, 3D Effects, Drop Shadow, Same Settings
Edit, copy Ele 38
Edit, paste, paste as new layer
Image, resize 40%
Move to the right behind the tube and on top of the snow
Effects, 3D Effects, Drop Shadow, Same Settings
Edit, copy Ele 50
Edit, paste, paste as new layer
Image, resize 70%
Move to the right behind the wheel
Effects, 3D Effects, Drop Shadow, Same Settings
Edit, copy Ele 1
Edit, paste, paste as new layer
Image, resize 50%
Move to the right and place in front of the wheel
Effects, 3D Effects, Drop Shadow, Same Settings
Edit, copy Ele 30
Edit, paste, paste as new layer
Image, resize 40%
Move to the left and place in front of the tree
Effects, 3D Effects, Drop Shadow, Same settings
Edit, copy Ele 55
Edit, paste, paste as new layer
Move to place behind the tubes legs
Image, Resize 40%
Effects, 3D Effects, Drop Shadow, Same settings
Edit, copy Ele 49
Edit, paste, paste as new layer
Image, resize 40%
Move to the left and place in front of the tree but behind the animals
Effects, 3D Effects, Drop Shadow, Same Settings
Edit, copy Ele 31
Edit, paste, paste as new layer
Image, resize 30%
Move to the left and place to look like it is hanging from one of the tree branches
Effects, 3D effects, Drop shadow, same settings
Remember to add your copyright info. Make sure it is plain and legible
Add your name to the tag
Save as PNG
Wednesday, January 10, 2018

I am using the artwork of Steve Baier. You need a license to use this tube. You can buy this tube at CDO
I am using the PTU Kit IB Steve Baier 13-2 by Schnegge’s Scraps. This kit is sold at CDO
WSL_Mask194 found HERE. You can find the download link on the right side of the page
Open new image 600 x 600
Edit, copy Frame 02
Edit, paste, paste as new layer
Image, resize 70%
With your magic wand click inside of the frame
Selections, Modify, Expand by 8
Edit, copy Paper 04
Edit, paste, paste as new layer
Layers, arrange, send to bottom
Selections, Invert
Edit, Clear
Selections, Select None
Select Raster 2
Effects, 3D Effects, Drop Shadow, Settings of:
Vertical : 2
Horizontal: 2
Opacity: 65
Blur: 5
Color: Black
Shadow on new layer NOT Checked
Edit, copy Tube
Edit, paste, paste as new layer
Image, resize 60%
Move up some so that the edge of the cut off is against the inner part of the circle of the frame
Effects, 3D Effects, Drop Shadow, Same settings
Edit, Copy Element 13
Edit, paste, paste as new layer
Image, resize 40%
Move to the bottom to cover up the cut off of the tube behind her boobs. See my tag for placement
Effects, 3D Effects, Drop Shadow, same Settings
Select Raster 2
Edit, copy Element 15
Edit, paste, paste as new layer
Image, resize 70%
Move to the right and move down some. See my tag for placement
Effects, 3D Effects, Drop Shadow, Same Settings
Edit, copy Element 02
Edit, paste, paste as new layer
Image, resize 50%
Move to the right and place on the mannequin
Effects, 3D Effects, Drop Shadow, Same Settings
Edit, copy Element 01
Edit, paste, paste as new layer
Image, Mirror
Move to the right side of the frame and place on the right side of the mannequin bottom
Image, resize 30%
Effects, 3D Effects, Drop Shadow, Same Settings
Edit, copy Element 19
Edit, paste, paste as new layer
Image, Mirror
Image, resize 50%
Move to the bottom left side of the frame beneath the elbows of the tube
Effects, 3D Effects, Drop Shadow, Same Settings
Edit, copy Element 17
Edit, paste, paste as new layer
Image, resize 70%
Move to the bottom of the frame on Raster 2
Effects, 3D Effects, Drop Shadow, Same Settings
Edit, Copy Element 07
Edit, paste, paste as new layer
Image, resize 70%
Image, Flip
Move to the bottom of the frame
Effects, 3D effects, Drop Shadow, Same Settings
Select Raster 2
Edit, copy Element 05
Edit, paste, paste as new layer
Image, resize 80%
Move to the bottom of the frame behind the cat and all
Effects, 3D Effects, Drop Shadow, Same settings
Edit, copy Element 14
Edit, paste, paste as new layer
Image, resize 40%
Move to the left and place behind the tube and move over
Effects, 3D effects, Drop Shadow, Same Settings
Edit, copy Paper 05
Edit, paste, paste as new layer
Layers, arrange, send to bottom
Layers, Load/save mask, load mask from disk, settings:
WSL_Mask194
Source Luminance
Fit To Canvas
Invert Transparency NOT Checked
Hide All Mask
Layers, merge, merge group
Remember to add your copyright info. Make sure it is plain and legible
Add your name to the tag
Save as PNG
Tuesday, January 2, 2018

I am using the artwork of Anna Liwanag. You need a license to use this tube. The tube can be purchased at CDO
I am using the PTU Kit New Beginnings-mini by Gimptastic Scraps . This kit is sold at CDO
Open new image 600 x 600
Edit, copy Frame 2
Edit, paste, paste as new layer
Image, resize 70%
With your magic wand click inside of the frame
Selections, Modify, Expand by 8
Edit, copy Paper 6
Edit, paste, paste as new layer
Layers, arrange, send to bottom
Selections, Invert
Edit, Clear
Selections, Select None
Select Raster 2
Effects, 3D Effects, Drop Shadow, Settings of:
Vertical : 2
Horizontal: 2
Opacity: 65
Blur: 5
Color: Black
Shadow on new layer NOT Checked
Edit, copy Tube
Edit, paste, paste as new layer
Image, resize 70%
Effects, 3D Effects, Drop Shadow, Same setting
Select Raster 2
Edit, Copy Ele 23
Edit, paste, paste as new layer
Move to the bottom of the frame and down some
Image, resize 60%
Effects, 3D Effects, Drop Shadow, same Settings
Edit, copy Ele 12
Edit, paste, paste as new layer
Image, resize 70%
Move to the left and sit on the snow and behind the tube
Effects, 3D Effects, Drop Shadow, Same Settings
Edit, copy Ele 20
Edit, paste, paste as new layer
Image, resize 60%
Move to the left side of the tube and move over a little so it covers the cut of legs
Effects, 3D Effects, Drop Shadow, Same Settings
Edit, copy Ele 39
Edit, paste, paste as new layer
Image, resize 40%
Move behind the skates and tube and in front of the tree..move over til they are to the left of the skates
Effects, 3D Effects, Drop Shadow, Same Settings
Edit, copy Ele 4
Edit, paste, paste as new layer
Image, resize 40%
Move behind the skates and over to the right some
Effects, 3D Effects, Drop Shadow, Same Settings
Edit, copy Ele 24
Edit, paste, paste as new layer
Image, resize 40%
Move to the top right of the frame
Effects, 3D Effects, Drop Shadow, Same Settings
Edit, copy Ele 28
Edit, paste, paste as new layer
Image, Mirror
Image, resize 60%
Move to the right and place so the hoof is on the snow
Effects, 3D Effects, Drop Shadow, Same Settings
Edit, copy Ele 1
Edit, paste, paste as new layer
Image, resize 40%
Move to the bottom left and place behind the gift and move to the left
Effects, 3D Effects, Drop Shadow, Same settings
Edit, copy Ele 16
Edit, paste, paste as new layer
Move to place in front of the tree behind the gifts
Image, Resize 40%
Effects, 3D Effects, Drop Shadow, Same settings
Remember to add your copyright info. Make sure it is plain and legible
Add your name to the tag
Save as PNG
Subscribe to:
Posts
(Atom)