Thursday, August 30, 2012
4:47 PM | Edit Post
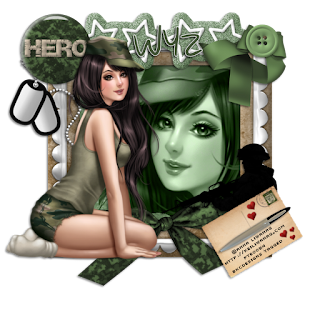
This tutorial was written by me. Any resemblance to any other tutorial is pure coincidence.Please DO NOT claim this tutorial as your own. It was written for PSP 9, but should be compatible with any version of PSP.
I am using the artwork of Anna Liwanag. You need a license to use her tubes. I bought this tube when she was at PTE. She is currently at Picsfordesign
I am using the artwork of Anna Liwanag. You need a license to use her tubes. I bought this tube when she was at PTE. She is currently at Picsfordesign
I am using the PTU kit called Pretty Camo by Designs by LK. You can purchase the kit at Scrap-A-Licious
Open new image 600 x 600
Edit, copy Frame Chrome Green
Edit, paste, paste as new layer
Using your magic wand click inside of frame
Select, Selections, Modify, Expand by 8
Edit, copy Paper 24
Edit, paste, paste as new layer
Layers, arrange, send to bottom
Selections, Invert
Edit, copy close up of tube
Edit, paste, paste as new layer
Edit, Clear
Selections, Select None
Change the blend mode of this layer to Luminance Legacy
Select Raster 2
Effects, 3D Effects, Drop Shadow, with the settings of:
Vertical: 3
Horizontal: 3
Opacity: 50
Blur: 5
Color: Black
Shadow on new layer NOT checked
Edit, copy Tube
Edit, paste, paste as new layer
Image, Mirror
Image, resize 80%
Effects, 3D Effects, Drop Shadow, Same settings
Edit, copy Postcard
Edit, paste, paste as new layer
Move to the bottom left of the frame
Image, resize 30%
Image, rotate, free rotate, left, 30
Effects, 3D Effects, Drop Shadow, Same Settings
Edit, copy Pen
Edit, paste, paste as new layer
Move to place above to the postcard
Image, resize 30%
Effects, 3D Effects, Drop Shadow, Same settings
Edit, Copy Silhouette 1
Edit, paste, paste as new layer
Image, resize 50%
Move til it is below the pen and postcard
Effects, 3D Effects, Drop Shadow, Same Settings
Edit, copy Bow Soft Gree
Edit, paste, paste as new layer
Move to the right top of the frame. See my tag for placement
Image, resize 50%
Effects, 3D Effects, Drop Shadow, same Settings
Edit, copy button green 1
Edit, paste, paste as new layer
Layers, arrange, bring to top to place above bow
Image, resize 50%
Effects, 3D Effects, Drop Shadow, Same Settings
Edit, copy Glass Buttons green 1
Edit, paste, paste as new layer
Move to top left of frame. See my tag for placement
Image, resize 50%
Effects, 3D Effects, Drop Shadow, same settings
Edit, copy dogtags
Edit, paste, paste as new layer
Move to place below the Hero Button. See my tag for placement
Image, resize 50%
Effects, 3D Effects, Drop Shadow, Same Settings
Edit, copy Glitter Sticker Star Green
Select Raster 2
Move to top of frame. See my tag for placement
Image, resize 80%
Effects, 3D Effects, Drop Shadow, Same Settings
My tag is just a guide
Remember to add your copyright info. Make sure it is plain and legible
Add your name to the tag
Save as PNG
Labels:PTU,Scrap-A-Licious CT,Tutorial | 0
comments
Wednesday, August 29, 2012
10:57 AM | Edit Post

This tutorial was written by me. Any resemblance to any other tutorial is pure coincidence.Please DO NOT claim this tutorial as your own. It was written for PSP 9, but should be compatible with any version of PSP
I am using the artwork of Elias Chatzoudis. You need a license to use his tubes. You can buy his artwork at his store found HERE
I am using the PTU kit called Hey Mister DJ by Lexi Creationz Scrapz. You can purchase the kit at Scrap-A-Licious
Open new image 600 x 600
Edit, copy Frame 3
Edit, paste, paste as new layer
Image, resize 70%
Using your magic wand click inside of frame
Select, Selections, Modify, Expand by 8
Edit, copy Paper 10
Edit, paste, paste as new layer
Layers, arrange, send to bottom
Selections, Invert
Edit, Clear
Selections, Select None
Select Raster 2
Effects, 3D Effects, Drop Shadow, with the settings of:
Vertical: 3
Horizontal: 3
Opacity: 50
Blur: 5
Color: Black
Shadow on new layer NOT checked
Select Raster 3
Selections, Select All, Float, Defloat
Edit, Copy, CityScape
Edit, paste, paste as new layer
Selections, Invert
Edit, Clear
Selections, Select None
Effects, 3D Effects, Drop Shadow, Same Settings
Edit, copy Tube
Edit, paste, paste as new layer
Image, resize 80%
Effects, 3D Effects, Drop Shadow, Same settings
Select Raster 3
Selections, Select None
Edit, copy Sparkles 2
Edit, paste, paste as new layer
Move til it looks like stars around the cityscape
Selections, Invert
Edit, clear
Selections, Select None
Effects, 3D Effects, Drop Shadow, Same Settings
Edit, copy Notes
Edit, paste, paste as new layer
Move to top of frame and make sure it is behind tube. See my tag for placement
Image, resize 80%
Effects, 3D Effects, Drop Shadow, Same settings
Edit, Copy DiscoBall
Edit, paste, paste as new layer
Image, resize 50%
Layers, arrange, send to bottom
Move to the left side of frame. See my tag for placement
Effects, 3D Effects, Drop Shadow, Same Settings
Edit, copy Martini
Edit, paste, paste as new layer
Move to the right of the frame. See my tag for placement
Image, resize 80%
Edit, repeat resize
Effects, 3D Effects, Drop Shadow, same Settings
Edit, copy Lips
Edit, paste, paste as new layer
Layers, arrange, bring to top
Image, resize 30%
Move to the martini. See my tag for placement
Effects, 3D Effects, Drop Shadow, Same Settings
Select Raster 2
Edit, copy keyboard
Edit, paste, paste as new layer
Move to bottom. See my tag for placement
Effects, 3D Effects, Drop Shadow, same settings
Edit, copy Skull1
Edit, paste, paste as new layer
Layers, arrange, bring to top
Move to the right of the frame. See my tag for placement
Effects, 3D Effects, Drop Shadow, Same Settings
My tag is just a guide
Remember to add your copyright info. Make sure it is plain and legible
Add your name to the tag
Save as PNG
Labels:PTU,Scrap-A-Licious CT,Tutorial | 0
comments
8:12 AM | Edit Post
Here is a new cluster frame for you..This is using the PTU kit Amazing Autumn byAmy of Amy & Leah's Gimptastic Tuts. Click on the preview below to take you to the download. Amy is no longer selling kits.
Labels:Amy(Gimptastic),Cluster frame,FTU | 0
comments
Monday, August 27, 2012
6:59 PM | Edit Post

The kit for this is called Amazing Autumn by Amy (Gimptastic Scraps) of Amy and Leah's Gimptastic Tuts. The scrapkit can be purchased at PicsforDesign.I made some extras for all of you, click on the tag to get the full size version. Please Do NOT alter these in anyway.
Labels:Amy(Gimptastic),Snags | 0
comments
5:35 PM | Edit Post
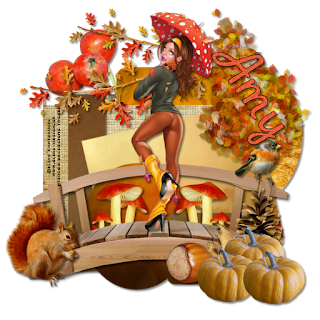
This tutorial was written by me. Any resemblance to any other tutorial is pure coincidence.Please DO NOT claim this tutorial as your own. It was written for PSP 9, but should be compatible with any version of PSP
I am using the artwork of Elias Chatzoudis. You need a license to use his tubes. This tube was a Limited Edition at PTE but you can buy it at his new store HERE
I am using the FTU kit called Amazing Autumn by Gimptastic Scraps .
Template220 by Denz Designz Found HERE
Open Template220
Duplicate and close original
Delete Raster 1
Select Blue Circle 2
Selections, Select All, Float, Defloat
Edit, copy Paper 1
Edit, paste, paste as new layer
Selections, Invert
Edit, Clear
Selections, Select None
Effects, 3D Effects, Drop Shadow, Settings of
Vertical and Horizontal: 3
Opacity: 50
Blur: 5
Color: Black
Shadow on new layer NOT checked
Delete Blue Circle 2
Select White Shape 2
Selections, Select All, Float, Defloat
Edit, copy Paper 5
Edit, paste, paste as new layer
Selections, Invert
Edit, Clear
Selections, Select None
Effects, 3D Effects, Drop Shadow, Same settings
Delete White Shape 2
Select Blue Rectangle
Selections, Select All, Float, Defloat
Edit, copy Paper 3
Edit, paste, paste as new layer
Selections, Invert
Edit, clear
Selections, Select None
Effects, 3D Effects, Drop Shadow, Same Settings
Delete Blue Rectangle
Select Black Strip
Selections, Select All, Float, Defloat
Edit, copy Paper 10
Edit, Paste, paste as new layer
Move til the star is showing..See my tag for placement
Selections, invert
Edit, Clear
Selections, Select None
Effects, 3D Effects, Drop Shadow, Same Settings
Delete Black Strip
Select Light Blue Shape
Selections, Select All, Float, Defloat
Edit, copy Paper 2
Edit, Paste, paste as new layer
Selections, Invert
Edit, Clear
Selections, Select None
Effects, 3D Effects, Drop Shadow, same settings
Delete Light Blue Shape
Select Blue Circle 1
Selections, Select All, Float, Defloat
Edit, copy Paper 6
Edit, paste, paste as new layer
Selections, Invert
Edit, Clear
Selections, Select None
Effects, 3D Effects, Drop Shadow, Same Settings
Delete Blue Circle 1
Select Small White Shape
Selections, Select All, Float, Defloat
Edit, Copy Paper 9
Edit, paste, paste as new layer
Selections, Invert
Edit, Clear
Selections, Select None
Effects 3D Effects, Drop Shadow, Same Settings
Delete Small White Shape
Edit, Copy Bridge
Edit, Paste, Paste as new layer
Move to the bottom. See my tag for placement
Effects, 3D Effects, Drop Shadow, Same Settings
Edit, copy Tube
Edit, paste, paste as new layer
Image, Arrange, bring to top
Image, resize 85%
Place on the bridge. See my tag for placement
Effects, 3D Effects, Drop Shadow. Same Settings
Edit, copy Tree
Edit, paste, paste as new layer
Image, resize 85%
Move to the right and down behind the bridge. See my tag for placement
Effects, 3D Effects, Drop Shadow, Same Settings
Edit, copy Branch
Image, Mirror
Edit, paste, paste as new layer
Make sure it is above Raster 4
Effects, 3D Effects, Drop Shadow, Same Settings
Edit, Copy Squirrel
Edit, paste, Paste as new layer
Move to the Left of the frame and place beside the bridge. See my tag for placement
Image, resize 50%
Effects, 3D Effects, Drop Shadow, Same Settings
Edit, copy Pumpkin
Edit, paste, paste as new layer
Move to the right and place in front of bridge. See my tag for placement
Image, resize 50%
Effects, 3D Effects, Drop Shadow, Same Settings
Layers, Duplicate
Move down a little and to the left
Layers, Duplicate
Image, mirror
Edit, copy Mushrooms 2
Select Raster 6
Image, resize 40%
Move til they are peeking up behind the bridge
Effects, 3D Effects, Drop Shadow, Same Settings
Layers, Duplicate
Image, Mirror
Move the duplicate above Raster 7
Edit, copy Pinecone
Edit, paste, paste as new layer
Make sure it is behind the pumpkins
Image, resize 50%
Effects, 3D Effects, Drop Shadow, Same Settings
Edit, Copy Nut
Edit, Paste, paste as new layer
Image, resize 50%
Move behind the left of the pumpkins. See my tag for placement
Effects, 3D Effects, Drop Shadow, same settings
Select Berries
Image, Mirror
Edit, copy Berries
Edit, paste, paste as new layer
Move toward the top left
Layers, arrange, send to bottom
Effects, 3D Effects, Drop Shadow, same settings
Edit, copy Bird 1
Edit, paste, paste as new layer
Move to the right and place it to look like it is sitting on the bridge
Image, resize 50%
Effects, 3D Effects, Drop Shadow, Same settings
My tag is just a guide
Remember to add your copyright info. Make sure it is plain and legible
Add your name to the tag
Save as PNG
Labels:Amy(Gimptastic),FTU,Tutorial | 0
comments
Friday, August 24, 2012
5:02 PM | Edit Post
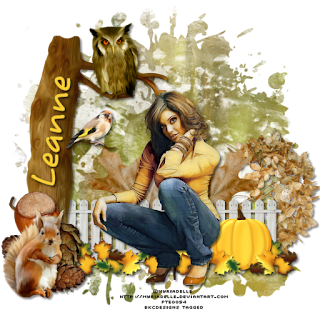
This tutorial was written by me. Any resemblance to any other tutorial is pure coincidence.Please DO NOT claim this tutorial as your own. It was written for PSP 9, but should be compatible with any version of PSP
I am using the artwork of Myriadelle. You need a license to use her tubes.
I bought this tube at PTE.
I am using the artwork of Myriadelle. You need a license to use her tubes.
I bought this tube at PTE.
I am using the PTU kit called Autumn Dreams by Bella's Design's . You can purchase the kit at Scrap-A-Licious
DBV Masks 126 Found HERE
Open new image 600 x 600
Edit, copy Element 41
Edit, paste, paste as new layer
Move down the image. See my tag for placement
Effects, 3D Effects, Drop Shadow, with the settings of:
Vertical: 3
Horizontal: 3
Opacity: 50
Blur: 5
Color: Black
Shadow on new layer NOT checked
Edit, copy Element 34
Edit, paste, paste as new layer
Move to the left of the fence. See my tag for placement
Image, resize 60%
Effects, 3D Effects, Drop Shadow, same settings
Edit, copy Element 7
Edit, paste, paste as new layer
Move to the second branch on the tree
Image, resize 20%
Effects, 3D Effects, Drop Shadow, Same Settings
Edit, copy Tube
Edit, paste, paste as new layer
Image, resize 60%
Effects, 3D Effects, Drop Shadow, Same settings
Edit, copy Element 13
Edit, paste, paste as new layer
Move to the bottom of the tree
Image, resize 40%
Effects, 3D Effects, Drop Shadow, Same Settings
Edit, copy Element 22
Edit, paste, paste as new layer
Move behind the pinecones
Image, resize 60%
Image, rotate, free rotate, right, 90
Image, resize 60%
Effects, 3D Effects, Drop Shadow, Same settings
Edit, Copy Element 25
Edit, paste, paste as new layer
Move to the bottom branch on the tree
Image, resize 20%
Effects, 3D Effects, Drop Shadow, Same Settings
Edit, copy Element 24
Edit, paste, paste as new layer
Move to the right and below the fence. Place beside the tube. See my tag for placement
Image, resize 50%
Image, rotate, free rotate, left 40
Effects, 3D Effects, Drop Shadow, same Settings
Layers, Duplicate
Image, mirror
Edit, copy Element 5
Edit, paste, paste as new layer
Layers, arrange, bring to top
Image, resize 30%
Effects, 3D Effects, Drop Shadow, Same Settings
Image, Mirror
Move to the left. See my tag for placement
Select Element 31
Image, Mirror
Image, Flip
Edit, paste, paste as new layer
Move to bottom. See my tag for placement
Effects, 3D Effects, Drop Shadow, same settings
Edit, copy Paper 3
Edit, paste, paste as new layer
Layers, arrange, send to bottom
Layers, Load/Save Mask, Load Mask from Disk, settings of
Source Luminance
Fit To Canvas
Hide All Mask
Layers, merge, merge group
My tag is just a guide
Remember to add your copyright info. Make sure it is plain and legible
Add your name to the tag
Save as PNG
Fit To Canvas
Hide All Mask
Layers, merge, merge group
My tag is just a guide
Remember to add your copyright info. Make sure it is plain and legible
Add your name to the tag
Save as PNG
Labels:PTU,Scrap-A-Licious CT,Tutorial | 0
comments
Wednesday, August 22, 2012
5:30 PM | Edit Post
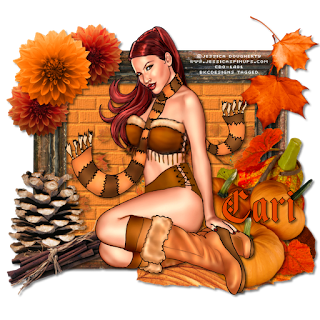
This tutorial was written by me. Any resemblance to any other tutorial is pure coincidence.Please DO NOT claim this tutorial as your own. It was written for PSP 9, but should be compatible with any version of PSP
I am using the artwork of Jessica Dougherty. You need a license to use her tubes. You can buy her tubes at CDO
I am using the artwork of Jessica Dougherty. You need a license to use her tubes. You can buy her tubes at CDO
I am using the PTU kit called Octobers Eve by Black Widow Creationz . You can purchase the kit at Scrap-A-Licious
Open new image 600 x 600
Edit, copy Element 38
Edit, paste, paste as new layer
Image, resize 70%
With your magic wand select the center of your frame
Selections, Expand by 10
Edit, copy Paper 14
Edit, paste, paste as new layer
Layers, arrange, send to bottom
Selections, Invert
Edit, Clear
Selections, Select None
Select Raster 2
Effects, 3D Effects, Drop Shadow, with the settings of:
Vertical: 3
Horizontal: 3
Opacity: 50
Blur: 5
Color: Black
Shadow on new layer NOT checked
Edit, copy tube
Edit, paste, paste as new layer
Effects, 3D Effects, Drop Shadow, same settings
Select Element 46
Image, Rotate, Rotate clockwise 90
Select Raster 3
Edit, copy Element 46
Edit, paste, paste as new layer
Effects, 3D Effects, Drop Shadow, same settings
Edit, copy Element 5
Edit, paste, paste as new layer
Move to the top right of frame
Image, resize 60%
Effects, 3D Effects, Drop Shadow, Same Settings
Select, Element 9
Image, rotate, Rotate clockwise 90
Image resize 60%
Edit, copy
Edit, paste, paste as new layer
Place at the bottom left of the frame
Effects, 3D Effects, Drop Shadow, Same Settings
Edit, copy Element 39
Edit, paste, paste as new layer
Move to the bottom left of frame and place above element 9
Image, resize 50%
Effects, 3D Effects, Drop Shadow, Same settings
Edit, Copy Element 14
Edit, paste, paste as new layer
Move to the top left of the frame
Image, resize 50%
Effects, 3D Effects, Drop Shadow, Same Settings
Edit, copy Element 13
Edit, paste, paste as new layer
Move to top left of frame and below element 14
Image, resize 40%
Effects, 3D Effects, Drop Shadow, same Settings
Layers, Duplicate
Move duplicate underneath and to the side of element 14
See my tag for placement
Select Raster 2
Edit, copy Element 8
Edit, paste, paste as new layer
Move to the bottom of the frame and to the right
Image, resize 70%
Effects, 3D Effects, Drop Shadow, Same Settings
Edit, copy Element 7
Edit, paste, paste as new layer
Place on top of element 8
Image, resize 60%
Effects, 3D Effects, Drop Shadow, same settings
Edit, Copy Element 4
Edit, Paste, Paste, as new Layer
Move to bottom right of frame
Image, resize 60%
Effects, 3D Effects, Drop Shadow, Same settings
Select Element 3
Image, rotate, Rotate, counterclockwise 90
Edit, Copy Element 3
Edit, paste, paste as new layer
Move below pumpkins
Image, resize 60%
Effects, 3D Effects, Drop Shadow, Same Settings
My tag is just a guide
Remember to add your copyright info. Make sure it is plain and legible
Add your name to the tag
Save as PNG
Labels:PTU,Scrap-A-Licious CT,Tutorial | 0
comments
Tuesday, August 21, 2012
6:51 AM | Edit Post
Here is a new cluster frame for you..This is using the PTU kit Golden Moments by Amy of Amy & Leah's Gimptastic Tuts. Click on the preview below to take you to the download. Amy is no longer selling kits.
Labels:Amy(Gimptastic),Cluster frame,FTU | 0
comments
Monday, August 20, 2012
8:03 PM | Edit Post

The kit for this is called Golden Moments by Amy (Gimptastic Scraps) of Amy and Leah's Gimptastic Tuts. The scrapkit can be purchased at PicsforDesign.I made some extras for all of you, click on the tag to get the full size version. Please Do NOT alter these in anyway.
Labels:Amy(Gimptastic),Snags | 0
comments
7:26 PM | Edit Post
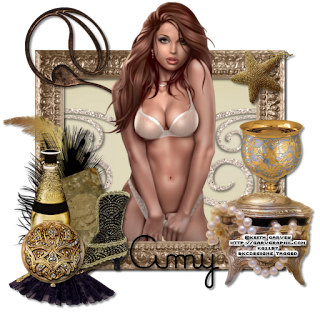
This tutorial was written by me. Any resemblance to any other tutorial is pure coincidence.Please DO NOT claim this tutorial as your own. It was written for PSP 9, but should be compatible with any version of PSP
I am using the artwork of Keith Garvey. You need a license to use his tubes. You can buy his tubes at his new store HERE
I am using the artwork of Keith Garvey. You need a license to use his tubes. You can buy his tubes at his new store HERE
I am using the FTU kit called Golden Moments by Gimptastic Scraps .
Open new image 600 x 600
Edit, copy Frame 4
Edit, paste, paste as new layer
Image, resize 85%
With your magic wand select the center of your frame
Selections, Expand by 10
Edit, copy Paper 1
Edit, paste, paste as new layer
Layers, arrange, send to bottom
Selections, Invert
Edit, Clear
Selections, Select None
Select Raster 2
Effects, 3D Effects, Drop Shadow, with the settings of:
Vertical: 3
Horizontal: 3
Opacity: 50
Blur: 5
Color: Black
Shadow on new layer NOT checked
Edit, copy tube
Edit, paste, paste as new layer
Effects, 3D Effects, Drop Shadow, same settings
Select Raster 2
Layers, Duplicate
Move above tube
Use your eraser tool to erase around the tubes face..I do this as she has no legs and I want to cover them up..
Select Raster 3
Selections, Select All, Float, Defloat
Edit, copy Swirl
Edit, paste, paste as new layer
Selections, Invert
Edit, Clear
Effects, 3D Effects, Drop Shadow, Same Settings
Layers, Duplicate
Image, Mirror
Edit, copy box
Edit, paste, paste as new layer
Layers, arrange, bring to top
Move to the right of the frame. See my tag for placement
Image, resize 50%
Effects, 3D Effects, Drop Shadow, same settings
Edit, copy Goblet
Edit, paste, paste as new layer
Move to the right and place behind the box
Image, resize 80%
Effects, 3D Effects, Drop Shadow, Same Settings
Edit, copy compact
Edit, paste, paste as new layer
Move to the bottom left of frame
Image, resize 40%
Effects, 3D Effects, Drop Shadow, Same settings
Edit, Copy bottle
Edit, paste, paste as new layer
Move to the left of the frame and place behind compact
Image, resize 60%
Effects, 3D Effects, Drop Shadow, Same Settings
Edit, copy Feather 1
Edit, paste, paste as new layer
Image, mirror
Image, resize 60%
Move to left of frame
Effects, 3D Effects, Drop Shadow, Same Settings
Edit, copy Feather 2
Edit, paste, paste as new layer
Image, resize 60%
Move to place in front of Feather 1
Effects, 3D Effects, Drop Shadow, Same Settings
Edit, copy Book
Edit, paste, paste as new layer
Move to left in front of feathers and behind bottle
Image, resize 60%
Image, rotate, free rotate, left, 20
Effects, 3D Effects, Drop Shadow, same settings
Edit, Copy Star
Edit, Paste, Paste, as new Layer
Move to top right of frame
Image, resize 40%
Effects, 3D Effects, Drop Shadow, Same settings
Edit, Copy Fan
Edit, paste, paste as new layer
Move below compact and book
Image, resize 50%
Effects, 3D Effects, Drop Shadow, Same Settings
Edit, Copy Boot
Edit, paste, paste as new layer
Image, resize 50%
Move in front of book. See my tag for placement
Effects, 3D Effects, Drop Shadow, Same Settings
Select Copy of Raster 2
Edit, Copy Deco 4
Edit, paste, paste as new layerMove to the left. See my tag for placement.I had to erase some more of the frame
Effects, 3D Effects, Drop Shadow, Same Settings
My tag is just a guide
Remember to add your copyright info. Make sure it is plain and legible
Add your name to the tag
Save as PNG
Labels:Amy(Gimptastic),FTU,Tutorial | 0
comments
10:14 AM | Edit Post
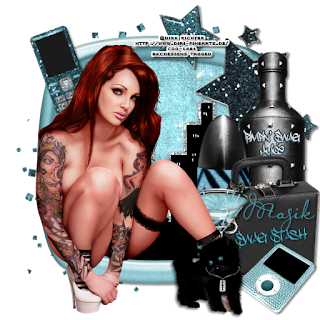
This tutorial was written by me. Any resemblance to any other tutorial is pure coincidence.Please DO NOT claim this tutorial as your own. It was written for PSP 9, but should be compatible with any version of PSP
I am using the artwork of Dirk Richter . You need a license to use his tubes. This tube can be purchased Creative Design Outlet
I am using the PTU kit called Swag Alley Blues by Manipulated by Magik. You can buy this kit at Scrap-A-Licious
Open new image 600 x 600
Edit, copy Frame 5
Edit, paste, paste as new layer
Image, resize 80%
With your magic wand select the center of your frame
Selections, Expand by 10
Edit, copy Paper 17
Edit, paste, paste as new layer
Layers, arrange, send to bottom
Selections, Invert
Edit, Clear
Edit, copy City Skyline
Edit, paste as new layer
Move to bottom of frame. See my tag for placement
Edit, Clear
Select Raster 3
Edit, copy Sparkles 1
Edit, paste, paste as new layer
Image, resize 80%
Move to the left
Layers, duplicate
Image, mirror
Select Raster 2
Effects, 3D Effects, Drop Shadow, with the settings of:
Vertical: 3
Horizontal: 3
Opacity: 50
Blur: 5
Color: Black
Shadow on new layer NOT checked
Edit, copy tube
Edit, paste, paste as new layer
Move to the left of the frame
Effects, 3D Effects, Drop Shadow, same settings
Edit, copy Glitter Scatter
Edit, paste, paste as new layer
Layers, arrange, send to bottom
Image, resize 90%
Edit, copy briefcase
Edit, paste, paste as new layer
Layers, arrange, bring to top
Move to the right of the frame. See my tag for placement
Image, resize 50%
Effects, 3D Effects, Drop Shadow, same settings
Edit, copy Bottle
Edit, paste, paste as new layer
Move to the right and place behind the briefcase
Image, resize 80%
Effects, 3D Effects, Drop Shadow, Same Settings
Edit, copy Cellphone
Edit, paste, paste as new layer
Move to the top left of frame
Image, resize 40%
Image, rotate, free rotate, left, 20
Effects, 3D Effects, Drop Shadow, Same settings
Edit, Copy ipod
Edit, paste, paste as new layer
Move to the right of frame. Place in front of briefcase
Image, resize 30%
Effects, 3D Effects, Drop Shadow, Same Settings
Select Raster 2
Edit, copy Glitter Stars
Edit, paste, paste as new layer
Move to top right of frame
Effects, 3D Effects, Drop Shadow, Same Settings
Edit, copy Kitty 2
Edit, paste, paste as new layer
Image, resize 30%
Image, mirror
Place in front of the leg of the tube
Effects, 3D Effects, Drop Shadow, Same Settings
Edit, copy Bullet
Edit, paste, paste as new layer
Move to beside bottle
Image, resize 60%
Effects, 3D Effects, Drop Shadow, same settings
Edit, Copy Martini
Edit, Paste, Paste, as new Layer
Place to the left of briefcase
Image, resize 60%
Edit, Repeat resize
Effects, 3D Effects, Drop Shadow, Same settings
My tag is just a guide
Remember to add your copyright info. Make sure it is plain and legible
Add your name to the tag
Save as PNG
Labels:PTU,Scrap-A-Licious CT,Tutorial | 0
comments
Saturday, August 18, 2012
6:01 PM | Edit Post
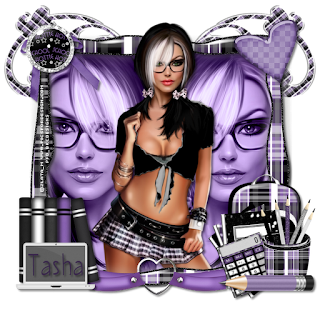
This tutorial was written by me. Any resemblance to any other tutorial is pure coincidence.Please DO NOT claim this tutorial as your own. It was written for PSP 9, but should be compatible with any version of PSP.
I am using the artwork of Zlata_M . You need a license to use her tubes. This tube can be purchased PicsforDesign
I am using the PTU kit called School Hottie by Tasha's Playground . You can buy this kit at PicsforDesign
Open new image 600 x 600
Edit, copy Frame 2
Edit, paste, paste as new layer
With your magic wand select the center of your frame
Selections, Expand by 25
Edit, copy Paper 8
Edit, paste, paste as new layer
Layers, arrange, send to bottom
Selections, Invert
Edit, Clear
Edit, copy close up of tube
Edit, paste as new layer
Move til her face is near the right side. See my tag for placement
Edit, Clear
Selections, Select None
Layers, Duplicate
Image, Mirror
Layers, merge, merge down
Change blend mode of this layer to Luminance(Legacy)
Select Raster 2
Effects, 3D Effects, Drop Shadow, with the settings of:
Vertical: 3
Horizontal: 3
Opacity: 50
Blur: 5
Color: Black
Shadow on new layer NOT checked
Edit, copy tube
Edit, paste, paste as new layer
Image, resize 80%
Edit, Repeat resize
Effects, 3D Effects, Drop Shadow, same settings
Select Raster 2
Layers, Duplicate
Layers, arrange, bring to top
Use your eraser to get the frame off of her face and hair
Edit, copy Books
Edit, paste, paste as new layer
Move to the bottom left of the frame
Image, resize 80%
Effects, 3D Effects, Drop Shadow, Same settings
Edit, copy backpack
Edit, paste, paste as new layer
Move to the bottom right of the frame. See my tag for placement
Image, resize 80%
Effects, 3D Effects, Drop Shadow, same settings
Edit, copy Notebooks
Edit, paste, paste as new layer
Move to the bottom right of the frame. Place in front of backpack
Image, resize 60%
Effects, 3D Effects, Drop Shadow, Same Settings
Edit, copy Pencil cup
Edit, paste, paste as new layer
Move to place in front of notebooks and to right of backpack. See my tag for placement
Image, resize 60%
Effects, 3D Effects, Drop Shadow, Same settings
Edit, Copy Pencil
Edit, paste, paste as new layer
Move to the right of the frame and place in front of pencil cup
Image, resize 60%
Effects, 3D Effects, Drop Shadow, Same Settings
Edit, copy Calculator
Edit, paste, paste as new layer
Move above notebooks and than move down behind pencil and pencil cup. See my tag for placement
Image, resize 50%
Image, rotate, free rotate, left, 20
Effects, 3D Effects, Drop Shadow, Same Settings
Edit, copy Laptop
Edit, paste, paste as new layer
Move and place in front of books. See my tag for placement
Image, resize 30%
Effects, 3D Effects, Drop Shadow, Same Settings
Edit, copy Bow
Edit, paste, paste as new layer
Move to the top left of the frame
Image, resize 60%
Effects, 3D Effects, Drop Shadow, same settings
Edit, Copy Flair 2
Edit, Paste, Paste, as new Layer
Move to the top and place above bow
Image, resize 60%
Effects, 3D Effects, Drop Shadow, Same settings
Select Copy of Raster 2 in the layer palette
Edit, Copy Heart Ribbon
Edit, paste, paste as new layer
Move to the bottom of the frame
Effects, 3D Effects, Drop Shadow, Same Settings
Edit, copy Flourish
Edit, paste, paste as new layer
Move toward the top right of the frame
Layers, arrange, send to bottom
Image, rotate, free rotate, right, 50
Effects, 3D Effects, Drop Shadow, Same Settings
Layers, Duplicate
Image, Mirror
Edit, copy Heart
Edit, paste, paste as new layer
Layers, arrange, send to top
Move to the top right of the frame
Image, resize 60%
My tag is just a guide
Remember to add your copyright info. Make sure it is plain and legible
Add your name to the tag
Save as PNG
Labels:PTU,Tutorial | 0
comments
Friday, August 17, 2012
9:02 PM | Edit Post

The kit for this is called Time 4 School by Amy (Gimptastic Scraps) of Amy and Leah's Gimptastic Tuts. The scrapkit can be purchased at PicsforDesign.I made some extras for all of you, click on the tag to get the full size version. Please Do NOT alter these in anyway.
Labels:Amy(Gimptastic),Snags | 0
comments
4:43 PM | Edit Post
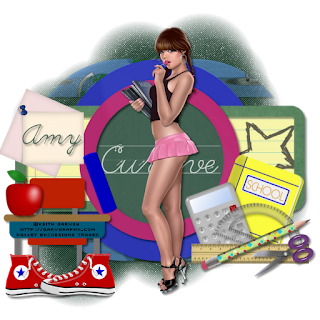
This tutorial was written by me. Any resemblance to any other tutorial is pure coincidence.Please DO NOT claim this tutorial as your own. It was written for PSP 9, but should be compatible with any version of PSP.
I am using the artwork of Keith Garvey. You need a license to use his tubes. You can buy his tubes at his new store HERE
I am using the FTU kit called Time 4 School by Gimptastic Scraps .
I am using the FTU kit called Time 4 School by Gimptastic Scraps .
SIS_Temp_ 69 By Scrap It Studio. You can find it HERE. It is located at the very bottom of the page
Open SIS_Temp_69
Duplicate and close original
Image, Rotate, Rotate Clockwise 90
Delete layers: WWW.SCRAPITSTUDIO.COM and background
Select Midldle Mat
Selections, Select All, Float, Defloat
Edit, copy Paper 9
Edit, paste, paste as new layer
Selections, Invert
Edit, Clear
Selections, Select None
Effects, 3D Effects, Drop Shadow, Settings of
Vertical and Horizontal: 3
Opacity: 50
Blur: 5
Color: Black
Shadow on new layer NOT checked
Delete Middle Mat
Select Shape
Selections, Select All, Float, Defloat
Edit, copy Paper 5
Edit, paste, paste as new layer
Selections, Invert
Edit, Clear
Selections, Select None
Effects, 3D Effects, Drop Shadow, Same settings
Delete Shape
Select Bottom Mat
Selections, Select All, Float, Defloat
Edit, copy Paper 8
Edit, paste, paste as new layer
Selections, Invert
Edit, clear
Selections, Select None
Effects, 3D Effects, Drop Shadow, Same Settings
Delete Bottom Mat
Select Top Mat
Selections, Select All, Float, Defloat
Edit, copy Paper 8
Edit, Paste, paste as new layer
Move til the star is showing..See my tag for placement
Selections, invert
Edit, Clear
Selections, Select None
Effects, 3D Effects, Drop Shadow, Same Settings
Delete Top Mat
Select Bottom Frame
Selections, Select All, Float, Defloat
Edit, copy Paper 2
Edit, Paste, paste as new layer
Selections, Invert
Edit, Clear
Selections, Select None
Effects, 3D Effects, Drop Shadow, same settings
Delete Bottom Frame
Select Top Frame
Selections, Select All, Float, Defloat
Edit, copy Paper 2
Edit, paste, paste as new layer
Selections, Invert
Edit, Clear
Selections, Select None
Effects, 3D Effects, Drop Shadow, Same Settings
Delete Top Frame
Select Frame
Selections, Select All, Float, Defloat
Edit, Copy Paper 10
Edit, paste, paste as new layer
Selections, Invert
Edit, Clear
Selections, Select None
Effects 3D Effects, Drop Shadow, Same Settings
Delete Frame
Select Mat
Selections, Select All, Float, Defloat
Edit, Copy Paper 1
Edit, Paste, paste as new layer
Move til you can see the word Cursive..See my tag for placement
Selections, Invert
Edit, Clear
Selections, Select None
Effects, 3D Effects, Drop Shadow, Same Settings
Delete Mat
Select Mask
Select a color that you want to use. I am using #405f50
Adjust, Color Balance, Manual Color Correction, settings of:
Manual Target Color
Source: c0c0c0
Target: #405f50
Edit, copy Tube
Edit, paste, paste as new layer
Image, Arrange, bring to top
Image, resize 80%
Place in middle of frame. See my tag for placement
Effects, 3D Effects, Drop Shadow. Same Settings
Edit, copy Desk
Edit, paste, paste as new layer
Image, resize 50%
Source: c0c0c0
Target: #405f50
Edit, copy Tube
Edit, paste, paste as new layer
Image, Arrange, bring to top
Image, resize 80%
Place in middle of frame. See my tag for placement
Effects, 3D Effects, Drop Shadow. Same Settings
Edit, copy Desk
Edit, paste, paste as new layer
Image, resize 50%
Move to the left of the template. See my tag for placement
Image, resize 50%
Effects, 3D Effects, Drop Shadow, Same Settings
Edit, copy Apple
Edit, paste, paste as new layer
Move to place on top of the desk. See my tag for placement
Image, resize 30%
Effects, 3D Effects, Drop Shadow, Same Settings
Edit, Copy Notebook
Edit, paste, Paste as new layer
Move to the right of the frame See my tag for placement
Image, resize 50%
Image, rotate, free rotate, right, 20
Effects, 3D Effects, Drop Shadow, Same Settings
Edit, copy Pencil
Edit, paste, paste as new layer
Move to the right of the template and place above the notebook
Image, resize 50%
Image, rotate, free rotate, right, 40
Effects, 3D Effects, Drop Shadow, Same Settings
Edit, copy Chalk
Edit, paste, paste as new layer
Place it on the left on the circle..See my tag for placement
Image, resize 60%
Image, rotate, free rotate, left, 20
Effects, 3D Effects, Drop Shadow, Same Settings
Edit, copy Ruler
Edit, paste, paste as new layer
Move to the notebook and pencil
Image, resize 60%
Image, rotate, free rotate, left, 20
Effects, 3D Effects, Drop Shadow, Same Settings
Edit, copy Ruler
Edit, paste, paste as new layer
Move to the notebook and pencil
Move down til it is below the pencil. See my tag for placement
Image, resize 40%
Effects, 3D Effects, Drop Shadow, Same Settings
Edit, Copy Scissors
Edit, Paste, paste as new layer
Image, Mirror
Image, resize 40%
Move to lay on the ruler
Image, rotate, free rotate, 20, left
Effects, 3D Effects, Drop Shadow, same settings
Edit, copy Calculator
Edit, paste, paste as new layer
Move til it is on top of the notebook but below the ruler. See my tag for placement
Image, resize 40%
Image,rotate, free rotate, 20, left
Effects, 3D Effects, Drop Shadow, same settings
Edit, copy Protractor
Edit, paste, paste as new layer
Move til it is on the note book and below the ruler
Image, resize 40%
Image, rotate, free rotate, 20, right
Effects, 3D Effects, Drop Shadow, Same settings
Edit, Copy, NotePaper
Edit, Paste, paste as new layer
Move to the left of the frame. See my tag for placement
Image, resize 40%
Effects, 3D Effects, Drop Shadow, Same Settings
Edit, copy Shoe
Edit, paste, paste as new layer
Move to the leg of the seat
Image, resize 40%
Effects, 3D Effects, Drop Shadow, Same settings
Layers, Duplicate
Image, MirrorMove other shoe to other leg of desk
My tag is just a guide
Remember to add your copyright info. Make sure it is plain and legible
Add your name to the tag
Save as PNG
Labels:Amy(Gimptastic),FTU,Tutorial | 0
comments
Wednesday, August 15, 2012
7:31 PM | Edit Post
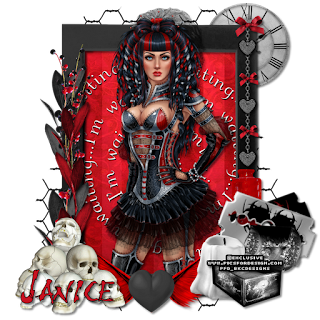
This tutorial was written by me. Any resemblance to any other tutorial is pure coincidence.Please DO NOT claim this tutorial as your own. It was written for PSP 9, but should be compatible with any version of PSP.
I am using the artwork of DiMary . You need a license to use her tubes. This tube was an exclusive at PicsforDesign
I am using the PTU kit called Dark Mood by Scrappers Gone Bad . You can buy this kit at Scrap-A-Licious
Open new image 600 x 600
Select Element 20
Image, rotate, Rotate clockwise 90
Edit, copy Element 20
Edit, paste, paste as new layer
Image, resize 85%
With your magic wand select the center of your frame
Selections, Expand by 10
Edit, copy Paper 8
Edit, paste, paste as new layer
Layers, arrange, send to bottom
Selections, Invert
Edit, Clear
Edit, copy Element 7
Edit, paste as new layer
Image, resize 60%
Edit, Clear
Selections, Select None
Select Raster 2
Effects, 3D Effects, Drop Shadow, with the settings of:
Vertical: 3
Horizontal: 3
Opacity: 50
Blur: 5
Color: Black
Shadow on new layer NOT checked
Edit, copy tube
Edit, paste, paste as new layer
Image, reisize 35%. I resized this much as it is a big tube
Effects, 3D Effects, Drop Shadow, same settings
Select Raster 2
Layers, Duplicate
Layers, arrange, bring to top
Use your eraser to get the frame off of her face and hair
Edit, copy Element 12
Edit, paste, paste as new layer
Layers,arrange, move down
Image, resize 60%
Move to the right some. See my tag for placement
Layers, Duplicate
Image, Mirror
Select Element 38
Image, Resize 20%
Edit, copy
Edit, paste, paste as new layer
Layers, arrange, bring to top
Move to the bottom right of the frame. See my tag for placement
Effects, 3D Effects, Drop Shadow, same settings
Edit, copy Element 47
Edit, paste, paste as new layer
Move to the bottom right of the frame. Placing below Element 38
Image, resize 40%
Effects, 3D Effects, Drop Shadow, Same Settings
Select Element 34
Image, resize 20%
Edit, copy
Edit, paste, paste as new layer
Move to the top right of frame
Layers, arrange, send to bottom
Move up a couple spots til it is above the wire
Effects, 3D Effects, Drop Shadow, Same settings
Edit, Copy Element 86
Edit, paste, paste as new layer
Move to the left of the frame. See my tag for placmenent
Image, resize 50%
Effects, 3D Effects, Drop Shadow, Same Settings
Edit, copy Element 87
Edit, paste, paste as new layer
Move below Element 86
Image, resize 60%
Effects, 3D Effects, Drop Shadow, Same Settings
Edit, copy Element 35
Edit, paste, paste as new layer
Move til it is below the box and in front of the bottle. See my tag for placement
Image, resize 40%
Effects, 3D Effects, Drop Shadow, Same Settings
Edit, copy Element 36
Edit, paste, paste as new layer
Move to the left bottom of frame
Layers, arrange bring to top
Image, resize 40%
Effects, 3D Effects, Drop Shadow, same settings
Edit, Copy Element 61
Edit, Paste, Paste, as new Layer
Move below candle and box. See my tag for placement
Image, resize 30%
Effects, 3D Effects, Drop Shadow, Same settings
Image, Rotate, Free Rotate,left, 20
Edit, Copy Element 62
Edit, paste, paste as new layer
Image, resize 30%
Image, rotate, free rotate, right, 20
Effects, 3D Effects, Drop Shadow, Same Settings
Edit, copy Element 56
Edit, paste, paste as new layer
Move to the right top of frame
Image, resize 40%
Effects, 3D Effects, Drop Shadow, Same Settings
Edit, copy Element 80
Image, Flip
Edit, paste, paste as new layer
Move between the black and red leaves. See my tag for placment
Image, resize 50%
Effects, 3D Effects, Drop Shadow, Same settings
Select Copy of raster 2 in the layer palette
Edit, Copy Element 91
Edit, paste, paste as new layer
Move to the bottom of the frame
Image, resize 60%
Effects, 3D Effects, Drop Shadow, Same Settings
My tag is just a guide
Remember to add your copyright info. Make sure it is plain and legible
Add your name to the tag
Save as PNG
Labels:PTU,Scrap-A-Licious CT,Tutorial | 2
comments
Tuesday, August 14, 2012
4:35 PM | Edit Post
Here are some FTU Frames that I have made..They can be used in kits or with your PSP Projects..no link back is required but if you want to you can...I just hope you enjoy using them.You can click on the preview below to download....
Labels:Frames,FTU | 0
comments
Monday, August 13, 2012
7:25 PM | Edit Post
Here is a new cluster frame for you..This is using the PTU kit Blue Monday by Amy of Amy & Leah's Gimptastic Tuts. Click on the preview below to take you to the download. Amy is no longer selling kits.
Labels:Amy(Gimptastic),Cluster frame,FTU | 1 comments
5:06 PM | Edit Post

The kit for this is called Blue Monday by Amy (Gimptastic Scraps) of Amy and Leah's Gimptastic Tuts. The scrapkit can be purchased at PicsforDesign.I made some extras for all of you, click on the tag to get the full size version. Please Do NOT alter these in anyway.
Labels:Amy(Gimptastic),Snags | 0
comments
4:48 PM | Edit Post
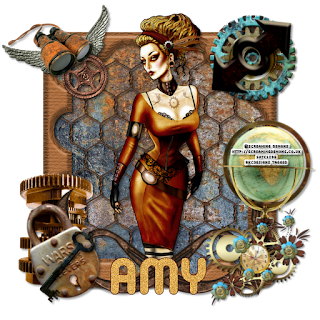
This tutorial was written by me. Any resemblance to any other tutorial is pure coincidence.Please DO NOT claim this tutorial as your own. It was written for PSP 9, but should be compatible with any version of PSP.
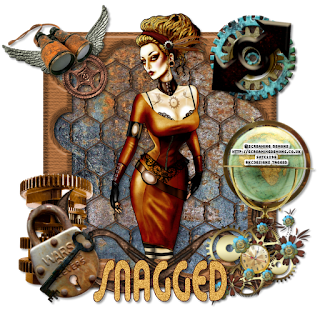
I am using the artwork of Screaming Demons. You need a license to use his tubes. You can buy the tube at SATC
I am using the FTU kit called Blue Monday by Gimptastic Scraps
Open new image 600 x 600
Edit, copy Frame 5
Edit, paste, paste as new layer
Image, resize 80%
With your magic wand select the center of your frame
Selections, Expand by 10
Edit, copy Paper 3
Edit, paste, paste as new layer
Layers, arrange, send to bottom
Selections, Invert
Edit, Clear
Selections, Select None
Select Raster 2
Effects, 3D Effects, Drop Shadow, with the settings of:
Vertical: 3
Horizontal: 3
Opacity: 50
Blur: 5
Color: Black
Shadow on new layer NOT checked
Select Raster 3
Edit, Copy Wire1
Edit, Paste, paste as new layer
Effects, 3D Effects, Drop Shadow, Same settings
Layers, Duplicate Wire1
Edit, copy tube
Edit, paste, paste as new layer
Effects, 3D Effects, Drop Shadow, same settings
Select Raster 2
Layers, Duplicate
Layers, arrange, bring to top
Use your eraser to get the frame off of her face and hair
Edit, copy Cluster2
Edit, paste, paste as new layer
Move to the bottom right of the frame. See my tag for placement
Image, resize 70%
Image, resize 80%
Effects, 3D Effects, Drop Shadow, Same Settings
Edit, Copy Wings
Edit, paste, paste as new layer
Move to the top left of the frame. See my tag for placement
Image, resize 80%
Effects, 3D Effects, Drop Shadow, same settings
Edit, copy Lock
Edit, paste, paste as new layer
Move to the bottom left of the frame
Image, rotate, free rotate, left, 30
Image, resize 80%
Effects, 3D Effects, Drop Shadow, Same Settings
Edit, copy Key1
Edit, paste, paste as new layer
Move to the bottom left side of the frame placing above lock. See my tag for placement
Image, rotate, free rotate, left, 50
Effects, 3D Effects, Drop Shadow, Same settings
Edit, Copy Cog1
Edit, paste, paste as new layer
Move to the top left of the frame. See my tag for placmenent
Image, resize 80%
Effects, 3D Effects, Drop Shadow, Same Settings
Edit, copy Cog6
Edit, paste, paste as new layer
Move atop Cog1
Image, resize 80%
Effects, 3D Effects, Drop Shadow, Same Settings
Edit, copy Cog3
Edit, paste, paste as new layer
Place atop Cog6
Image, resize 80%
Effects, 3D Effects, Drop Shadow, Same Settings
Edit, copy Globe
Edit, paste, paste as new layer
Move to the right of the frame
Move down til it is below raster 6
Image, resize 80%
Effects, 3D Effects, Drop Shadow, same settings
Edit, Copy Binoculars
Edit, Paste, Paste, as new Layer
Move to top left of frame above wings. See my tag for placement
Image, reisize 80%
Effects, 3D Effects, Drop Shadow, Same settings
Edit, copy Arrow
Edit, paste, paste as new layer
Image, rotate, free rotate, right, 50
Effects, 3D Effects, Drop Shadow, Same Settings
Select Copy of Raster 2
Edit, copy Doodle1
Edit, paste, paste as new layer
Move to the bottom of the frame. See my tag for placement
Effects, 3D Effects, Drop Shadow, Same Settings
Layers, Duplicate
Image, Mirror
Select Raster 2
Edit, copy Cog4
Edit, paste, paste as new layer
Move behind the lock and key
Image, resize 60%
Effects, 3D Effects, Drop Shadow, Same settings
My tag is just a guide
Remember to add your copyright info. Make sure it is plain and legible
Add your name to the tag
Save as PNG
Labels:Amy(Gimptastic),FTU,Tutorial | 0
comments
Saturday, August 11, 2012
2:37 PM | Edit Post
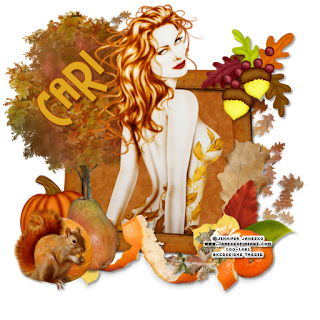
This tutorial was written by me. Any resemblance to any other tutorial is pure coincidence.Please DO NOT claim this tutorial as your own. It was written for PSP 9, but should be compatible with any version of PSP.
I am using the artwork of Jennifer Janesko. You need a license to use her tubes. You can buy the tube at CDO
I am using the PTU kit called Autumn In Central Park by Black Widow Creationz. You can buy this kit at Scrap-A-Licious
Open new image 600 x 600
Edit, copy Element 30
Edit, paste, paste as new layer
Image, resize 80%
With your magic wand select the center of your frame
Selections, Expand by 10
Edit, copy Paper 8
Edit, paste, paste as new layer
Layers, arrange, send to bottom
Selections, Invert
Edit, Clear
Selections, Select None
Select Raster 2
Effects, 3D Effects, Drop Shadow, with the settings of:
Vertical: 3
Horizontal: 3
Opacity: 50
Blur: 5
Color: Black
Shadow on new layer NOT checked
Edit, copy tube
Edit, paste, paste as new layer
Image, Mirror
Effects, 3D Effects, Drop Shadow, same settings
Select Raster 2
Layers, Duplicate
Layers, arrange, bring to top
Use your eraser to get the frame off of her face and hair
Edit, copy Element 6
Edit, paste, paste as new layer
Move to left side of frame. See my tag for placement
Image, resize 80%
Effects, 3D Effects, Drop Shadow, Same Settings
Edit, Copy Element 1
Edit, paste, paste as new layer
Layers, arrange, send to bottom
Effects, 3D Effects, Drop Shadow, same settings
Edit, copy Element 33
Edit, paste, paste as new layer
Move to the bottom left of the frame
Image, resize 50%
Effects, 3D Effects, Drop Shadow, Same Settings
Edit, copy Element 7
Edit, paste, paste as new layer
Move to the bottom left side of the frame. See my tag for placement
Image, resize 50%
Effects, 3D Effects, Drop Shadow, Same settings
Edit, Copy Element 10
Edit, paste, paste as new layer
Image, resize 50%
Image, Mirror
Image, rotate, free rotate, right, 90
Move next to the left of the frame. Place between the pumpkin and gourd..See my tag for placement
Effects, 3D Effects, Drop Shadow, Same Settings
Edit, copy Element 2
Edit, paste, paste as new layer
Layers, arrange, bring to top
Image, resize 60%
Place in front of the pumpkins and gourd. See my tag for placement
Effects, 3D Effects, Drop Shadow, Same Settings
Edit, copy Element 18
Edit, paste, paste as new layer
Image, Mirror
Move down til it is resting on the frame. See my tag for placement
Effects, 3D Effects, Drop Shadow, Same Settings
Edit, copy Element 31
Edit, paste, paste as new layer
Move to the top right of frame
Image, resize 40%
Effects, 3D Effects, Drop Shadow, same settings
Edit, Copy Element 23
Edit, Paste, Paste, as new Layer
Move down on the right til it is below the orange peel layer. See my tag for placement
Effects, 3D Effects, Drop Shadow, Same settings
Edit, copy Element 16
Edit, paste, paste as new layer
Image, resize 60%
Layers, arrange, move down til it is behind the green and red leaf
Effects, 3D Effects, Drop Shadow, Same Settings
My tag is just a guide
Remember to add your copyright info. Make sure it is plain and legible
Add your name to the tag
Save as PNG
Labels:PTU,Scrap-A-Licious CT,Tutorial | 0
comments
Wednesday, August 8, 2012
7:57 PM | Edit Post

The kit for this is called Tiki Beach by Amy (Gimptastic Scraps) of Amy and Leah's Gimptastic Tuts. The scrapkit can be purchased at PicsforDesign.I made some extras for all of you, click on the tag to get the full size version. Please Do NOT alter these in anyway.


Labels:Amy(Gimptastic),Snags | 0
comments
7:47 PM | Edit Post
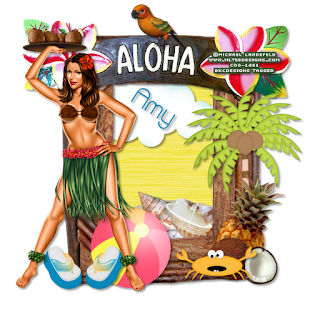
This tutorial was written by me. Any resemblance to any other tutorial is pure coincidence.Please DO NOT claim this tutorial as your own. It was written for PSP 9, but should be compatible with any version of PSP.
I am using the artwork of Michael Landefeld. You need a license to use his tubes. I purchased this tube at CDO
I am using the FTU kit called Tiki Beach by Gimptastic Scraps
Open new image 600 x 600
Edit, copy Frame 5
Edit, paste, paste as new layer
Image, resize 85%
With your magic wand select the center of your frame
Selections, Expand by 10
Edit, copy Paper 9
Edit, paste, paste as new layer
Layers, arrange, send to bottom
Selections, Invert
Edit, Clear
Selections, Select None
Select Raster 2
Effects, 3D Effects, Drop Shadow, with the settings of:
Vertical: 3
Horizontal: 3
Opacity: 50
Blur: 5
Color: Black
Shadow on new layer NOT checked
Edit, copy tube
Edit, paste, paste as new layer
Effects, 3D Effects, Drop Shadow, same settings
Edit, copy Aloha Banner
Edit, paste, paste as new layer
Move to top frame..See my tag for placement
Effects, 3D Effects, Drop Shadow, Same Settings
Select Raster 3
Selections, Select All, Float, Defloat
Edit, Copy Sand
Edit, paste, paste as new layer
Pull down to the bottom of the frame. See my tag for placement
Selections, Invert
Edit, clear
Effects, 3D Effects, Drop Shadow, same settings
Edit, copy Shell 4
Edit, paste, paste as new layer
Move to the right of the frame on the sand. See my tag for placement
Image, resize 50%
Image, rotate, free rotate, right 20
Edit, copy Shell 3
Edit, paste, paste as new layer
Move to the sand and down below shell 4
Image, resize 50%
Image, rotate, free rotate, right, 20
Effects, 3D Effects, Drop Shadow, Same Settings
Edit, copy Shell 2
Edit, paste, paste as new layer
Move to the left above the sand
Image, resize 50%
Image, rotate, free rotate, left, 20
Effects, 3D Effects, Drop Shadow, Same Settings
Edit, copy Palm Tree
Edit, paste, paste as new layer
Move to the right side of the frame. See my tag for placement
Image, resize 60%
Effects, 3D Effects, Drop Shadow, Same settings
Select Raster 3
Selections, Select All, Float Defloat
Edit, Copy Cloud
Edit, paste, paste as new layer
Image, resize 80%
Selections, Invert
Edit, clear
Selections, Select None
Effects, 3D Effects, Drop Shadow, Same Settings
Edit, copy coconut
Edit, paste, paste as new layer
Place at the foot of the Palm Tree
Image, resize 60%
Effects, 3D Effects, Drop Shadow, Same Settings
Edit, copy Pineapple
Edit, paste, paste as new layer
Move to the bottom right of frame
Move down so it will be behind the coconut
Image, resize 60%
Effects, 3D Effects, Drop Shadow, same settings
Edit, Copy Bird
Edit, Paste, Paste, as new Layer
Image, Resize 50%
Move to the top of the Aloha Banner. See my tag for placement
Effects, 3D Effects, Drop Shadow, Same settings
Edit, copy Crab
Edit, paste, paste as new layer
Move down til it is above the coconut
Image, resize 60%
Effects, 3D Effects, Drop Shadow, Same Settings
Edit, copy Ball
Edit, paste, paste as new layer
Image, resize 60%
Move behind and to the side of her foot. See my tag for placement
Effects, 3D Effects, Drop Shadow, Same Settings
Edit, copy Flipflops
Edit, paste, paste as new layer
Image, resize 50%
Move between the tubes legs.. See my tag for placement
Effects, 3D Effects, Drop Shadow, Same Settings
My tag is just a guide
Remember to add your copyright info. Make sure it is plain and legible
Add your name to the tag
Save as PNG
Labels:Amy(Gimptastic),FTU,Tutorial | 0
comments
Subscribe to:
Posts
(Atom)
Categories
- Amy(Gimptastic) (433)
- Amy(Gimptastic) Tutorial (4)
- Artistic Tag Passions Exclusive Tut (2)
- Barbara Jensen (24)
- Berry (1)
- Birthstone (36)
- CDO (651)
- Christmas (64)
- Cluster frame (106)
- Color Palette (2)
- Creative Addiction Exclusive (17)
- Creative Crazy Scraps (1)
- Crystals Creations (1)
- Curious Creative Dreams (10)
- Designs by Sarah Bryan (1)
- Diamond Creations (27)
- emo (2)
- Foxys Designz (62)
- Frames (4)
- Freek's Creations CT (22)
- FTU (299)
- FTU Tutorial (36)
- Halloween (6)
- Keith Garvey (5)
- Lady Mishka (1)
- Ladybug (2)
- Ladyhawwk (224)
- Magik (197)
- Manipulated by Magic Forum Exclusive (3)
- Manipulated by Magik (3)
- Masks (1)
- Mellie Beans (1)
- Michael Calandra (1)
- Michael Landefeld (1)
- Monti's Scraps (17)
- Mystical Scraps (7)
- Naughty Angelz Creationz (5)
- Ocean (3)
- Old School (8)
- Pammers Passions (1)
- Paper Pack (5)
- Pimpin' PSPers Warehouse (5)
- Pinup Toons (3)
- PTU (1243)
- PTU Tutorial (671)
- Purple (1)
- Purple's CT (16)
- Schnegge's Scraps (49)
- Scrap-A-Licious CT (20)
- Snags (32)
- Steampunk (1)
- Summer (1)
- Sweet Cravings Scraps (80)
- tag show off (5)
- Tasha's Playground (188)
- Template (24)
- Textures (2)
- Thanksgiving (3)
- Treasured Scraps (4)
- Tutorial (1298)
- Valentine (8)
- Wallpaper (21)
- Whisprd Designz Store (9)
- Wicked Princess Scraps (101)
- Wordart (15)
Blog Archive
-
▼
2012
(158)
-
▼
August
(28)
- Camo Girl PTU Tutorial
- Listen To The Music PTU Tutorial
- Amazing Autumn FTU Cluster Frame
- CT Tag & Extras
- Autumn Walk FTU Tutorial
- Dreaming of Autumn PTU Tutorial
- Autumns First Glance PTU Tutorial
- Golden Moments FTU Cluster Frame
- CT Tag & Extras
- A Moment In Time FTU Tutorial
- Swag PTU Tutorial
- School Hottie PTU Tutorial
- CT Tag & Extras
- School Girl FTU Tutorial
- Moody Goth Bride PTU Tutorial
- FTU Frames
- SteamPunked FTU Cluster Frame
- CT Tag & Extras
- SteamPunked FTU Tutorial
- Fall In The Park PTU Tutorial
- CT Tag & Extras
- Hawaii Tropics FTU Tutorial
- Wedding Day PTU Tutorial
- Don't Stop The Music PTU Tutorial
- CT Tag and Extras
- Playing Doc PTU Tutorial
- Skull Girl PTU Tutorial
- Scrap-A-Licious Collab Kit
-
▼
August
(28)


