NO to AI

You will not find AI on my blog!
CT Teams



I am using the artwork of Cuddly Rigor Mortis. You need a license to use this tube. You can purchase this tube at CDO. This is a retired bonus tube from July 2019
I used the filters Mura's Meister, L en K, penta.com, Tramages and AAA Frames
Wordart is by Wendy found HERE
Wordart in second sample is by KathyFrances found HERE
**The screenshots will not look like the tag I made as I didn't write the tut as I played with it**
Open new image 800 x 325
Pick a dark color to place in the foreground
Pick a light color to place in the background
Edit, copy Tube
Edit, paste, paste as new layer
Effects,
Plugins, Mura's Meister, Wallpaper with the following setting
Effects, Plugins, L en K, Zitah with the following settings

Effects, Edge Effects, Enhance
Effects,
Plugins, penta.com, Drag with the
following setting
Layers, new raster layer
Floodfill with your background color
Change the blend mode of this layer to Screen
Layers, merge visible
Effects,
Plugins, Tramages, Tow The Line with the following setting
Effects,
Plugins, AAA Frames, Texture Frame with the following setting
Edit, copy Tube
Edit, paste, paste as new layer
Image, Mirror
Move to look like it is laying in the frame
Image, resize to fit your tag
Effects, 3D Effects, Drop Shadow, Settings of:
Vertical : 2
Horizontal: 2
Opacity: 65
Blur: 5
Color: Black
Shadow on new layer NOT Checked
Layers, new raster layer
Selections, Select All, Selections, Modify, Contract by 3
Selections, Invert
Floodfill with your dark foreground color
Selections, Select None
Effects, 3D effects drop shadow, same settings
Edit, copy wordart of choice
Edit, paste, paste as new layer
Resize to fit your tag
Move around til you have it placed where you want on your tag
Remember to add your copyright info. Make sure it is plain and legible
Add your name to the tag
Save as PNG


This tutorial was written by me. Any resemblance to any other tutorial is pure coincidence. Please DO NOT claim this tutorial as your own. It was written in PSP 9 but should be compatible with any version of PSP.
I am using the artwork of Verymany. You need a license to use this tube. You can purchase this tube at their store HERE
I used the filters DC, Filter Factory N, Forest's Filters
Preset shapes Trinkets JL (Border Elements)_X. If you do not have this. Use whatever Preset shape you want to
Open new image 700x300
Pick a dark color to place in the foreground
Pick a light color to place in the background
Floodfill your image with your light background color
Edit, copy Tube
Layers, merge, merge visible
Effects,
Plugins, DC, Perssian Rug, with the following settings
Effects, Plugins, Filter Factory Galley N, Flip Chop
Radial with the following settings
Effects,
Plugins, Forest's Filters, Circles with
the following settings
Effects, Texture Effects, Blinds with the following settings

Layers, new raster
Floodfill with light color
Change the blend mode to Overlay on your light color
Selections, Select All, Modify, Contract 4
Selections, Invert
Layers, new raster layer
Floodfill with dark foreground color
Effects, 3D Effects, Drop Shadow, Settings of:
Vertical : 2
Horizontal: 2
Opacity: 65
Blur: 5
Color: Black
Shadow on new layer NOT Checked
Select Raster 1
Edit, copy Tube
Edit, paste, paste as new layer
Image, resize to fit your tag
Effects, 3D Effects, Drop Shadow, Same Settings
Select Raster 1
Switch your colors so that your light color is in foreground and dark in the background
Go to your preset shapes select Trinkets JL (Border Elements)_X
I went halfway down to try to center this and pulled from one side of the tag to the other. Make sure you start from below the border so that the edges will be behind the border
Stretch across your tags than stretch and make it as big or as small as you want on your background
Objects, Align, Center In Canvas
Layers, convert to raster layer
Effects, 3D Effects, Drop Shadow, Same settings
Effects, Texture Effects, Blinds changing the color to your light color
Remember to add your copyright info. Make sure it is plain and legible
Add your name to the tag
Save as PNG
Another tag using the tutorial


This tutorial was written by me. Any resemblance to any other tutorial is pure coincidence. Please DO NOT claim this tutorial as your own. It was written in PSP 9 but should be compatible with any version of PSP.
I am using the artwork of Cuddly Rigor Mortis You need a license to use this tube. You can purchase this tube at CDO
I used the filters VM Extravangza, VM Experimental, Funhouse
Open new image 700x300
Pick a dark color to place in the foreground
Pick a light color to place in the background
Floodfill your image with your light background color
Edit, copy Tube
Edit, paste, paste as new layer
Layers, merge, merge visible
Effects,
Plugins, VM Extravangza, Stay In Line! with the following setting
Effects, Plugins, VM Experimental, TeeWee with the following settings

Effects, Plugins, Funhouse, Radial ZigZag with the following settings

Layers, new raster
Floodfill with light color
Lower opacity to 80
Effects, Plugins, Artistic, Film Grain with the following settings

Selections, Select All, Modify, Contract 4
Selections, Invert
Layers, new raster layer
Floodfill with dark foreground color
Selections, Select None
Effects, 3D Effects, Drop Shadow, Settings of:
Vertical : 2
Horizontal: 2
Opacity: 65
Blur: 5
Color: Black
Shadow on new layer NOT Checked
Edit, copy Tube
Edit, paste, paste as new layer
Move below the layer you just made. On your tag it should be labeled as Raster 1
Image, resize to fit your tube
Effects, 3D Effects, Drop Shadow, Same Settings
Select Raster 1
Edit, copy Tube
Edit, paste, paste as new layer
Do not resize this time
Change the blend mode to Soft light
Add a saying or wordart of your choice to go with your tube
Remember to add your copyright info. Make sure it is plain and legible
Add your name to the tag
Save as PNG
Here is another example of the tutorial using another tube


I am using the artwork of Maryline Cazenave. I picked 3 tubes by the same artist. You need a license to use this tube. You can purchase this tube package at CDO
I am using the mask RD_Mask939 by Rachel Designs found HERE
Beauty School Dropout Font found HERE
Open new image 600x400
Pick a dark color to place in the foreground
Pick a light color to place in the background
Floodfill your image with your dark foreground color
Layers, new raster layer on your image
Floodfill with light background color
Layers, Load/save mask, load mask from disk, settings:
RD_Mask939
Source Luminance
Fit To Canvas
Invert Transparency NOT Checked
Hide All Mask
Layers, Merge, merge Group
Layers, new raster layer
Selections, Select All
Selections, Modify, Contract by 4
Selections, Invert
Floodfill with your light background color
Selections, Select None
Adjust, Add/Remove noise settings of

Effects, 3D Effects, Drop Shadow, Settings of:
Vertical : 2
Horizontal: 2
Opacity: 65
Blur: 5
Color: Black
Shadow on new layer NOT Checked
Switch the colors so foreground is light and background is dark
Select your preset shape Rounded Rectangle
Draw a rectangle on the left side of your tag making sure it is close to the edge of your tag like below

Objects, align, vertical center in canvas
Layers, convert to raster layer
Effects, 3D effects, Drop Shadow, same settings
Layers, duplicate
Image, Mirror
Layers, Duplicate
Move the duplicate to the middle so that the rectangles line up
Effects, Blinds, settings of
Width: 5
Opacity: 10
Color: White
Light from left/top CHECKED
Repeat this setting on all the rectangles
Select your rectangle on the left
Layers, Duplicate
Image, resize 85%
Move til it is centered on the rectangle
Layers, Duplicate
Image, Mirror
Move the duplicate above the rectangle on the right
Select the left original rectangle
Adjust, blur, gaussian blur with the settings of

Select the original rectangle on the right
Adjust, blur, gaussian blur settings of

Edit, copy one of your Tubes
Edit, paste, paste as new layer
Move to place how you want on your tag. If you are like me you are going to be moving the tubes around once you have them on to place them just like you want
Image, resize to fit your tag
Effects, 3D Effects, Drop Shadow, same settings
Edit, copy another tube
Edit, paste, paste as new layer
Move to place on the right
Image, resize to fit your tag
Effects, 3d Effects, Drop shadow, same settings
Edit, copy yet another tube
Edit, paste, paste as new layer
Move to place in the middle
Effects, 3D Effects, Drop Shadow, same settings
Move your tubes around til you have them placed the way you want them to show on your tag
Select Raster 2
Layers, Arrange, bring to top
That way your border is at the top of everything
Remember to add your copyright info. Make sure it is plain and legible
Add your name to the tag
Save as PNG


Penny


This tutorial was written by me. Any resemblance to any other tutorial is pure coincidence. Please DO NOT claim this tutorial as your own. It was written in PSP 9 but should be compatible with any version of PSP.
I am using the artwork of Simona Candini. You need a license to use this tube. You can purchase this tube at CDO
Open new image 650x300
Pick a dark color to place in the foreground
Pick a light color to place in the background
Floodfill your image with your light background color
Adjust, Add/Remove noise settings of

Effects, Reflection Effects, Pattern settings of

Effects, Distortion Effects, Wave settings of

Edit, copy Tube
Edit, paste, paste as new layer
I left it in the middle of the tag
Image, resize to fit your tag. I resized mine a couple times til I had it just the way I wanted it
Effects, 3D Effects, Drop Shadow settings of
Vertical : 2
Horizontal: 2
Opacity: 65
Blur: 5
Color: Black
Shadow on new layer NOT Checked
Layers, Duplicate
Change the blend mode to Soft Light
Layers, Merge, Merge Down
Select raster 1. This should be the layer that has what you have done thus far
Edit, copy tube
Edit, paste, paste as new layer
Image, Mirror
Move to the right side of the tag
Move around til you have just a specific part of the tube showing. For me I am using the eyes for this tube as the tube has huge eyes. More will be showing but I want the eyes to be showcased
Change the blend mode to Soft light
Edit, copy tube
Edit, paste, paste as new layer
Move to the left side of the tag. Move til you have another part of the tube showing. For me with this tube it was the heart the tube is holding
Change the blend mode to Soft Light
This is what your tag should look like at this point

Layers, new raster
Layers, arrange, bring to top
Selections, Select All, Selections, Modify, Contract 5
Selections, Invert
Floodfill with your dark foreground color
Selections, Select None
Effects, Texture Effects, Blinds with the settings of

Effects, 3D Effects, Inner Bevel with the settings of

Effects, 3D Effects, Drop Shadow, Same Settings
Find a quote or use your own text to add to the tag. Place on the tag where you wish it to show the most. This is completely up to you
Remember to add your copyright info. Make sure it is plain and legible
Add your name to the tag
Save as PNG

This tutorial was written by me. Any resemblance to any other tutorial is pure coincidence. Please DO NOT claim this tutorial as your own. It was written in PSP 9 but should be compatible with any version of PSP.
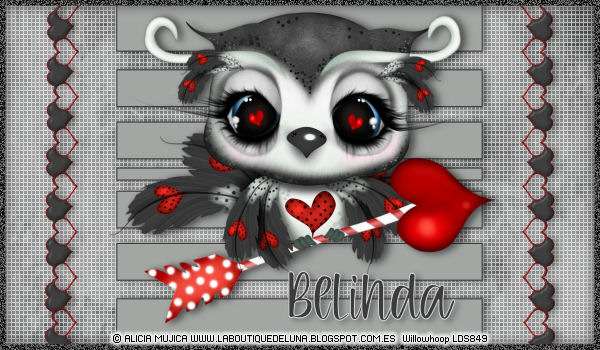
I am using the artwork of SybileArt. You need a license to use this tube. You can purchase this tube at CDO
RD_Mask939 by Rachel Designs found HERE
Preset shape: Trinkets JL(Border Element) H or if you can't find the Preset shape than here is a font that has the shape Trinkets JL Font HERE. Thank you Anne for the link for this.
Wmvalentine1 font used for the hearts found at Dafont
Open new image 600x350
Pick a dark color to place in the foreground
Pick a light color to place in the background
Floodfill your image with your light background color
Effects, Texture Effects, Blinds settings of

Effects, Reflection Effects, Pattern settings of

Change background to white
Layers, new raster layer on your image
Floodfill with white
Layers, Load/save mask, load mask from disk, settings:
RD_Mask939
Source Luminance
Fit To Canvas
Invert Transparency NOT Checked
Hide All Mask
Layers, Merge, merge Group
Change blend mode to Luminance(Legacy)
Change opacity to 54
Change the background color back to your light color
Select your Preset shape tool
Pick Trinkets JL (Border Element) H

Move to the middle of the image and pull over and down. Make sure that you can't see the line of the preset shape at the top and bottom. I pulled up at top and pulled down at the bottom
Objects, Align, Center in Canvas
Layers, convert to Raster Layer
Effects, 3D Effects, Drop Shadow, Settings of:

Make sure you select the flood fill tool
Layers, new raster layer
Selections, Select All, Selections, Modify, Contract 5, Selections, Invert
Floodfill with your dark foreground color
Selections, Select None
Adjust, Add/Remove Noise with the settings:

Effects, 3D Effects, Drop Shadow, Same settings
Edit, copy Tube
Move below the border you just added so that it is above the Preset shape
Image, resize to fit your tag. My tube is big so I had to resize 45% to get it to fit in the tag
Effects, 3D Effects, Drop Shadow Same settings
Layers, Duplicate
Change the blend mode to Soft Light
Layers, Merge, Merge Down
Select Your Font tool. Select the wmvalentine1 font. I chose the letter j for this tag. I have the size set at 125. But use the font size you want with the font you use
This font works only with small letters. So I used the small j not J
Place on the right side of the tag
Move how you want on the side
Layers, convert to raster layer
Effects, 3D Effects, Drop Shadow, Same settings
Layers, Duplicate
Image, Mirror
Remember to add your copyright info. Make sure it is plain and legible
Add your name to the tag
Save as PNG
A couple other examples of the tags I made while playing around with this..