NO to AI

You will not find AI on my blog!
CT Teams


Saturday, August 30, 2014

I am using the artwork of Dirk Richter You need a license to use this tube. You can buy the tube at CDO
I am using the PTU kit IB Dirk Richter 1-2 by Tasha's Playground. You can find this kit at CDO
Open new image 600 x 600
Edit, Copy Frame 01
Edit, paste, paste as new layer
Image, resize 75%
With your magic wand click inside of the frame
Selections, Modify, Expand by 8
Edit, copy Paper 01
Edit, paste, paste as new layer
Layers, arrange, send to bottom
Selections, Invert
Edit, Clear
Edit, copy e14
Edit, paste, paste as new layer
Move up and to the right some
Edit, Clear
Selections, Select None
Select Raster 2
Effects, 3D Effects, Drop Shadow, Settings of:
Vertical : -3
Horizontal: 3
Opacity: 50
Blur: 10
Color: Black
Shadow on new layer NOT Checked
Edit, Copy e17
Edit, paste, paste as new layer
Image, resize 90%
Layers, arrange, send to bottom
Effects, 3D Effects, Drop Shadow, same Settings
Layers, Duplicate
Image, Mirror
Edit, Copy e02
Edit, paste, paste as new layer
Layers, arrange, send to bottom
Image, Flip
Image, resize 80%
Move up toward the top of the frame so you can see the beads above the frame and none at the bottom
Effects, 3D Effects, Drop Shadow, Same Settings
Edit, copy e11
Edit, paste, paste as new layer
Layers, arrange, bring to top
Image, resize 60%
Move to the right side of the frame
Effects, 3D Effects, Drop Shadow, Same Settings
Edit, copy e16
Edit, paste, paste as new layer
Image, resize 70%
Move to Raster 2 and place at the top of the frame. See my tag for placement
Effects, 3D Effects, Drop Shadow, Same Settings
Edit, copy e13
Edit, paste, paste as new layer
Image, resize 70%
Layers, arrange, bring to top
Move to the left side of the frame
Effects, 3D Effects, Drop Shadow, Same Settings
Edit, copy Tube
Edit, paste, paste as new layer
Image, resize to fit your tag
Effects, 3D Effects, Drop Shadow, Same Settings
Edit, copy e08
Edit, paste, paste as new layer
Image, resize 50%
Move to the bottom left of the frame
Effects, 3D Effects, Drop Shadow, same Settings
Edit, copy e12
Edit, paste, paste as new layer
Image, resize 40%
Image, mirror
Move to the far left and place below and to the left of the flower
Image, rotate, free rotate, right, 30
Effects, 3D Effects, Drop Shadow, Same Settings
Layers, Duplicate
Image, Mirror
Edit copy e06
Edit, paste, paste as new layer
Image, resize 60%
Move to place behind the swirlie and to the right to make it look like it is waving from the swirlie
Effects, 3D Effects, Drop Shadow, Same Settings
Move to the left and move behind the flower on the right side
Remember to add your copyright info. Make sure it is plain and legible
Add your name to the tag
Save as PNG
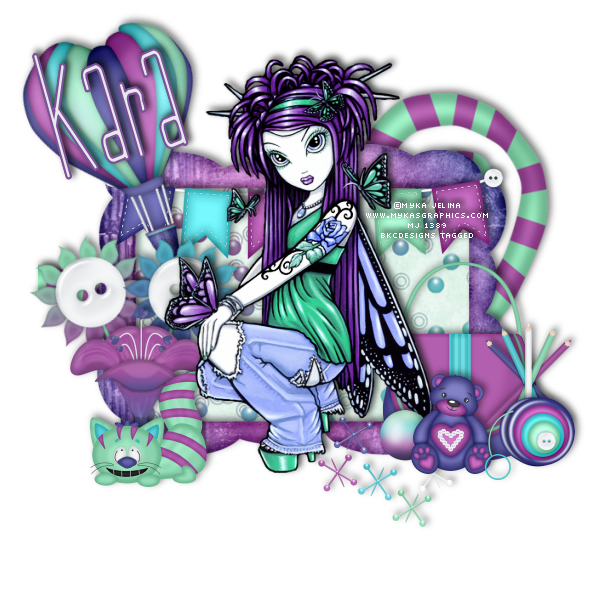
I am using the artwork of Myka Jelina. You need a license to use this tube. You can buy this tube at her store HERE
I am using the PTU kit Buttons by Sweet Cravings Scraps. You can buy the kit at TKO Scraps, Exquisite Scraps, and Scraps & Tubes
Open new image 600 x 600
Edit, Copy Frame 5
Edit, paste, paste as new layer
Image, resize 55%
With your magic wand click inside of the frame
Selections, Modify, Expand by 8
Edit, copy Paper 5
Edit, paste, paste as new layer
Layers, arrange, send to bottom
Selections, Invert
Edit, Clear
Edit, copy Beads
Edit, paste, paste as new layer
Edit, Clear
Selections, Select None
Select Raster 2
Effects, 3D Effects, Drop Shadow, Settings of:
Vertical : -3
Horizontal: 3
Opacity: 50
Blur: 10
Color: Black
Shadow on new layer NOT Checked
Edit, Copy Flower 1
Edit, paste, paste as new layer
Image, resize 40%
Move to the bottom left of the frame
Image, rotate, free rotate, left, 20
Effects, 3D Effects, Drop Shadow, same Settings
Edit, Copy Flower 2
Edit, paste, paste as new layer
Image, resize 40%
Move to the bottom left and place on the right side of the other flower
Image, rotate, free rotate, right, 20
Effects, 3D Effects, Drop Shadow, Same Settings
Edit, copy Flower 4
Edit, paste, paste as new layer
Image, resize 30%
Move to the bottom left and place in front of the two other flowers
Effects, 3D Effects, Drop Shadow, Same Settings
Edit, Copy Banner
Edit, paste, paste as new layer
Image, resize 50%
Move to the top of the frame
Effects, 3D Effects, Drop Shadow, Same Settings
Edit, copy Hot Air Balloon
Edit, paste, paste as new layer
Image, resize 30%
Move to the top left of the frame
Image, rotate, free rotate, left, 20
Effects, 3D Effects, Drop Shadow, Same Settings
Edit, copy Cat 1
Edit, paste, paste as new layer
Image, resize 20%
Move to the left and place in front of the flowers
Effects, 3D Effects, Drop Shadow, Same Settings
Edit, copy Swirl 1
Edit, paste, paste as new layer
Image, resize 85%
Layers, arrange, send to bottom
Effects, 3D Effects, Drop Shadow, Same Settings
Edit, copy Tube
Edit, paste, paste as new layer
Image, resize to fit your tag
Layers, arrange, bring to top
Effects, 3D Effects, Drop Shadow, Same Settings
Edit, copy Purse
Edit, paste, paste as new layer
Image, resize 40%
Move to the bottom right of the frame and place on Raster 2
Effects, 3D Effects, Drop Shadow, Same Settings
Edit, copy Jack and ball
Edit, paste, paste as new layer
Image, resize 30%
Layers, arrange, bring to top
Move to the right and place on the left side of the purse
Effects, 3D Effects, Drop Shadow, same Settings
Edit, copy Stack of Pencils
Edit, paste, paste as new layer
Image, resize 20%
Move to the bottom right and place on the right side of the purse
Effects, 3D Effects, Drop Shadow, Same Settings
Edit, Copy Teddy Bear 2
Edit, paste, paste as new layer
Image, resize 20%
Move to the bottom right of the frame and place on the purse. See my tag for placement
Effects, 3D Effects, Drop Shadow, Same Settings
Edit, copy YoYo
Edit, paste, paste as new layer
Image, resize 20%
Move to the bottom right and place to the right of the bear
Effects, 3D Effects, Drop Shadow, Same Settings
Remember to add your copyright info. Make sure it is plain and legible
Add your name to the tag
Save as PNG
Thursday, August 28, 2014

I am using the artwork of Anna Liwanag. You need a license to use this tube I bought this tube at CDO
I am using the PTU kit Nuts About Autumn by Manipulated by Magik. You can buy this kit exclusively at PFD, Mystical Scraps and Thrifty Scraps
Open new image 600 x 600
Edit, Copy Frame 6
Edit, paste, paste as new layer
Image, resize 70%
With your magic wand click inside of the frame
Selections, Modify, Expand by 8
Edit, copy Paper 3
Edit, paste, paste as new layer
Layers, arrange, send to bottom
Selections, Invert
Edit, Clear
Edit, copy Sparkles 1
Edit, paste, paste as new layer
Edit, Clear
Edit, copy Rain
Edit, paste, paste as new layer
Edit, Clear
Selections, Select None
Select Raster 2
Effects, 3D Effects, Drop Shadow, Settings of:
Vertical : -3
Horizontal: 3
Opacity: 50
Blur: 10
Color: Black
Shadow on new layer NOT Checked
Edit, Copy Tree
Edit, paste, paste as new layer
Image, resize 70%
Move to the left side of the frame
Effects, 3D Effects, Drop Shadow, same Settings
Edit, Copy Basket of Apples
Edit, paste, paste as new layer
Image, resize 50%
Move to the far left and place in front of the tree
Effects, 3D Effects, Drop Shadow, Same Settings
Edit, copy Grass
Edit, paste, paste as new layer
Move to place at the bottom of the frame and to the right
Effects, 3D Effects, Drop Shadow, Same Settings
Layers, Duplicate
Image, Mirror
Edit, copy Cider Barrel
Edit, paste, paste as new layer
Image, resize 50%
Move to the left and place behind the apple bucket and to the left
Effects, 3D Effects, Drop Shadow, Same Settings
Edit, copy Sign
Edit, paste, paste as new layer
Image, resize 60%
Move to the bottom right of the frame
Effects, 3D Effects, Drop Shadow, Same Settings
Select Doodle
Image, rotate, rotate clockwise 90
Edit, copy Doodle
Edit, paste, paste as new layer
Layers, arrange, send to bottom and move toward the top of the frame some
Image, resize 85%
Effects, 3D Effects, Drop Shadow, Same Settings
Edit, copy Tube
Edit, paste, paste as new layer
Image, resize 80%
Layers, arrange, bring to top
Effects, 3D Effects, Drop Shadow, same Settings
Edit, copy Walnuts
Edit, paste, paste as new layer
Image, resize 40%
Move to the bottom of the tube to cover up the cut off legs
Effects, 3D Effects, Drop Shadow, Same Settings
Edit, Copy Hazelnuts
Edit, paste, paste as new layer
Image, resize 40%
Move to the bottom of the frame to place on top and to the right of the Walnuts to help cover up the cut off legs of the tube
Effects, 3D Effects, Drop Shadow, Same Settings
Edit, copy Bird
Edit, paste, paste as new layer
Image, resize 30%
Move to the right and place on the sign
Effects, 3D Effects, Drop Shadow, Same Settings
Edit, copy Beech Nut
Edit, paste, paste as new layer
Image, resize 20%
Move to place in front of the walnuts and hazelnuts
Effects, 3D Effects, Drop Shadow, Same Settings
Edit, copy Squirrel 2
Edit, paste, paste as new layer
Image, resize 30%
Move to the right and place on the bottom right of the sign.. See my tag for placement
Effects, 3D Effects, Drop Shadow, Same Settings
Edit, Copy Squirrel 1
Edit, Paste, paste as new layer
Image, resize 20%
Move to the left and place on the cider Barrel
Effects, 3D Effects, Drop Shadow, Same Settings
Edit, Copy Squirrel in leaves
Edit, paste, paste as new layer
Image, resize 30%
Move to the bottom left and place in front of the apple and cider
Effects, 3D Effects, Drop Shadow, Same Settings
Edit, copy Branch
Edit, paste, paste as new layer
Image, rotate, free rotate, left, 20
Move to the top of the frame and place on Raster 2
Effects, 3D Effects, Drop Shadow, Same settings
Edit, copy Dandelion
Edit, paste, paste as new layer
Image, resize 50%
Move to the right and place behind the sign on the left side of the sign
Effects, 3D effects, Drop Shadow, Same Settings
Edit, Copy Leaves
Edit, paste, paste as new layer
Move to the top right of the frame
Image, resize 70%
Effects, 3D Effects, Drop Shadow, Same Settings
Layers, arrange, send to bottom. Move out so you can see it some
Remember to add your copyright info. Make sure it is plain and legible
Add your name to the tag
Save as PNG
Wednesday, August 27, 2014

I am using the artwork of Popeye Wong. He is a FTU Artist. You can find his tubes HERE
I am using the PTU Kit Football Fan by Gimptastic Scraps . This kit is exclusive to The PSP Project
Open new image 600 x 600
Edit, Copy Frame 3
Edit, paste, paste as new layer
Image, resize 70%
With your magic wand click inside of the frame
Selections, Modify, Expand by 8
Edit, copy Paper 2
Edit, paste, paste as new layer
Layers, arrange, send to bottom
Selections, Invert
Edit, Clear
Selections, Select None
Select Raster 2
Effects, 3D Effects, Drop Shadow, Settings of:
Vertical : -3
Horizontal: 3
Opacity: 50
Blur: 10
Color: Black
Shadow on new layer NOT Checked
Edit, Copy Deco
Edit, paste, paste as new layer
Image, resize 80%
Layers, arrange, send to bottom
Effects, 3D Effects, Drop Shadow, same Settings
Edit, Copy Doodle
Edit, paste, paste as new layer
Image, resize 85%
Layers, arrange, send to bottom
Effects, 3D Effects, Drop Shadow, Same Settings
Edit, copy Dots
Edit, paste, paste as new layer
Layers, arrange, send to bottom
Effects, 3D Effects, Drop Shadow, Same Settings
Edit, copy Goal Post
Edit, paste, paste as new layer
Image, resize 70%
Move to the right side of the frame
Effects, 3D Effects, Drop Shadow, Same Settings
Edit, copy Girl
Edit, paste, paste as new layer
Image, resize 40%
Move to the right and place at the bottom of the goal post
Effects, 3D Effects, Drop Shadow, Same Settings
Edit, copy Ball
Edit, paste, paste as new layer
Move to the right and place on the goal post
Image, resize 60%
Effects, 3D Effects, Drop Shadow, Same Settings
Edit, copy Scoreboard
Edit, paste, paste as new layer
Image, resize 50%
Move to the far right and place behind the goal posts
Effects, 3D Effects, Drop Shadow, same Settings
Edit, copy Tube
Edit, paste, paste as new layer
Image, resize 85%
Move to the left side of the goal post
Effects, 3D Effects, Drop Shadow, Same Settings
Edit, Copy Flair 1
Edit, paste, paste as new layer
Image, resize 60%
Move to the top left of the frame
Effects, 3D Effects, Drop Shadow, Same Settings
Edit, copy Ticket
Edit, paste, paste as new layer
Image, resize 40%
Move to the right and place behind the girl and in front of the goal post base
Effects, 3D Effects, Drop Shadow, Same Settings
Edit, copy Flag
Edit, paste, paste as new layer
Image, resize 60%
Move to the far right behind the girl and next to the ticket
Effects, 3D Effects, Drop Shadow, Same Settings
Edit, copy Megaphone
Edit, paste, paste as new layer
Image, resize 50%
Move to the right and place on the top left of the score board
Effects, 3D Effects, Drop Shadow, Same Settings
Edit, Copy Defense
Edit, Paste, paste as new layer
Image, resize 50%
Image, rotate, free rotate, left 90
Move to the left and place on the left side of the frame
Effects, 3D Effects, Drop Shadow, Same Settings
Edit, Copy Beer
Edit, paste, paste as new layer
Image, resize 40%
Move to the bottom left of the frame
Effects, 3D Effects, Drop Shadow, Same Settings
Edit, copy Soda
Edit, paste, paste as new layer
Image, resize 40%
Move to the bottom left of the frame and place to the right of the beer
Effects, 3D Effects, Drop Shadow, Same settings
Edit, copy Pretzel
Edit, paste, paste as new layer
Image, resize 40%
Move to the left and place in front of the soda and beer
Effects, 3D effects, Drop Shadow, Same Settings
Edit, Copy Popsicle
Edit, paste, paste as new layer
Move to the bottom left and place behind the pretzel
Image, resize 50%
Effects, 3D Effects, Drop Shadow, Same Settings
Edit, copy Cleat
Edit, paste, paste as new layer
Image, resize 50%
Move to Raster 2 and place at the bottom of the frame under the girl
Effects, 3D Effects, Drop Shadow, same Settings
Edit, Copy Label
Edit, paste, paste as new layer
Move to the right and place on the bottom of the scoreboard. See my tag for placement
Image, resize 50%
Effects, 3D Effects, Drop Shadow, Same Settings
Remember to add your copyright info. Make sure it is plain and legible
Add your name to the tag
Save as PNG
Sunday, August 24, 2014

I am using the artwork of Verymany. You need a license to use this tube. You can buy this tube at their store HERE
I am using the PTU Kit Punk Rock Girl by Gimptastic Scraps . This kit is exclusive to The PSP Project
Open new image 600 x 600
Edit, Copy Frame 1
Edit, paste, paste as new layer
Image, resize 70%
With your magic wand click inside of the frame
Selections, Modify, Expand by 8
Edit, copy Paper 8
Edit, paste, paste as new layer
Layers, arrange, send to bottom
Selections, Invert
Edit, Clear
Edit, copy Sparkle
Edit, paste, paste as new layer
Edit, Clear
Selections, Select None
Select Raster 2
Effects, 3D Effects, Drop Shadow, Settings of:
Vertical : -3
Horizontal: 3
Opacity: 50
Blur: 10
Color: Black
Shadow on new layer NOT Checked
Edit, Copy Stars 2
Edit, paste, paste as new layer
Image, resize 90%
Layers, arrange, send to bottom
Effects, 3D Effects, Drop Shadow, same Settings
Edit, Copy Mask
Edit, paste, paste as new layer
Image, resize 85%
Layers, arrange, send to bottom
Effects, 3D Effects, Drop Shadow, Same Settings
Edit, copy Tube
Edit, paste, paste as new layer
Layers, arrange, bring to top
Image, resize to fit your tube
Effects, 3D Effects, Drop Shadow, Same Settings
Edit, copy Speaker
Edit, paste, paste as new layer
Image, resize 50%
Move to the left and place behind the tube and down some
Effects, 3D Effects, Drop Shadow, Same Settings
Edit, copy Guitar
Edit, paste, paste as new layer
Image, resize 70%
Move to the left and place in front of the speaker
Effects, 3D Effects, Drop Shadow, Same Settings
Select Microphone
Image, rotate, free rotate, left 30
Image, Mirror
Edit, Copy Microphone
Edit, paste, paste as new layer
Move to the left and place on the speaker behind the guitar
Effects, 3D Effects, Drop Shadow, Same Settings
Select Raster 2
Layers, Duplicate
Layers, arrange, bring to top
Using your eraser erase the excess frame. Just leave the frame at the bottom to cover up the cut off legs of the tube
Edit, copy Skull Lamp
Edit, paste, paste as new layer
Move to the right side of the frame
Image, resize 90%
Effects, 3D Effects, Drop Shadow, Same Settings
Edit, copy Plant
Edit, paste, paste as new layer
Image, resize 80%
Move to the far right and place on the right of the skull lamp
Effects, 3D Effects, Drop Shadow, same Settings
Edit, copy Bear
Edit, paste, paste as new layer
Image, resize 50%
Move to the right and place in front of the plant and lamp
Effects, 3D Effects, Drop Shadow, Same Settings
Edit, Copy Balloon
Edit, paste, paste as new layer
Image, resize 80%
Move to the left and place behind the tubes head on the left side
Image, rotate, free rotate, left, 20
Effects, 3D Effects, Drop Shadow, Same Settings
Edit, copy Keyboard
Edit, paste, paste as new layer
Image, resize 30%
Move to the left and place behind the guitar and in front of the speaker placing at the bottom of the speaker
Effects, 3D Effects, Drop Shadow, Same Settings
Edit, copy Boot
Edit, paste, paste as new layer
Image, Mirror
Layers, arrange, bring to top
Image, resize 560%
Move to the far right and place on the left side of the skull lamp
Effects, 3D Effects, Drop Shadow, Same Settings
Edit, copy Potion
Edit, paste, paste as new layer
Image, resize 40%
Move to the right and place in front of the lamp and plant but behind the bear and place on the left side of the bear
Effects, 3D Effects, Drop Shadow, Same Settings
Edit, Copy Broken Heart
Edit, Paste, paste as new layer
Image, resize 40%
Move to the bottom left of the frame. Place to the left side of the speaker
Effects, 3D Effects, Drop Shadow, Same Settings
Edit, Copy Sunglasses
Edit, paste, paste as new layer
Image, resize 30%
Move to the bottom right of the frame on top of the boot
Image, rotate, free rotate, right, 20
Effects, 3D Effects, Drop Shadow, Same Settings
Edit, copy Choker
Edit, paste, paste as new layer
Image, resize 60%
Move to the bottom of the frame and move behind the sunglasses
Effects, 3D Effects, Drop Shadow, Same settings
Select Raster 2
Edit, copy Frame 2
Edit, paste, paste as new layer
Image, resize 75%
Effects, 3D Effects, Drop Shadow, Same settings
Edit, copy Headphones
Edit, paste, paste as new layer
Image, resize 40%
Layers, arrange, bring to top
Image, rotate, free rotate, left 20
Move to the left and place on the guitar and microphone. See my tag for placement
Effects, 3D effects, Drop Shadow, Same Settings
Edit, Copy Nail Polish
Edit, paste, paste as new layer
Move to the bottom of the frame
Image, resize 50%
Move to place beside the sunglasses
Effects, 3D Effects, Drop Shadow, Same Settings
Remember to add your copyright info. Make sure it is plain and legible
Add your name to the tag
Save as PNG
Tuesday, August 19, 2014

I am using the artwork of Ted Hammond. You need a license to use this tube. You can buy this tube at CDO
I am using the PTU Kit Falling Limbs by Gimptastic Scraps . This kit is exclusive to The PSP Project
Open new image 600 x 600
Edit, Copy Frame 6
Edit, paste, paste as new layer
Image, resize 65%
With your magic wand click inside of the frame
Selections, Modify, Expand by 8
Edit, copy Paper 3
Edit, paste, paste as new layer
Layers, arrange, send to bottom
Move to the left some
Selections, Invert
Edit, Clear
Edit, copy Rain
Edit, paste, paste as new layer
Move down some
Edit, Clear
Selections, Select None
Select Raster 2
Effects, 3D Effects, Drop Shadow, Settings of:
Vertical : -3
Horizontal: 3
Opacity: 50
Blur: 10
Color: Black
Shadow on new layer NOT Checked
Edit, Copy Tree Stump
Edit, paste, paste as new layer
Image, resize 70%
Move to the far left of the frame
Effects, 3D Effects, Drop Shadow, same Settings
Edit, Copy Well
Edit, paste, paste as new layer
Image, resize 50%
Move to the left and place in front of the tree stump
Effects, 3D Effects, Drop Shadow, Same Settings
Edit, copy Tube
Edit, paste, paste as new layer
Image, resize 85%
Effects, 3D Effects, Drop Shadow, Same Settings
Edit, copy Wheel
Edit, paste, paste as new layer
Image, resize 50%
Move to the bottom right of the frame and place on Raster 2
Effects, 3D Effects, Drop Shadow, Same Settings
Edit, copy Path
Edit, paste, paste as new layer
Image, resize 85%
Keeping on Raster 2 move down to the bottom so it shows below the well and tube. See my tag for placement
Effects, 3D Effects, Drop Shadow, Same Settings
Edit, Copy Grass
Edit, paste, paste as new layer
Move to the far right and place behind the wheel
Effects, 3D Effects, Drop Shadow, Same Settings
Edit, copy Bulrushes
Edit, paste, paste as new layer
Move to the far right and place on top of the grass
Effects, 3D Effects, Drop Shadow, Same Settings
Edit, copy Guts
Edit, paste, paste as new layer
Image, resize 40%
Move to the far left and place on the left side of the well
Effects, 3D Effects, Drop Shadow, same Settings
Edit, copy Brain
Edit, paste, paste as new layer
Image, resize 40%
Move to the left and place on the edge of the well. See my tag for placement
Effects, 3D Effects, Drop Shadow, Same Settings
Edit, Copy Foot
Edit, paste, paste as new layer
Image, resize 40%
Move to the left and place beside the tube
Effects, 3D Effects, Drop Shadow, Same Settings
Edit, copy Holding Hands
Edit, paste, paste as new layer
Image, resize 40%
Move to the left and place on the pulley in the well. See my tag for placement
Effects, 3D Effects, Drop Shadow, Same Settings
Edit, copy Deer
Edit, paste, paste as new layer
Image, resize 50%
Move to the far right and place in front of the wheel
Effects, 3D Effects, Drop Shadow, Same Settings
Select Raster 2
Edit, copy Blood
Edit, paste, paste as new layer
Image, resize 50%
Move to the top of the frame
Effects, 3D Effects, Drop Shadow, Same Settings
Edit, Copy Bird
Edit, Paste, paste as new layer
Image, resize 40%
Layers, arrange, bring to top
Move to the right and place on the wheel
Effects, 3D Effects, Drop Shadow, Same Settings
Edit, Copy Fox
Edit, paste, paste as new layer
Image, resize 40%
Move to the left of the frame and place to the left side of the well
Effects, 3D Effects, Drop Shadow, Same Settings
Edit, copy Log
Edit, paste, paste as new layer
Image, resize 60%
Move to the right and place behind the deer
Effects, 3D Effects, Drop Shadow, Same settings
Edit, copy Axe
Edit, paste, paste as new layer
Move to place on the log that is behind the deer
Image, resize 60%
Image, rotate, free rotate, left, 30
Effects, 3D Effects, Drop Shadow, Same settings
Remember to add your copyright info. Make sure it is plain and legible
Add your name to the tag
Save as PNG
Monday, August 18, 2014

I am using the artwork of Elias Chatzoudis You need a license to use this tube.I got this tube when he was at PTE. You can buy the tube at his store HERE
I am using the PTU kit Autumn Sunrise by Tasha's Playground. You can find where to purchase the kit HERE
Open new image 600 x 600
Edit, Copy Frame 01
Edit, paste, paste as new layer
Image, resize 80%
With your magic wand click inside of the frame
Selections, Modify, Expand by 8
Edit, copy Paper 01
Edit, paste, paste as new layer
Layers, arrange, send to bottom
Selections, Invert
Edit, Clear
Edit, copy e34
Edit, paste, paste as new layer
Edit, clear
Selections, Select None
Select Raster 2
Effects, 3D Effects, Drop Shadow, Settings of:
Vertical : -3
Horizontal: 3
Opacity: 50
Blur: 10
Color: Black
Shadow on new layer NOT Checked
Edit, Copy e08
Edit, paste, paste as new layer
Image, resize 70%
Move to the bottom of the frame
Effects, 3D Effects, Drop Shadow, same Settings
Edit, Copy e38
Edit, paste, paste as new layer
Move to the left and move up some so that it is above the frame
Effects, 3D Effects, Drop Shadow, Same Settings
Edit, copy e32
Edit, paste, paste as new layer
Image, resize 70%
Image, Mirror
Move to the left and place behind the birdfeeder
Effects, 3D Effects, Drop Shadow, Same Settings
Layers, Duplicate
Layers, arrange, bring to top
Edit, copy e33
Edit, paste, paste as new layer
Image, resize 60%
Move to the bottom left of the frame
Effects, 3D Effects, Drop Shadow, Same Settings
Edit, copy e22
Edit, paste, paste as new layer
Image, resize 60%
Move to the left and place behind the basket of flowers
Effects, 3D Effects, Drop Shadow, Same Settings
Layers, duplicate
Move to the right so they are side by side
Edit, Copy e14
Edit, paste, paste as new layer
Image, resize 50%
Layers, arrange, bring to top
Move to the left bottom of the frame
Effects, 3D Effects, Drop Shadow, Same Settings
Select e16
Image, rotate, free rotate, left 90
Edit, copy e16
Edit, paste, paste as new layer
Layers, arrange, send to bottom and move to the left
Effects, 3D Effects, Drop Shadow, Same Settings
Layers, duplicate
Image, Mirror
Image, Flip
Edit, copy e57
Edit, paste, paste as new layer
Image, resize 40%
Layers, arrange, bring to top
Place on the birdfeeder where the hole is
Effects, 3D Effects, Drop Shadow, same Settings
Edit, copy Tube
Edit, paste, paste as new layer
Image, resize to fit your tag
Effects, 3D Effects, Drop Shadow, Same Settings
Edit, Copy e35
Edit, paste, paste as new layer
Image, Mirror
Image, resize 50%
Move to the bottom right of the frame and place on the fence
Effects, 3D Effects, Drop Shadow, Same Settings
Edit, copy e03
Edit, paste, paste as new layer
Image, resize 40%
Move to the bottom right of the frame and place under the spigot
Effects, 3D Effects, Drop Shadow, Same Settings
Edit, copy e25
Edit, paste, paste as new layer
Image, resize 40%
Move to the bottom right and place on the fence beside the spigot
Effects, 3D Effects, Drop Shadow, Same Settings
Layers, Duplicate move beside the first flower
Layers, duplicate and move beside the second flower
Edit, copy e41
Edit, paste, paste as new layer
Image, Flip
Image, Mirror
Image, resize 40%
Move to the left and place in front of the basket but behind the rabbit
Effects, 3D Effects, Drop Shadow, Same Settings
Edit, Copy e12
Edit, Paste, paste as new layer
Image, resize 60%
Layers, arrange, send to bottom
Move to the far right corner so it looks to be behind the bucket and things
Effects, 3D Effects, Drop Shadow, Same Settings
Edit, Copy e46
Edit, paste, paste as new layer
Layers, arrange, bring to top
Move to the bottom right and place on the flowers
Effects, 3D Effects, Drop Shadow, Same Settings
Layers, Duplicate
Image, Mirror move the duplicate to the right or left of how you place your element. See my tag for placement
Edit, copy e27
Edit, paste, paste as new layer
Image, resize 30%
Move to the left and place beside the basket
Effects, 3D Effects, Drop Shadow, Same settings
Edit, copy e26
Edit, paste, paste as new layer
Image, resize 40%
Move to the right and place on the fence
Effects, 3D Effects, Drop Shadow, Same settings
Remember to add your copyright info. Make sure it is plain and legible
Add your name to the tag
Save as PNG
Autumn Sunrise FTU Cluster Frame using the PTU Kit Autumn Sunrise by
Tasha's Playground. Tasha no longer sales kits.

Thursday, August 14, 2014

I am using the artwork of Caron Vinson. You need a license to use this tube. You can buy this tube at CDO
I am using the PTU kit Pieces of Me by Sweet Cravings Scraps. You can buy the kit at TKO Scraps, Exquisite Scraps, and Scraps & Tubes
Open new image 600 x 600
Edit, Copy Frame 7
Edit, paste, paste as new layer
Image, resize 50%
With your magic wand click inside of the frame
Selections, Modify, Expand by 8
Edit, copy Paper 8
Edit, paste, paste as new layer
Layers, arrange, send to bottom
Selections, Invert
Edit, Clear
Selections, Select None
Select Raster 2
Effects, 3D Effects, Drop Shadow, Settings of:
Vertical : -3
Horizontal: 3
Opacity: 50
Blur: 10
Color: Black
Shadow on new layer NOT Checked
Edit, Copy Tree
Edit, paste, paste as new layer
Image, resize 50%
Move to the far left of your frame
Effects, 3D Effects, Drop Shadow, same Settings
Edit, Copy Flower Pots
Edit, paste, paste as new layer
Image, resize 40%
Move to the left and place at the bottom of the tree
Effects, 3D Effects, Drop Shadow, Same Settings
Edit, copy Mushroom
Edit, paste, paste as new layer
Image, resize 20%
Move to the left. Place in front of the tree and behind the flower pots
Effects, 3D Effects, Drop Shadow, Same Settings
Edit, copy Bird
Edit, paste, paste as new layer
Image, resize 20%
Layers, arrange, bring to top
Move to the left and place on the far left flower pot
Effects, 3D Effects, Drop Shadow, Same Settings
Edit, copy Leaf 3
Edit, paste, paste as new layer
Image, resize 70%
Move to Raster 2 and place at the bottom of the frame
Effects, 3D Effects, Drop Shadow, Same Settings
Edit, Copy Leaf 2
Edit, paste, paste as new layer
Image, resize 70%
Move down and place behind leaf 3 but leave above it so it is seen
Effects, 3D Effects, Drop Shadow, Same Settings
Edit, copy Flower 1
Edit, paste, paste as new layer
Image, resize 60%
Image, Mirror
Move to the right of the frame and make sure the stem of the flower is behind the leaves
Effects, 3D Effects, Drop Shadow, Same Settings
Edit, copy Berry Stem
Edit, paste, paste as new layer
Image, resize 60%
Move to the right and place in front of the flower
Effects, 3D Effects, Drop Shadow, same Settings
Edit, copy Sunburst
Edit, paste, paste as new layer
Move down til it is on top of Raster 3 and you can see it spilling out of the frame
Effects, 3D Effects, Drop Shadow, Same Settings
Edit, Copy Basket
Edit, paste, paste as new layer
Layers, arrange, bring to top
Image, resize 40%
Move to the bottom right of the frame and place in front of the leaves and flowers
Effects, 3D Effects, Drop Shadow, Same Settings
Edit, copy Apples
Edit, paste, paste as new layer
Image, resize 30%
Move to the bottom right and place on the basket
Effects, 3D Effects, Drop Shadow, Same Settings
Edit, copy Leaf 1
Edit, paste, paste as new layer
Layers, arrange, send to bottom
Effects, 3D Effects, Drop Shadow, Same Settings
Layers, Duplicate
Image, Mirror
Edit, copy Tube
Edit, paste, paste as new layer
Layers, arrange, bring to top
Image, resize 85%
Effects, 3D Effects, Drop Shadow, Same Settings
Edit, Copy Wheat Sprig 1
Edit, Paste, paste as new layer
Image, Mirror
Image, resize 50%
Move to the right and move down til it is behind Raster 2
Effects, 3D Effects, Drop Shadow, Same Settings
Layers, Duplicate
Image, Mirror
Edit, Copy Duck
Edit, paste, paste as new layer
Layers, arrange, bring to top
Image, Resize 20%
Move to the far left and place in front of the flower pots
Effects, 3D Effects, Drop Shadow, Same Settings
Edit, copy Kitten
Edit, paste, paste as new layer
Image, resize 40%
Move to the bottom right and place on the tubes knee and in front of the apples and basket
Effects, 3D Effects, Drop Shadow, Same settings
Edit, copy Flower 7
Edit, paste, paste as new layer
Move to the bottom left and place behind the duck and in front of the flower pot
Image, resize 20%
Effects, 3D Effects, Drop Shadow, Same settings
Remember to add your copyright info. Make sure it is plain and legible
Add your name to the tag
Save as PNG
Tuesday, August 12, 2014

I am using the artwork of Keith Garvey You need a license to use this tube. You can buy the tube at his store HERE
I am using the PTU kit Schoolgirl Crush by Tasha's Playground. You can find where to purchase the kit HERE
Open new image 600 x 600
Edit, Copy Frame 01
Edit, paste, paste as new layer
Image, resize 70%
With your magic wand click inside of the frame
Selections, Modify, Expand by 8
Edit, copy Paper 06
Edit, paste, paste as new layer
Layers, arrange, send to bottom
Selections, Invert
Edit, Clear
Edit copy e50
Edit, paste, paste as new layer
Edit, clear
Edit, copy e38
Edit, paste, paste as new layer
Edit,Clear
Selections, Select None
Select Raster 2
Effects, 3D Effects, Drop Shadow, Settings of:
Vertical : -3
Horizontal: 3
Opacity: 50
Blur: 10
Color: Black
Shadow on new layer NOT Checked
Edit, Copy e19
Edit, paste, paste as new layer
Image, mirror
Move to the bottom left of the frame
Image, resize 50%
Effects, 3D Effects, Drop Shadow, same Settings
Edit, Copy e56
Edit, paste, paste as new layer
Image, resize 30%
Move to the far left and place to the side of the desk
Effects, 3D Effects, Drop Shadow, Same Settings
Edit, copy e54
Edit, paste, paste as new layer
Image, resize 30%
Move to the bottom left and place beside the chair of the desk
Effects, 3D Effects, Drop Shadow, Same Settings
Edit, copy e61
Edit, paste, paste as new layer
Image, resize 30%
Move to the bottom left and sit on the other book
Effects, 3D Effects, Drop Shadow, Same Settings
Edit, copy e55
Edit, paste, paste as new layer
Image, resize 30%
Move to left and place on the top of the desk
Effects, 3D Effects, Drop Shadow, Same Settings
Edit, Copy e39
Edit, paste, paste as new layer
Image, resize 30%
Move to the left and place on the desk beside the books
Effects, 3D Effects, Drop Shadow, Same Settings
Edit, copy e01
Edit, paste, paste as new layer
Image, resize 30%
Move to the bottom left and place on the book and beside the other books some
Effects, 3D Effects, Drop Shadow, Same Settings
Edit, copy e60
Edit, paste, paste as new layer
Image, resize 60%
Move to Raster 2 and move to the far left
Effects, 3D Effects, Drop Shadow, same Settings
Edit, copy e29
Edit, paste, paste as new layer
Image, resize 30%
Move to the left and place on top of the locker
Effects, 3D Effects, Drop Shadow, Same Settings
Edit, Copy e27
Edit, paste, paste as new layer
Image, resize 30%
Move to the left and place on the desk beside the books
Effects, 3D Effects, Drop Shadow, Same Settings
Select e24
Image, rotate, rotate clockwise 90
Edit, copy e24
Edit, paste, paste as new layer
Image, resize 30%
Layers, arrange, bring to top
Move to the left and place in front of the backpack
Effects, 3D Effects, Drop Shadow, Same Settings
Edit, copy e21
Edit, paste, paste as new layer
Image, resize 20%
Move to the bottom left and place in front of the bookcase but behind the previous element
Effects, 3D Effects, Drop Shadow, Same Settings
Edit, copy e37
Edit, paste, paste as new layer
Image, resize 20%
Move to the left and place behind the previous two elements and to the left side of the backpack
Effects, 3D Effects, Drop Shadow, Same Settings
Edit, Copy e08
Edit, Paste, paste as new layer
Layers, arrange, send to bottom
Effects, 3D Effects, Drop Shadow, Same Settings
Edit, Copy e26
Edit, paste, paste as new layer
Effects, 3D Effects, Drop Shadow, Same Settings
Edit, copy e20
Edit, paste, paste as new layer
Image, resize 20%
Layers, arrange, bring to top
Move to place on the books that are on the desk
Effects, 3D Effects, Drop Shadow, Same settings
Edit, copy e43
Edit, paste, paste as new layer
Move to the right side of the frame
Image, resize 60%
Effects, 3D Effects, Drop Shadow, Same settings
Edit, copy e33
Edit, paste, paste as new layer
Image, resize 60%
Move to the right and place in front of the previous element and move to the bottom of the frame
Effects, 3D Effects, Drop Shadow, Same Settings
Edit, Copy Tube
Edit, paste, paste as new layer
Image, Mirror
Image, resize to fit your tag
Effects, 3D Effects, Drop Shadow, Same Settings
Edit, Copy e09
Edit, Paste, paste as new layer
Image, resize 30%
Move to the bottom right of the frame and place on the right side of the easel
Effects, 3D Effects, Drop Shadow, Same Settings
Edit, Copy e32
Edit, paste, paste as new layer
Image, resize 30%
Move to the bottom right and place on the left side of the paint
Effects, 3D Effects, Drop Shadow, Same Settings
Edit, Copy e45
Edit, paste, paste as new layer
Image, resize 30%
Move to the far right and place on the left leg of the easel
Effects, 3D Effects, Drop Shadow, Same Settings
Remember to add your copyright info. Make sure it is plain and legible
Add your name to the tag
Save as PNG
School Girl Crush FTU Cluster Frame using the PTU Kit Schoolgirl Crush by Tasha's Playground. Tasha no longer sales kits.

Monday, August 11, 2014

I am using the artwork of Cris DeLara. You need a license to use this tube. You can buy this tube at The PSP Project
I am using the PTU Kit Young Teacher by Gimptastic Scraps . This kit is exclusive to The PSP Project
Open new image 600 x 600
Edit, Copy Frame 3
Edit, paste, paste as new layer
Image, resize 70%
With your magic wand click inside of the frame
Selections, Modify, Expand by 8
Edit, copy Paper 4
Edit, paste, paste as new layer
Layers, arrange, send to bottom
Selections, Invert
Edit, Clear
Selections, Select None
Select Raster 2
Effects, 3D Effects, Drop Shadow, Settings of:
Vertical : -3
Horizontal: 3
Opacity: 50
Blur: 10
Color: Black
Shadow on new layer NOT Checked
Edit, Copy Scribble
Edit, paste, paste as new layer
Layers, arrange, send to bottom
Effects, 3D Effects, Drop Shadow, same Settings
Edit, Copy Mess
Edit, paste, paste as new layer
Image, rotate, free rotate, left, 90
Effects, 3D Effects, Drop Shadow, Same Settings
Edit, copy Teacher Desk
Edit, paste, paste as new layer
Image, resize 50%
Layers, arrange, bring to top
Move to the bottom of the frame
Effects, 3D Effects, Drop Shadow, Same Settings
Edit, copy Chalkboard
Edit, paste, paste as new layer
Image, resize 50%
Move to the top right of the frame
Effects, 3D Effects, Drop Shadow, Same Settings
Edit, copy Tube
Edit, paste, paste as new layer
Image, resize to fit your tag
Move til tube is standing in front of the desk and hand is on the chalkboard
Effects, 3D Effects, Drop Shadow, Same Settings
Edit, Copy Crayon
Edit, paste, paste as new layer
Image, resize 30%
Move to the top right and place under the tubes hand to make it look like the crayon is being held
Image, rotate, free rotate, right 10
Effects, 3D Effects, Drop Shadow, Same Settings
Edit, copy Teddy
Edit, paste, paste as new layer
Image, resize 40%
Move to the bottom left and place beside the tubes foot and in front of the desk
Effects, 3D Effects, Drop Shadow, Same Settings
Edit, copy Book Stack
Edit, paste, paste as new layer
Image, resize 40%
Move to the bottom right and place beside the tube and in front of the desk
Effects, 3D Effects, Drop Shadow, same Settings
Edit, copy Ball
Edit, paste, paste as new layer
Image, resize 40%
Move to the left and place behind and to the left some behind the teddy
Effects, 3D Effects, Drop Shadow, Same Settings
Edit, Copy Abacus
Edit, paste, paste as new layer
Image, resize 40%
Move to the bottom right of the frame and place behind the books and to the right
Effects, 3D Effects, Drop Shadow, Same Settings
Edit, copy Atom
Edit, paste, paste as new layer
Image, resize 20%
Move to the top right and place in the right corner of the chalkboard
Effects, 3D Effects, Drop Shadow, Same Settings
Edit, copy Glasses
Edit, paste, paste as new layer
Image, resize 30%
Layers, arrange, bring to top
Move to the bottom right and place on the books
Effects, 3D Effects, Drop Shadow, Same Settings
Edit, copy Apple
Edit, paste, paste as new layer
Image, resize 40%
Move to the far right and place beside the books and in front of the abacus
Effects, 3D Effects, Drop Shadow, Same Settings
Edit, Copy Bubbles Bottle
Edit, Paste, paste as new layer
Image, resize 30%
Move to the bottom left and place beside the basketball
Effects, 3D Effects, Drop Shadow, Same Settings
Select Raster 2
Edit, Copy Locker
Edit, paste, paste as new layer
Move to the left of the frame. See my tag for placement
Effects, 3D Effects, Drop Shadow, Same Settings
Edit, copy Pencil
Edit, paste, paste as new layer
Image, resize 40%
Move to the bottom right and place on the books
Effects, 3D Effects, Drop Shadow, Same settings
Edit, copy Easel
Edit, paste, paste as new layer
Move to the right and down to Raster 2
Image, resize 50%
Move behind the desk and abacus
Effects, 3D Effects, Drop Shadow, Same settings
Edit, copy Magnifying Glass
Edit, paste, paste as new layer
Image, resize 40%
Move to the left and place under the tubes hand to make it look like she is holding the magnifying glass
Effects, 3D Effects, Drop Shadow, Same Settings
Edit, Copy Lamp
Edit, paste, paste as new layer
Image, Mirror
Image, resize 40%
Move to the right and place on top of the books
Effects, 3D Effects, Drop Shadow, Same Settings
Edit, Copy Sign
Edit, Paste, paste as new layer
Image, resize 40%
Move to the top middle of the chalkboard
Effects, 3D Effects, Drop Shadow, Same Settings
Edit, Copy Comp Book
Edit, paste, paste as new layer
Image, resize 40%
Move to the far left and place in front of the desk laying it on the edge of it
Image, rotate, free rotate, 20, left
Effects, 3D Effects, Drop Shadow, Same Settings
Edit, Copy Alarm Clark
Edit, paste, paste as new layer
Image, resize 30%
Layers, arrange, bring to top
Move to the far right and place on the books
Effects, 3D Effects, Drop Shadow, Same Settings
Remember to add your copyright info. Make sure it is plain and legible
Add your name to the tag
Save as PNG
Sunday, August 10, 2014

I am using the artwork of Jose Cano. You need a license to use this tube I bought this tube when he was saling at PTE...You can now buy his tubes at his store found HERE
I am using the PTU kit Hey Schoolgirl Blues by Manipulated by Magik. You can buy this kit exclusively at PFD and Mystical Scraps
Open new image 600 x 600
Edit, Copy Frame 4
Edit, paste, paste as new layer
Image, resize 70%
With your magic wand click inside of the frame
Selections, Modify, Expand by 8
Edit, copy Paper 6
Edit, paste, paste as new layer
Layers, arrange, send to bottom
Selections, Invert
Edit, Clear
Selections, Select None
Select Raster 2
Effects, 3D Effects, Drop Shadow, Settings of:
Vertical : -3
Horizontal: 3
Opacity: 50
Blur: 10
Color: Black
Shadow on new layer NOT Checked
Edit, Copy Backpack
Edit, paste, paste as new layer
Image, resize 50%
Move to the bottom left of the frame
Effects, 3D Effects, Drop Shadow, same Settings
Edit, Copy Notebook
Edit, paste, paste as new layer
Image, resize 30%
Move to the bottom left and move to the left side of the backpack
Image, rotate, free rotate, left, 20
Effects, 3D Effects, Drop Shadow, Same Settings
Edit, copy Books
Edit, paste, paste as new layer
Image, resize 30%
Move to the bottom left and place in front of the notebook
Effects, 3D Effects, Drop Shadow, Same Settings
Edit, copy Calculator
Edit, paste, paste as new layer
Image, resize 30%
Move to the bottom left and place behind the books and in front of the notebook. See my tag for placement
Effects, 3D Effects, Drop Shadow, Same Settings
Edit, copyLaptop
Edit, paste, paste as new layer
Image, resize 30%
Move to the bottom left and place beside the books. Move up so it is front of the books some
Effects, 3D Effects, Drop Shadow, Same Settings
Edit, Copy Pencil
Edit, paste, paste as new layer
Image, resize 30%
Move to the left. Place on the notebook
Image, rotate, free rotate, left 20 and place on the edge of the notebook
Effects, 3D Effects, Drop Shadow, Same Settings
Edit, copy USB Stick
Edit, paste, paste as new layer
Image, resize 20%
Move to the bottom left and place in front of the books and laptop
Effects, 3D Effects, Drop Shadow, Same Settings
Edit, copy Clock
Edit, paste, paste as new layer
Image, resize 40%
Move to the top right of the frame
Effects, 3D Effects, Drop Shadow, same Settings
Edit, copy Schoolhouse
Edit, paste, paste as new layer
Image, resize 50%
Move to place on Raster 3
Effects, 3D Effects, Drop Shadow, Same Settings
Edit, Copy Chalkboard
Edit, paste, paste as new layer
Image, resize 50%
Move to the bottom right of the frame
Effects, 3D Effects, Drop Shadow, Same Settings
Edit, copy Chalk
Edit, paste, paste as new layer
Image, resize 20%
Move to the Right and place on the chalkboard
Effects, 3D Effects, Drop Shadow, Same Settings
Edit, copy Tube
Edit, paste, paste as new layer
Image, resize to fit your tag
Effects, 3D Effects, Drop Shadow, Same Settings
Edit, copy Assignment
Edit, paste, paste as new layer
Image, resize 30%
Move to the left and place in front of the backpack and to the right side of the calculator. See my tag for placement
Effects, 3D Effects, Drop Shadow, Same Settings
Edit, Copy Globe
Edit, Paste, paste as new layer
Image, resize 30%
Move to the bottom right and place on the right side of the chalkboard
Effects, 3D Effects, Drop Shadow, Same Settings
Edit, Copy Tissue Box
Edit, paste, paste as new layer
Image, resize 30%
Move to the bottom right and place on the left side of the globe
Effects, 3D Effects, Drop Shadow, Same Settings
Edit, copy Apple
Edit, paste, paste as new layer
Image, resize 20%
Move to the bottom right and place on the left side of the tissue box
Effects, 3D Effects, Drop Shadow, Same settings
Edit, copy Lockers
Edit, paste, paste as new layer
Move to the left and move down to Raster 2
Image, resize 40%
Effects, 3D Effects, Drop Shadow, Same settings
Remember to add your copyright info. Make sure it is plain and legible
Add your name to the tag
Save as PNG
Saturday, August 9, 2014
I have received a rawkin award from my friend Magik....Thank you hon.you Rawk too!
I give this award to the following people in no order for giving me a chance to CT on their teams and give me wings to grow..Thank you!

I give this award to the following people in no order for giving me a chance to CT on their teams and give me wings to grow..Thank you!
If you have received the award please place it on your blog and send it out to five more people! :)
Thanks for being so cool and rocking!!
Thanks for being so cool and rocking!!

I am using the artwork of Enamorte. You need a license to use these tubes. You can buy this tube at CDO
I am using the PTU kit Birthstone Series: Peridot by Gimptastic Scraps . Amy no longer sells kits.
This kit is going to be a series between Tasha and Gimptastic Scraps.
Open new image 600 x 600
Select Frame 2
Image, rotate, rotate clockwise 90
Edit, Copy Frame 2
Edit, paste, paste as new layer
Image, resize 75%
With your magic wand click inside each of the frames
Selections, Modify, Expand by 8
Edit, copy Paper 5
Edit, paste, paste as new layer
Layers, arrange, send to bottom
Selections, Invert
Edit, Clear
Edit, copy Sparkle
Edit, paste, paste as new layer
Edit, Clear
Edit, copy Grass
Edit, paste, paste as new layer
Image, resize 60%
Move to the bottom of the frame
Edit, Clear
Selections, Select None
Select Raster 2
Effects, 3D Effects, Drop Shadow, Settings of:
Vertical : -3
Horizontal: 3
Opacity: 50
Blur: 10
Color: Black
Shadow on new layer NOT Checked
Edit, Copy Bee Chain
Edit, paste, paste as new layer
Image, resize 60%
Move to the right and place on the top of one of the posts sticking up on the frame
Image, Rotate, free rotate, left , 20
Effects, 3D Effects, Drop Shadow, same Settings
Edit, Copy Deco 1
Edit, paste, paste as new layer
Image, resize 60%
Move to the top of the frame. The right side of the deco will cover the top of the bee chain
Effects, 3D Effects, Drop Shadow, Same Settings
Edit, copy Tube
Edit, paste, paste as new layer
Image, resize 70% or to fit your tag
Effects, 3D Effects, Drop Shadow, Same Settings
Edit, copy Crystal Ball
Edit, paste, paste as new layer
Image, resize 70%
Move to the left and than below the tube. See my tag for placement
Effects, 3D Effects, Drop Shadow, Same Settings
Edit, copy Element
Edit, paste, paste as new layer
Move to the left of the frame
Image, resize 70%
Move to the bottom left and place behind and to the left of the crystal ball
Effects, 3D Effects, Drop Shadow, Same Settings
Edit, Copy Feather Jar
Edit, paste, paste as new layer
Move to the right and place behind the tube but to the right
Image, resize 70%
Effects, 3D Effects, Drop Shadow, Same Settings
Edit, copy Cherub
Edit, paste, paste as new layer
Image, resize 50%
Layers, arrange bring to top
Move to the bottom left and place in front of the crystal ball and element
Effects, 3D Effects, Drop Shadow, Same Settings
Edit, copy Butterfly
Edit, paste, paste as new layer
Image, resize 50%
Layers, arrange, bring to top
Move to the left and place on the frame
Image, rotate, free rotate, right, 30
Effects, 3D Effects, Drop Shadow, same Settings
Edit, copy Leaf 2
Edit, paste, paste as new layer
Move to the far left of the frame
Layers, arrange, send to bottom
Effects, 3D Effects, Drop Shadow, Same Settings
Layers, Duplicate
Image, Mirror
Edit, Copy Star Sparkle
Edit, paste, paste as new layer
Image, rotate, free rotate, right 20
Effects, 3D Effects, Drop Shadow, Same Settings
Layers, Duplicate
Image, Mirror
Edit, copy Flower 1
Edit, paste, paste as new layer
Image, resize 30%
Move to the right and place on the flower jar
Effects, 3D Effects, Drop Shadow, Same Settings
Edit, copy Flower 2
Edit, paste, paste as new layer
Image, resize 30%
Move the right and place behind Flower 1 and up some
Effects, 3D Effects, Drop Shadow, Same Settings
Remember to add your copyright info. Make sure it is plain and legible
Add your name to the tag
Save as PNG
Friday, August 8, 2014

I am using the artwork of Enamorte. You need a license to use this tube. You can buy this tube at CDO
I am using the PTU kit Birthstone Series: Peridot by Tasha's Playground. Tasha no longer sells kits.
This kit is going to be a series between Tasha and Gimptastic Scraps.
Open new image 600 x 600
Select Frame 02
Image, rotate, rotate, clockwise 90
Edit, Copy Frame 02
Edit, paste, paste as new layer
With your magic wand click inside each of the frames
Selections, Modify, Expand by 8
Edit, copy Paper 03
Edit, paste, paste as new layer
Layers, arrange, send to bottom
Move over to the left some
Selections, Invert
Edit, Clear
Edit, copy e20
Edit, paste, paste as new layer
Move to the top and right some
Edit, Clear
Selections, Select None
Select Raster 2
Effects, 3D Effects, Drop Shadow, Settings of:
Vertical : -3
Horizontal: 3
Opacity: 50
Blur: 10
Color: Black
Shadow on new layer NOT Checked
Edit, Copy e06
Edit, paste, paste as new layer
Image, resize 50%
Move below Raster 2 and pull to the top of the frame
Effects, 3D Effects, Drop Shadow, same Settings
Edit, Copy e17
Edit, paste, paste as new layer
Layers, arrange, bring to top
Image, resize 80%
Image, Mirror
Move to the left side of the frame
Effects, 3D Effects, Drop Shadow, Same Settings
Edit, copy e23
Edit, paste, paste as new layer
Move to the left of the frame and place on the tree
Image, resize 80%
Effects, 3D Effects, Drop Shadow, Same Settings
Edit, copy e31
Edit, paste, paste as new layer
Move to the bottom right of the frame
Effects, 3D Effects, Drop Shadow, Same Settings
Edit, copy e27
Edit, paste, paste as new layer
Image, mirror
Move to the right side of the frame place on top of the other flower
Effects, 3D Effects, Drop Shadow, Same Settings
Edit, Copy e26
Edit, paste, paste as new layer
Image, resize 70%
Move to the right bottom of the frame
Effects, 3D Effects, Drop Shadow, Same Settings
Edit, copy Tube
Edit, paste, paste as new layer
Image, resize 70%
Image, Mirror
Move to the left of the frame
Effects, 3D Effects, Drop Shadow, Same Settings
Edit, copy e30
Edit, paste, paste as new layer
Image, resize 70%
Move to the bottom right of the frame in front of all the flowers
Effects, 3D Effects, Drop Shadow, same Settings
Edit, copy e28
Edit, paste, paste as new layer
Image, resize 50%
Move to raster 2 and place in the top right of the frame
Effects, 3D Effects, Drop Shadow, Same Settings
Edit, Copy e05
Edit, paste, paste as new layer
Image, resize 50%
Move to the left of the frame
Effects, 3D Effects, Drop Shadow, Same Settings
Edit, copy e10
Edit, paste, paste as new layer
Image, resize 70%
Move below the tube and to the left
Effects, 3D Effects, Drop Shadow, Same Settings
Edit, copy e04
Edit, paste, paste as new layer
Image, resize 50%
Move to the right and place on the dropping flower
Effects, 3D Effects, Drop Shadow, Same Settings
Edit, copy e07
Edit, paste, paste as new layer
Image, Resize 50%
Move to the right and place behind the frog. See my tag for placement
Remember to add your copyright info. Make sure it is plain and legible
Add your name to the tag
Save as PNG
Peridot FTU Cluster Frame using the PTU Kit Birthstone Series: Peridot by Tasha's
Playground. Tasha no longer sells kits.

Wednesday, August 6, 2014

I am using the artwork of Arthur Crowe. You need a license to use this tube I bought this tube at his store found HERE
I am using the PTU kit Razorblade Kiss by Manipulated by Magik. You can buy this kit exclusively at Mystical Scraps
Open new image 600 x 600
Edit, Copy Frame 5
Edit, paste, paste as new layer
Image, resize 70%
With your magic wand click inside each of the frames
Selections, Modify, Expand by 8
Edit, copy Paper 3
Edit, paste, paste as new layer
Layers, arrange, send to bottom
Selections, Invert
Edit, Clear
Edit, copy Sparkles
Edit, paste, paste as new layer
Edit, Clear
Edit, copy Sparkles and heartgrams
Edit, paste, paste as new layer
Move to the left a little bit
Edit, Clear
Selections, Select None
Select Raster 2
Effects, 3D Effects, Drop Shadow, Settings of:
Vertical : -3
Horizontal: 3
Opacity: 50
Blur: 10
Color: Black
Shadow on new layer NOT Checked
Edit, Copy Wordart 3
Edit, paste, paste as new layer
Image, resize 75%
Layers, arrange, send to bottom
Effects, 3D Effects, Drop Shadow, same Settings
Edit, Copy Lightbeams
Edit, paste, paste as new layer
Layers, arrange, bring to top
Image, resize 75%
Move to place at the bottom of the frame
Effects, 3D Effects, Drop Shadow, Same Settings
Edit, copy Flames
Edit, paste, paste as new layer
Move to the left of the frame
Image, resize 80%
Move to the far left of the frame
Layers, arrange, send to bottom
Effects, 3D Effects, Drop Shadow, Same Settings
Layers, Duplicate
Image, Mirror
Edit, copy Chain
Edit, paste, paste as new layer
Layers, arrange, bring to top
Image, resize 80%
Move to the top of the frame
Effects, 3D Effects, Drop Shadow, Same Settings
Edit, copy Speaker
Edit, paste, paste as new layer
Move to the left of the frame
Image, resize 70%
Effects, 3D Effects, Drop Shadow, Same Settings
Edit, Copy Guitar 1
Edit, paste, paste as new layer
Move to the far left and place on the left side of the speaker
Image, resize 70%
Effects, 3D Effects, Drop Shadow, Same Settings
Edit, copy Headphones
Edit, paste, paste as new layer
Image, resize 30%
Place to look like they are hanging on the speaker
Effects, 3D Effects, Drop Shadow, Same Settings
Edit, copy Backstage Pass
Edit, paste, paste as new layer
Image, resize 30%
Layers, arrange, bring to top
Move to the left and place on the guitar handle
Image, rotate, free rotate, right, 20
Effects, 3D Effects, Drop Shadow, same Settings
Edit, copy Skulls 2
Edit, paste, paste as new layer
Image, resize 60%
Move to the bottom right of the frame
Effects, 3D Effects, Drop Shadow, Same Settings
Edit, Copy Candles
Edit, paste, paste as new layer
Image, resize 50%
Move to the right and place behind and pull up toward the top some behind the skulls
Effects, 3D Effects, Drop Shadow, Same Settings
Edit, copy Liquor
Edit, paste, paste as new layer
Image, resize 40%
Move to the left and place in front of the speaker guitar
Effects, 3D Effects, Drop Shadow, Same Settings
Edit, copy Heartagram deco
Edit, paste, paste as new layer
Image, resize 50%
Move to the top of the frame and place behind the chain
Effects, 3D Effects, Drop Shadow, Same Settings
Edit, copy Bear
Edit, paste, paste as new layer
Image, Resize 40%
Move to the left and place in front of guitar and liquor
Effects, 3D Effects, Drop Shadow, same settings
Edit, copy Razorblade
Edit, paste, paste as new layer
Image, resize 40%
Move to the right and place behind the skulls and in front of the candles
Image, rotate, free rotate, right, 20
Effects, 3D Effects, Drop Shadow, Same Settings
Edit, copy Tube
Edit, paste, paste as new layer
Image, resize to fit your tag
Effects, 3D Effects, Drop Shadow, Same Settings
Edit, Copy Drums
Edit, paste, paste as new layer
Image, resize 60%
Move to the bottom of the frame behind the tube and above the spot lights
Effects, 3D Effects, Drop Shadow, Same settings
Edit, copy Guitar Pick
Edit, paste, paste as new layer
Image, Resize 20%
Layers, arrange, bring to top
Move to the far left and place it on the guitar above the heartagram sign
Image, rotate, free rotate, left 20
Effects, 3D Effects, Drop Shadow, Same Settings
Edit, copy Heart & Dagger
Edit, paste, paste as new layer
Image, resize 40%
Move to the top right of the frame
Effects, 3D Effects, Drop Shadow, Settings
Edit, copy Licky Lips
Edit, paste, paste as new layer
Image, Resize 20%
Layers, arrange bring to top
Move to the right and place in front of the skulls
Effects, 3D Effects, Drop Shadow, Same Settings
Remember to add your copyright info. Make sure it is plain and legible
Add your name to the tag
Save as PNG
Tuesday, August 5, 2014

I am using the artwork of Katherine Barber. You need a license to use this tube. You can buy this tube at The PSP Project
I am using the PTU Kit Resilience by Gimptastic Scraps . This kit is exclusive to The PSP Project
Open new image 600 x 600
Edit, Copy Frame 2
Edit, paste, paste as new layer
Image, resize 70%
With your magic wand click inside each of the frames
Selections, Modify, Expand by 8
Edit, copy Paper 1
Edit, paste, paste as new layer
Layers, arrange, send to bottom
Image, resize 70%
Selections, Invert
Edit, Clear
Edit, copy Stars
Edit, paste, paste as new layer
Edit, Clear
Edit, copy Sparkle
Edit, paste, paste as new layer
Move to the left a little bit
Edit, Clear
Selections, Select None
Select Raster 2
Effects, 3D Effects, Drop Shadow, Settings of:
Vertical : -3
Horizontal: 3
Opacity: 50
Blur: 10
Color: Black
Shadow on new layer NOT Checked
Edit, Copy Floating Tree
Edit, paste, paste as new layer
Image, resize 70%
Move to the left side of the frame
Image, Mirror move back to the left
Effects, 3D Effects, Drop Shadow, same Settings
Select Moss 1
Image, Mirror
Edit, Copy Moss 1
Edit, paste, paste as new layer
Move to raster 2 and move to the right
Effects, 3D Effects, Drop Shadow, Same Settings
Edit, copy Fallen Leaves
Edit, paste, paste as new layer
Layers, arrange, bring to top
Move to the left of the frame
Effects, 3D Effects, Drop Shadow, Same Settings
Layers, Duplicate
Image, Mirror
Edit, copy Grass
Edit, paste, paste as new layer
Image, resize 70%
Move to Raster 2
Move to the far right of the frame
Effects, 3D Effects, Drop Shadow, Same Settings
Layers, Duplicate
Image, Mirror
Select Enchanted Flowers
Image, Mirror
Edit, copy Enchanted Flowers
Edit, paste, paste as new layer
Move to the right and place in front of the grass and move up some
Effects, 3D Effects, Drop Shadow, Same Settings
Edit, Copy Dandelion Puff
Edit, paste, paste as new layer
Move to the far right and place to the right of the enchanted flowers
Effects, 3D Effects, Drop Shadow, Same Settings
Edit, copy Tube
Edit, paste, paste as new layer
Image, resize to fit your tag
Layers, arrange, bring to top
Move to place on the floating tree
Effects, 3D Effects, Drop Shadow, Same Settings
Edit, copy Moon
Edit, paste, paste as new layer
Image, resize 40%
Move to the top left of the frame. Place above the branches of the floating tree
Effects, 3D Effects, Drop Shadow, same Settings
Edit, copy Snail
Edit, paste, paste as new layer
Image, resize 50%
Layers, arrange, bring to top
Move to the bottom right and place it on the moss and leaves
Effects, 3D Effects, Drop Shadow, Same Settings
Edit, Copy Butterfly
Edit, paste, paste as new layer
Image, resize 40%
Move to place on the dandelion puff
Effects, 3D Effects, Drop Shadow, Same Settings
Edit, copy Hedgehog
Edit, paste, paste as new layer
Image, resize 40%
Move to the right and place in front of the mushroom on the moss
Effects, 3D Effects, Drop Shadow, Same Settings
Edit, copy Pumpkin
Edit, paste, paste as new layer
Image, resize 50%
Layers, arrange, bring to top
Move to the bottom left of the tag
Effects, 3D Effects, Drop Shadow, Same Settings
Select Owl
Image, Mirror
Edit, copy Owl
Edit, paste, paste as new layer
Image, Resize 40%
Move to the right and place on the mushroom behind the hedgehog
Effects, 3D Effects, Drop Shadow, same settings
Edit, copy Pinecone
Edit, paste, paste as new layer
Image, resize 40%
Move to the left and than behind the pumpkin on the left some
Effects, 3D Effects, Drop Shadow, Same Settings
Edit, copy Berries 2
Edit, paste, paste as new layer
Image, resize 50%
Move to the bottom of the tag and place behind and to the left of the pinecone. See my tag for placement
Effects, 3D Effects, Drop Shadow, Same Settings
Edit, Copy Berries 1
Edit, paste, paste as new layer
Image, resize 40%
Move to the far left and place behind the pumpkin
Effects, 3D Effects, Drop Shadow, Same settings
Edit, copy Wand
Edit, paste, paste as new layer
Image, Resize 50%
Move down til it is behind the tube and pointing at the enchanted flowers
Effects, 3D Effects, Drop Shadow, Same Settings
Edit, copy Leaf 1
Edit, paste, paste as new layer
Pull up and than to the far left of the frame
Layers, Arrange, send to bottom so that you can see it at the edge of the frame in the background
Effects, 3D Effects, Drop Shadow, Settings
Layers, Duplicate
Image, Mirror
Edit, copy Twig
Edit, paste, paste as new layer
Image, Mirror
Image, Flip
Layers, arrange bring to top
Move down and place above the leaves layers
Effects, 3D Effects, Drop Shadow, Same Settings
Edit, copy Lantern
Edit, paste, paste as new layer
Image, resize 40%
Move to the far right and place it on the moss
Effects, 3D Effects, Drop Shadow, same settings
Remember to add your copyright info. Make sure it is plain and legible
Add your name to the tag
Save as PNG
Subscribe to:
Posts
(Atom)