NO to AI

You will not find AI on my blog!
CT Teams


Wednesday, October 31, 2012


Tuesday, October 30, 2012
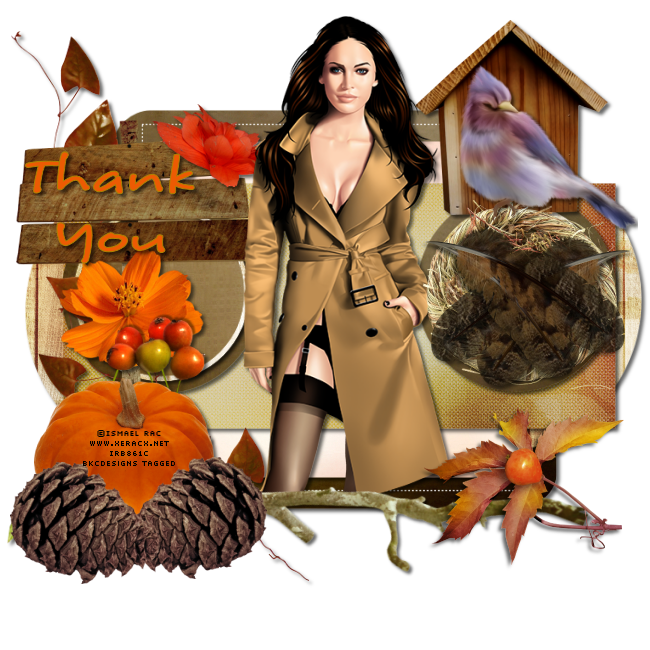
A new cluster frame for you using the PTU Kit Flourishing Fall by Amy(Gimptastic Scraps). Amy is no longer selling kits.

You can download the cluster frame


The kit for this is called Flourishing Fall by Amy (Gimptastic Scraps). You can find the many great places Amy sales her kits by going HERE. To get these extras click on the tag to see full size version. Please DO NOT alter these in anyway!


This tutorial was written by me. Any resemblance to any other tutorial is pure coincidence. Please DO NOT claim this tutorial as your own. It was written in PSP 9 but should be compatible with any version of PSP.
I am using the artwork of Ismael Rac. You need a license to use his tubes. You can buy this tube at his store found HERE
I am using the FTU kit Flourishing Fall by Gimptastic Scraps
Template 103 By Millie. Found HERE
Open template
Duplicate and close original
Delete the cr and background layer
Resize template to 650 x 650
Select 1
Selections, Select All, Float, Defloat
Edit, copy Paper 1
Edit, paste, paste as new layer
Selections, Invert
Edit, clear
Selections, Select None
Effects, 3D Effects, Drop Shadow, settings of:
Vertical and Horizontal: 3
Opacity: 50
Blur: 5
Color: Black
Shadow on new layer NOT Checked
Delete 1
Select 3
Selections, Select All, Float, Defloat
Edit, copy Paper 4
Edit, paste, paste as new layer
Selections, Invert
Edit, Clear
Selections, Select None
Effects, 3D Effects, Drop Shadow, Same Settings
Delete 3
Select 4
Selections, Select All, Float, Defloat
Edit, copy Paper 4
Edit, paste, paste as new layer
Selections, Invert
Edit, Clear
Selections, Select None
Effects, 3D Effects, Drop Shadow, Same settings
Delete 4
Select 5
Selections, Select All, Float, Defloat
Edit, copy Paper 6
Edit, paste, paste as new layer
Selections, Invert
Edit, Clear
Selections, Select None
Effects, 3D Effects, Drop Shadow, Same settings
Delete 5
Select 6
Selections, Select All, Float, Defloat
Edit, copy Paper 5
Edit, paste, paste as new layer
Selections, Invert
Edit, Clear
Selections, Select None
Effects, 3D Effects, Drop Shadow, Same Settings
Delete 6
Select 7
Selections, Select All, Float, Defloat
Edit, copy Paper 1
Edit, paste, paste as new layer
Selections, Invert
Edit, Clear
Selections, Select None
Effects, 3D Effects, Drop Shadow, Same settings
Delete 7
Select 8
Selections, Select All, Float, Defloat
Edit, copy Paper 1
Edit, paste, paste as new layer
Selections, Invert
Edit, Clear
Selections, Select None
Effects, 3D Effects, Drop Shadow, Same settings
Delete 8
Select 9
Selections, Select All, Float, Defloat
Edit, copy Paper 2
Edit, paste, paste as new layer
Selections, Invert
Edit, Clear
Selections, Select None
Effects, 3D Effects, Drop Shadow, Same settings
Delete 9
Select 10
Selections, Select All, Float, Defloat
Edit, copy Paper 2
Edit, paste, paste as new layer
Selections, Invert
Edit, Clear
Selections, Select None
Effects, 3D Effects, Drop Shadow, Same settings
Delete 10
Select 11
Selections, Select All, Float, Defloat
Edit, copy Paper 4
Edit, paste, paste as new layer
Selections, Invert
Edit, Clear
Selections, Select None
Effects, 3D Effects, Drop Shadow, Same settings
Delete 11
Select 12
Selections, Select All, Float, Defloat
Edit, copy Paper 4
Edit, paste, paste as new layer
Selections, Invert
Edit, Clear
Selections, Select None
Effects, 3D Effects, Drop Shadow, Same settings
Delete 12
Edit, copy tube
Edit, paste, paste as new layer
Image, resize 85%.
Layers arrange bring to top
Effects, 3D Effects, Drop Shadow, Same settings
Select Branch 2
Image, rotate, rotate clockwise 90
Edit, copy Branch 2
Edit, paste, paste as new layer
Move to bottom right of the tag
Image resize 85%
Image, rotate, free rotate, left 20
Image, flip and move back to bottom. See my tag for placement
Effects ,3D Effects, Drop Shadow, Same Settings
Edit, copy Berries 1
Edit, Paste, Paste as new layer
Image, Mirror
Move to right end of the branch
Image, resize 50%
Effects, 3D Effects, Drop Shadow, Same Settings
Edit, copy Sign
Edit, paste, paste as new layer
Move to the left of the template and tube
Image, resize 70%
Keep moving down til it is below the branch and tube
Effects, 3D Effects, Drop Shadow, Same settings
Edit, copy pumpkin
Move to place before the sign
Image, resize 60%
Effects, 3D Effects, Drop Shadow, Same Settings
Edit, copy birdhouse
Edit, paste, paste as new image
Move to the right. See my tag for placement
Image, resize 60%
Effects, 3D Effects, Drop Shadow, same settings
Edit, copy Birdnest
Edit, paste, paste as new layer
Move below birdhouse
Image, resize 60%
Effects, 3D Effects, Drop shadow, Same settings
Edit, copy Bird
Edit, paste, paste as new layer
Image, mirror
Image, resize 60%
Move to place on the top of the birdnest. see my tag for placement
Effects, 3D Effects, Drop Shadow, Same Settings
Edit, Copy Flower 4
Edit, paste, paste as new layer
Place behind pumpkin
Image, resize 80%
Effects, 3D Effects, Drop Shadow, same settings
Edit, copy pinecone
Edit, paste, paste as new layer
Image, resize 60%
Move to the right of the pumpkin
Effects, 3D Effects, Drop Shadow, Same settings
Layers, Duplicate
Image, Mirror
Effects, 3D Effects, Drop Shadow, Same Settings
Edit, copy Branch 1
Edit, paste, paste as new layer
Move down til it is below the sign
Effects, 3D Effects, Drop Shadow, same settings
Edit, copy feather
Edit, paste, paste as new layer
Image, resize 50%
Move to the birds nest. See my tag for placement
Effects, 3D Effects, Drop Shadow, Same Settings
Layers, Duplicate
Image, Mirror
Edit, copy Flower 6
Edit, paste, paste as new layer
Image, resize 50%
Move to the top right corner of the sign
Move down til it is below the tube
Effects, 3D effects, Drop Shadow, Same Settings
My Tag is just a guide
Remember to add your copyright info. Make sure it is plain and legible
Add your name to the tag
Save as PNG
Monday, October 22, 2012

This tutorial was written by me. Any resemblance to any other tutorial is pure coincidence. Please DO NOT claim this tutorial as your own. It was written in PSP 9 but should be compatible with any version of PSP.
I am using the artwork of Misticheskaya. You need a license to use her tubes. This is an exclusive tube from PicsForDesign
I am using the PTU kit Spell On You by Manipulated by Magik . Visit her blog HERE to find where she sales her kits and more.
Template 190 by Denz Designz. Found HERE
Plugins: Xero(Fritillary) and dsb Flux (Bright Noise) can be found HERE
Wintermute Font for text found HERE
Chiller Font For Name found HERE
Open template
Duplicate and close original
Delete the Denz Designz top layer and the circle layer
Select Vertical Stripes x 3 in layer palette
Selections, Select All, Float, Defloat
Edit, copy Paper 11
Edit, paste, paste as new layer
Selections, Invert
Edit, clear
Selections, Select None
Effects, 3D Effects, Drop Shadow, settings of:
Vertical and Horizontal: 3
Opacity: 50
Blur: 5
Color: Black
Shadow on new layer NOT Checked
Delete Vertical Stripes x 3
Select Stripes x 2 in the layer palette
Selections, Select All, Float, Defloat
Edit, copy Paper 8
Edit, paste, paste as new layer
Selections, Invert
Edit, Clear
Selections, Select None
Effects, 3D Effects, Drop Shadow, Same Settings
Delete Stripes x 2
Select Large Square in the layers palette
Selections, Select All, Float, Defloat
Edit, copy Paper 24
Edit, paste, paste as new layer
Selections, Invert
Edit, Clear
Selections, Select None
Effects, Plugins, Xero, Fritillary at default
Effects, 3D Effects, Drop Shadow, Same settings
Delete Large Square
Select Rectangle 1 in the layers palette
Selections, Select All, Float, Defloat
Edit, copy Paper 15
Edit, paste, paste as new layer
Selections, Invert
Edit, Clear
Selections, Select None
Effects, 3D Effects, Drop Shadow, Same settings
Delete Rectangle 1
Select 3 Stars in the layer palette
Selections, Select All, Float, Defloat
Edit, copy Paper 25
Edit, paste, paste as new layer
Selections, Invert
Edit, Clear
Selections, Select None
Effects, Plugins, dsb Flux, Bright Noise Settings of:
Intensity 48
Mix selected
Effects, 3D Effects, Drop Shadow, Same Settings
Delete 3 Stars
Select Large star in layer palette
Selections, Select All, Float, Defloat
Edit, copy Paper 22
Edit, paste, paste as new layer
Selections, Invert
Edit, Clear
Selections, Select None
Effects, 3D Effects, Drop Shadow, Same settings
Delete Large Star
Edit, copy tube
Edit, paste, paste as new layer
Image, resize 35%. The reason that I resized the tube so much is that it is a big sized tube
Move down to the bottom of the template
Effects, 3D Effects, Drop Shadow, Same settings
Edit, copy pumpkin
Edit, paste, paste as new layer
Move to bottom right of the tag. See my tag for placement
Image, resize 80%
Effects ,3D Effects, Drop Shadow, Same Settings
Edit, copy Black Cat
Edit, Paste, Paste as new layer
Move to look like it is standing on the pumpkin
Effects, 3D Effects, Drop Shadow, Same Settings
Select Raster 4 in the layer palette
Selections, Select All, Float, Defloat
Edit, copy Moon
Edit, paste, paste as new layer
Move to you have as much of the moon as you want showing. See my tag for what I did
Selections, Invert
Edit, Clear
Selections, Select None
Edit, copy Cauldron
Move down and place behind the tube. See my tag for placement
Image, resize 60%
Effects, 3D Effects, Drop Shadow, Same Settings
Edit, copy candle
Edit, paste, paste as new image
Move to the left. See my tag for placement
Edit, copy Broom
Edit, paste, paste as new layer
Image, Mirror
Move to place resting against the candle and behind the tube. See my tag for placement
Effects, 3D Effects, Drop shadow, Same settings
Edit, copy Mortar and Pestle
Edit, paste, paste as new layer
Move to place on the right of the cauldron
Image, resize 60%
Effects, 3D Effects, Drop Shadow, Same Settings
Edit, Copy Spellbook
Edit, paste, paste as new layer
Place behind caudlron and candle.See my tag for placement
Effects, 3D Effects, Drop Shadow, same settings
Edit, copy Bat
Edit, paste, paste as new layer
Image, resize 40%
Image, rotate, free rotate, 30, right
Place on the moon
Effects, 3D Effects, Drop Shadow, Same settings
Using the font Wintermute at 48. Background color black and foreground color df6535. Type out the words I'm going to cast my spell on you!
Layers, arrange, move to bottom
You may have to move the words down a bit
Check my tag for what I did
Effects, 3D Effects, Drop Shadow, Same Settings
My Tag is just a guide
Remember to add your copyright info. Make sure it is plain and legible
Add your name to the tag
Save as PNG
Saturday, October 20, 2012
Here is a new cluster frame. This is using the PTU Kit Kitsune by Amy(Gimptastic Scraps). Amy is no longer selling kits.

You can download the Frame


The kit for this is called Kitsune by Amy(Gimptastic Scraps). The kit for this is exclusive to PSP Tube Stop. To find the great places Amy sales her kits check HERE. I made some extras for you. Click on the tag to make it the full version! Please DO NOT alter these in anyway!


Friday, October 19, 2012

This tutorial was written by me. Any resemblance to any other tutorial is pure coincidence. Please DO NOT claim this tutorial as your own. It was written in PSP 9 but should be compatible with any version of PSP.
I am using the artwork of Constanza Ehrenhaus. You need a license to use her tubes. You can purchase this tube at PSP Tube Stop
I am using the FTU kit Kitsune by Gimpastic Scraps
Open new image 600 x 600
Edit, Copy Door
Edit, paste, paste as new layer
Move to the left
Image, resize 80%
Effects, 3D Effects, Drop Shadow, Settings of:
Vertical and Horizontal: 3
Opacity: 60
Blur: 5
Color: Black
Shadow on new layer NOT Checked
Edit, copy Silk Screen
Edit, Paste, paste as new layer
See my tag for placement
Image, resize 80%
Effects, 3D Effects, Drop Shadow, Same settings
Edit, copy Bird
Edit, paste, paste as new layer
Image resize 60%
Image, mirror
Place at the door and branches. see my tag for placement
Edit, copy Lantern
Edit, paste, paste as new layer
Move to the right
See my tag for placement
Image, resize 80%
Effects, 3D Effects, Drop Shadow, Same Settings
Edit, copy umbrella
Edit, paste, paste as new layer
Image, resize 70%
Move to the bottom of the lantern
Effects, 3D Effects, Drop Shadow, Same settings
Edit, copy Rotting Tree
Edit, paste, paste as new layer
Move to the bottom of the tag. It will be laying at the bottom of the lantern and below the umbrella
Effects, 3D Effects, Drop Shadow, Same settings
Edit, copy Branch 4
Edit, paste, paste as new layer
Move to the left
Move down one place
Image, resize 80%
Effects, 3D Effects, Drop Shadow, Same Settings
Layers, Duplicate
Image, resize 85%
Move down and over. See my tag for placement
Edit, copy Rock
Edit, Paste, paste as new layer
Move to the left
Image, resize 70%
Effects, 3D Effects, Drop Shadow, Same settings
Edit, copy Owl
Edit, paste, paste as new layer
Move til it is sitting on the rotten tree
Image, resize 60%
Image, resize 80%
Effects, 3D Effects, Drop Shadow, Same settings
Edit, Copy Fox
Edit, paste, paste as new layer
Move to the rock. See my tag for placement
Image, resize 60%
Effects, 3D Effects, Drop Shadow, Same Settings
Select Hairsticks
Image, rotate, rotate clockwise 90
Edit, copy
Edit, paste, paste as new layer
Move to the lantern so they are on the lantern
Effects, 3D Effects, Drop Shadow, same settings
Select Tree
Image, resize 80%
Image, Mirror
Edit, copy
Edit, paste, paste as new layer
Move to the left
Layers, arrange, send to bottom. Move so you can see the tree through the door
My Tag is just a guide
Remember to add your copyright info. Make sure it is plain and legible
Add your name to the tag
Save as PNG
Tuesday, October 16, 2012

The kit for this is called Evening Dew by Amy(Gimptastic Scraps). You can find the many places Amy sales her kits by looking HERE. I made some extras for all of you. click on the tag to see the full size version. Please DO NOT alter these in anyway!


This tutorial was written by me. Any resemblance to any other tutorial is pure coincidence. Please DO NOT claim this tutorial as your own. It was written in PSP 9 but should be compatible with any version of PSP.
I am using the artwork of Zebrush. You need a license to use her tubes. This is an exclusive tube from PicsForDesign
I am using the FTU kit Evening Dew by Gimptastic Scraps.
07 Template by Millie found HERE
Open template
Duplicate and close original
Delete the cr and raster 1 layer
Select 1 in layer palette
Selections, Select All, Float, Defloat
Edit, copy Paper 9
Edit, paste, paste as new layer
Selections, Invert
Edit, clear
Selections, Select None
Effects, 3D Effects, Drop Shadow, settings of:
Vertical and Horizontal: 3
Opacity: 50
Blur: 5
Color: Black
Shadow on new layer NOT Checked
Delete 1
Select 2 in the layer palette
Selections, Select All, Float, Defloat
Edit, copy Paper 8
Edit, paste, paste as new layer
Selections, Invert
Edit, Clear
Effects, 3D Effects, Drop Shadow, Same Settings
Delete 2
Select 3 in the layers palette
Selections, Select All, Float, Defloat
Edit, copy Paper 3
Edit, paste, paste as new layer
Selections, Invert
Edit, Clear
Effects, 3D Effects, Drop Shadow, Same settings
Delete 3
Select 4 in the layers palette
Selections, Select All, Float, Defloat
Edit, copy Paper 10
Edit, paste, paste as new layer
Selections, Invert
Edit, Clear
Effects, 3D Effects, Drop Shadow, Same settings
Delete 4
Select 5 in the layer palette
Selections, Select All, Float, Defloat
Edit, copy Paper 7
Edit, paste, paste as new layer
Selections, Invert
Edit, Clear
Effects, 3D Effects, Drop Shadow, Same Settings
Delete 5
Select 6 in layer palette
Selections, Select All, Float, Defloat
Edit, copy Paper 7
Edit, paste, paste as new layer
Selections, Invert
Edit, Clear
Effects, 3D Effects, Drop Shadow, Same settings
Delete 6
Edit, copy tube
Edit, paste, paste as new layer
Image, resize 40%
Effects, 3D Effects, Drop Shadow, Same settings
Select Raster 3
Selections, Select All, Float, Defloat
Edit, copy Scatter 2
Edit, paste, paste as new layer
Move around til you have it the way you want. See my tag for placement
Selections, Invert
Edit, Clear
Selections, Select none
Effects, 3D Effects, Drop Shadow, Same settings
Layers, Duplicate
Image, mirror
Edit, copy trunk
Edit, paste, paste as new layer
Move to bottom left of the tag. See my tag for placement
Image, resize 60%
Effects ,3D Effects, Drop Shadow, Same Settings
Edit, copy Umbrella
Edit, Paste, Paste as new layer
Move til it looks like the tube is leaning on it
Effects, 3D Effects, Drop Shadow, Same Settings
Edit, copy Shoes
Edit, paste, paste as new layer
Image, resize 60%
Move to the left beside the trunk. See my tag for placement
Effects, 3D Effects, Drop Shadow, same settings
Edit, copy Bottle
Move over to the left til it is below the trunk
Image, resize 80%
Effects, 3D Effects, Drop Shadow, Same Settings
Edit, copy bear
Edit, paste, paste as new image
Move to the left. See my tag for placement
Image, resize 60%
Edit, copy Birdhouse
Edit, paste, paste as new layer
Image, resize 80%
Effects, 3D Effects, Drop shadow, Same settings
Edit, copy Branch 1
Edit, paste, paste as new layer
Image, Mirror
Move to the bottom of the birdhouse
Image, resize 60%
Effects, 3D Effects, Drop Shadow, Same Settings
Edit, Copy Leaf 1
Edit, paste, paste as new layer
Layers move down
Image, resize 60%
Effects, 3D Effects, Drop Shadow, same settings
Edit, copy Fog
Edit, paste, paste as new layer
Image, resize 60%
Move to the right and place it in front of the birdhouse. See my tag for placement
Edit, copy bird
Edit, paste, paste as new layer
Image, resize 40%
Move to the hole in the birdhouse
Effects, 3D Effects, Drop Shadow, Same settings
Edit, copy Seeds
Edit, paste, paste as new layer
Image, resize 60%
Move over to the right and behind the frog
Effects, 3D Effects, Drop Shadow, Same Settings
Edit, copy Branch3
Edit, paste, paste as new layer
Image, resize 60%
Place on the stem of the birdhouse. See my tag for placement
Effects, 3D Effects, Drop Shadow, Same Settings
Edit, Copy Egg
Edit, paste, paste as new layer
Move below the seed. See my tag for placement
Image, rotate, free rotate, 30, left
Effects, 3D Effects, Drop Shadow, Same Settings
My Tag is just a guide
Remember to add your copyright info. Make sure it is plain and legible
Add your name to the tag
Save as PNG
Saturday, October 13, 2012

This tutorial was written by me. Any resemblance to any other tutorial is pure coincidence. Please DO NOT claim this tutorial as your own. It was written in PSP 9 but should be compatible with any version of PSP.
I am using the artwork of Elias Chatzoudis. You need a license to use his tubes. You can purchase the tube at his store HERE
I am using the PTU kit Happy Haunting by Manipulated by Magik. Visit her blog HERE to find this kit and more.
Squint Mask found HERE. If this is your mask please let me know and I will link back to you
Open new image 600 x 600
Edit, copy frame 2
Edit, paste, paste as new layer
Image, resize 80%
Using your magic wand click inside your frame
Select, Selections, Modify, Expand by 8
Edit, copy Paper 21
Edit, paste, paste as new layer
Layers, arrange, send to bottom
Selections, Invert
Edit, clear
Selections, Select None
Select Raster 2
Effects, 3D Effects, Drop Shadow, settings of:
Vertical and Horizontal: 3
Opacity: 50
Blur: 5
Color: Black
Shadow on new layer NOT Checked
Select Raster 3
Edit, copy Broken Gravestone
Edit, paste, paste as new layer
Move to the left of the frame. See my tag for placement
Effects, 3D Effects, Drop Shadow, Same Settings
Edit, copy Silhoutte
Edit, paste, paste as new layer
Layers, arrange, bring to top
Image, mirror
Move to the left side of frame. See my tag for placement
Image, resize 80%
Effects, 3D Effects, Drop Shadow, Same settings
Select Raster 3
Selections, Select All, Float, Defloat
Select Moon
Image, Rotate, Free Rotate, Left, 40
Image, resize 60%
Edit, copy Moon
Edit, paste, paste as new layer
Move to the top right of the frame
Selections, Invert
Edit, Clear
Effects, 3D Effects, Drop Shadow, Same settings
Edit, copy Ghost
Edit, paste, paste as new layer
Move to the left of the gravestone . See my tag for placement
Image, resize 60%
Effects, 3D Effects, Drop Shadow, Same Settings
Select Raster 3
Edit, copy Spiderweb 1
Edit, paste, paste as new layer
Edit, copy tube
Edit, paste, paste as new layer
Layers, arrange, bring to top
Image, resize 80%
Image, Mirror
Move to the left side of the frame. See my tag for placement
Effects, 3D Effects, Drop Shadow, Same settings
Edit, copy Witchpot
Edit, paste, paste as new layer
Move to the right side of the frame
Image, resize 60%
Effects, 3D Effects, Drop Shadow, Same settings
Edit, copy Skull pile
Edit, paste, paste as new layer
Move to the right and place in front of witch pot
Image, resize 50%
Effects, 3D Effects, Drop Shadow, Same settings
Make sure raster 4 is checked
Edit, copy Skeleton
Edit, paste, paste as new layer
Move to bottom of gravestone. See my tag for placement
Image, resize 80%
Effects ,3D Effects, Drop Shadow, Same Settings
Edit, copy Scythe
Edit, Paste, Paste as new layer
Move til it is on raster 2
Move to the right so it is placed behind the witch pot
Effects, 3D Effects, Drop Shadow, Same Settings
Edit, copy Spider 2
Edit, paste, paste as new layer
Image, resize 50%
Move to place on the scythe
Effects, 3D Effects, Drop Shadow, same settings
Edit, copy Paper 2
Edit, paste, paste as new layer
Layers, arrange, send to bottom
Layers, Load/save mask, Load mask from disk, Squint Mask with the settings of:
Source Luminance
Fit to Canvas
Invert Transparency Checked
Hide All Mask
Layers, merge, merge group
Image, resize 85%
My Tag is just a guide
Remember to add your copyright info. Make sure it is plain and legible
Add your name to the tag
Save as PNG
Tuesday, October 9, 2012

Wednesday, October 3, 2012
Here is a new cluster frame for you..This is using the PTU kit Falling for Steampunk by
Amy(Gimptastic Scraps)
. Amy is no longer selling kits.


The kit for this is called Falling for Steampunk by Amy(Gimptastic Scraps) of Amy and Leah's Gimptastic Tuts. You can find the many great places Amy sales her kits by looking HERE. I made some extras for all of you. Click on the tag to get the full size version. Please DO NOT alter these in any way.


This tutorial was written by me. Any resemblance to any
other tutorial is pure coincidence. Please DO NOT claim this tutorial as your
own. It was written in PSP 9 but should be compatible with any version of PSP.
I am using the artwork of Zindy. S. D. Nielsen. You need a
license to use her tubes. You can purchase the tube at her store HERE
I am using the FTU kit Falling for Steampunk by Gimptastic Scraps
Open new image 600 x 600
Edit, copy Frame 6
Edit, paste, paste as new layer
Image, resize 80%
Using your magic wand click inside your frame
Select, Selections, Modify, Expand by 8
Edit, copy Paper 5
Edit, paste, paste as new layer
Layers, arrange, send to bottom
Selections, Invert
Edit, clear
Selections, Select None
Select Raster 2
Effects, 3D Effects, Drop Shadow, settings of:
Vertical and Horizontal: 3
Opacity: 50
Blur: 5
Color: Black
Shadow on new layer NOT Checked
Edit, Copy Tube
Edit, paste, paste as new layer
Image, Resize 80%
Layers, duplicate Raster 2
Layers, arrange, bring to top
Use your eraser to erase around the tubes face. I do this so that we can hide that the tubes cut off point
Select Raster 3
Selections, Select All, Float, Defloat
Edit, copy Tree
Edit, paste, paste as new layer. Move to the right
Image Resize 70%
Selections, Invert
Edit, clear
Effects, 3D Effects, Drop Shadow, same settings
Edit, copy wood
Edit, paste, paste as new layer
Layers, arrange, send to top
Move to the bottom of the frame. See my tag for placement
Effects, 3D Effects, Drop Shadow, Same settings
Edit, copy acorns
Move down to the bottom left of the frame
Effects, 3D Effects, Drop Shadow, Same settings
Edit, copy Leaf 1
Edit, paste, paste as new layer
Image, Mirror
Image, rotate, free rotate, left, 20
Image, resize 50%
Effects, 3D Effects, Drop Shadow, Same Settings
Edit, copy Leaf 3
Edit, paste, paste as new layer
Image, resize 50%
Move down and behind the other leaf. See my tag for placement
Effects, 3D Effects, Drop Shadow, Same Settings
Edit, copy Mushroom
Edit, paste, paste as new layer
Move to the left of frame. See my tag for placement
Resize 60%
Move below the acorn element
Effects, 3D Effects, Drop Shadow, Same settings
Edit, copy stick
Edit, paste, paste as new layer
Move to the left of frame. See my tag for placement
Effects, 3D Effects, Drop Shadow, Same settings
Edit, copy bird
Edit, paste, paste as new layer
Move to the left of the frame and place on the limb from the stick
Image, resize 60%
Effects, 3D Effects, Drop shadow, Same settings
Edit, copy squirrel
Edit, paste, paste as new layer
Move to the right of the frame and toward the bottom. See my tag for placement
Image, resize 60%
Effects, 3D Effects, Drop Shadow, same settings
Edit, copy butterfly
Edit, paste, paste as new layer
Move to the top right of the frame
Image, resize 60%
Image, rotate, free rotate, right, 40
Effects, 3D Effects, Drop Shadow, Same settings
Edit, copy Sunflower Cog
Edit, paste, paste as new layer
Image, resize 40%
Move to the left of the frame and place it in the middle of the stick. See my tag for placement
Effects, 3D Effects, Drop Shadow, Same settings
My Tag is just a guide
Remember to add your copyright info. Make sure it is plain and legible
Add your name to the tag
Save as PNG
Subscribe to:
Posts
(Atom)