NO to AI

You will not find AI on my blog!
CT Teams


Saturday, April 30, 2016

I am using the artwork of Barbara Jensen. You need a license to use this tube. You can buy this tube at her store HERE
I am using the PTU kit Spellbound by Ladyhawwk Designs You can find this kit exclusively at Barbara Jensen’s store HERE
Open new image 600 x 600
Edit, Copy Frame 4
Edit, paste, paste as new layer
Image, resize 60%
With your magic wand click inside of the frame
Selections, Modify, Expand by 8
Edit, copy Paper 5
Edit, paste, paste as new layer
Layers, arrange, send to bottom
Selections, Invert
Edit, Clear
Edit, copy Ele27
Edit, paste, paste as new layer
Image, resize 60%
Edit, Clear
Selections, Select None
Select Raster 2
Effects, 3D Effects, Drop Shadow, Settings of:
Vertical : 2
Horizontal:2
Opacity: 50
Blur: 6
Color: Black
Shadow on new layer NOT Checked
Edit, Copy Ele2
Edit, paste, paste as new layer
Layers, arrange, send to bottom
Effects, 3D Effects, Drop Shadow, same Settings
Edit, Copy Tube
Edit, paste, paste as new layer
Image, resize to fit your tag
Layers, arrange, bring to top
Effects, 3D Effects, Drop Shadow, Same Settings
Edit, copy Ele13
Edit, paste, paste as new layer
Layers, arrange, send to bottom..Move it above the glitter at the bottom
Image, resize 70%
Effects, 3D Effects, Drop Shadow, Same Settings
Layers, Duplicate
Image, Mirror
Edit, copy Ele21
Edit, paste, paste as new layer
Image, resize 70%
Move to the right side on Raster 2
Effects, 3D Effects, Drop Shadow, Same Settings
Select Raster 3
Edit, copy Ele30
Edit, paste, paste as new layer
Move to the left side
Image, resize 50%
Move up toward the top so you can see them
Effects, 3D Effects, Drop Shadow, Same Settings
Layers, Duplicate
Image, Mirror
Select Raster 2
Edit, copy Ele48
Edit, paste, paste as new layer
Image, resize 60%
Move to the top of the frame
Effects, 3D Effects, Drop Shadow, same Settings
Edit, Copy Ele7
Edit, paste, paste as new layer
Image, resize 50%
Move to the top left of the frame moving under the previous element
Effects, 3D Effects, Drop Shadow, Same Settings
Edit, copy Ele28
Edit, paste, paste as new layer
Image, resize 40%
Move to the right and place it on the base of the candelbra
Effects, 3D Effects, Drop Shadow, Same Settings
Edit, copy Ele31
Edit, paste, paste as new layer
Image, resize 60%
Move to the right and place behind the tube and candelabra. See my tag for placement
Effects, 3D Effects, Drop Shadow, Same Settings
Edit, copy Ele46
Edit, paste, paste as new layer
Image, resize 60%
Move to bottom left of the frame moving to Raster 2
Effects, 3D Effects, Drop Shadow, Same Settings
Edit, Copy Ele37
Edit, paste, paste as new layer
Image, resize 60%
Move to the bottom left and place on the right side and behind the previous element
Effects, 3D Effects, Drop Shadow, Same Settings
Select Raster 2
Edit, copy Ele14
Edit, paste, paste as new layer
Image, rotate, free rotate, right, 90
Image, mirror
Image, resize 50%
Move to the bottom left of the frame. See my tag for placement
Effects, 3D Effects, Drop Shadow, Same settings
Edit, copy Ele18
Edit, paste, paste as new layer
Image, resize 40%
Move to the right and place between the chest and candelbra
Effects, 3D Effects, Drop Shadow, Same Settings
Edit, copy Ele41
Edit, paste, paste as new layer
Image, resize 40%
Move to the bottom left placing in front of both of the jars
Effects, 3D Effects, Drop Shadow, Same Settings
Remember to add your copyright info. Make sure it is plain and legible
Add your name to the tag
Save as PNG
Thursday, April 28, 2016

I am using the artwork of Barbara Jensen. You need a license to use this tube. You can buy this tube at her store HERE
I am using the PTU kit Vino Vixen by Ladyhawwk Designs You can find this kit exclusively at Barbara Jensen’s store HERE
Squirrely Mask 36 found HERE.
Open new image 600 x 600
Edit, Copy Ele49
Edit, paste, paste as new layer
Image, resize 80%
Effects, 3D Effects, Drop Shadow, Settings of:
Vertical : 2
Horizontal:2
Opacity: 50
Blur: 6
Color: Black
Shadow on new layer NOT Checked
Edit, copy Tube
Edit, paste, paste as new layer
Image, resize to fit your tag
Effects, 3D Effects, Drop Shadow, Same Settings
Edit, copy Ele26
Edit, paste, paste as new layer
Image, resize 60%
Move to the right and place behind the tube and pull to the right some
Effects, 3D Effects, Drop Shadow, Same Settings
Edit, copy Ele42
Edit, paste, paste as new layer
Image, resize 30%
Move to right and place on top of the dresser
Effects, 3D Effects, Drop Shadow, Same Settings
Edit, copy Ele50
Edit, paste, paste as new layer
Image, resize 50%
Move to the left side placing behind the tube and to thel eft
Effects, 3D Effects, Drop Shadow, same Settings
Edit, Copy Ele23
Edit, paste, paste as new layer
Image, resize 50%
Move to the bottom of the cut off legs of the tube
Effects, 3D Effects, Drop Shadow, Same Settings
Edit, copy Ele32
Edit, paste, paste as new layer
Image, resize 40%
Move to the right and place on the dresser in front of the bowl of grapes on the right side
Effects, 3D Effects, Drop Shadow, Same Settings
Edit, copy Ele30
Edit, paste, paste as new layer
Image, resize 40%
Move to the right and place behind the wine glass
Effects, 3D Effects, Drop Shadow, Same Settings
Edit, copy Ele37
Edit, paste, paste as new layer
Image, resize 40%
Move to the right and place at the right corner of the dresser. See my tag for placement
Effects, 3D Effects, Drop Shadow, Same Settings
Edit, Copy Paper6
Edit, paste, paste as new layer
Layers, arrange, send to bottom
Layers, Load/save mask, load mask from disk, settings:
SquirrelyMask63
Source Luminance
Fit To Canvas
Invert Transparency NOT Checked
Hide All Mask
Layers, Merge, merge Group
Edit, copy Ele48
Edit, paste, paste as new layer
Image, resize 60%
Move to the left side placing on the screen. See my tag for placement
Effects, 3D Effects, Drop Shadow, Same settings
Edit, copy Ele9
Edit, paste, paste as new layer
Image, resize 40%
Move to the right and place in front of the dresser and behind the cat
Effects, 3D Effects, Drop Shadow, Same Settings
Edit, copy Ele7
Edit, paste, paste as new layer
Image, resize 40%
Move to the bottom left move over so part of it is in front of the vase
Effects, 3D Effects, Drop Shadow, Same Settings
Remember to add your copyright info. Make sure it is plain and legible
Add your name to the tag
Save as PNG
Sunday, April 24, 2016
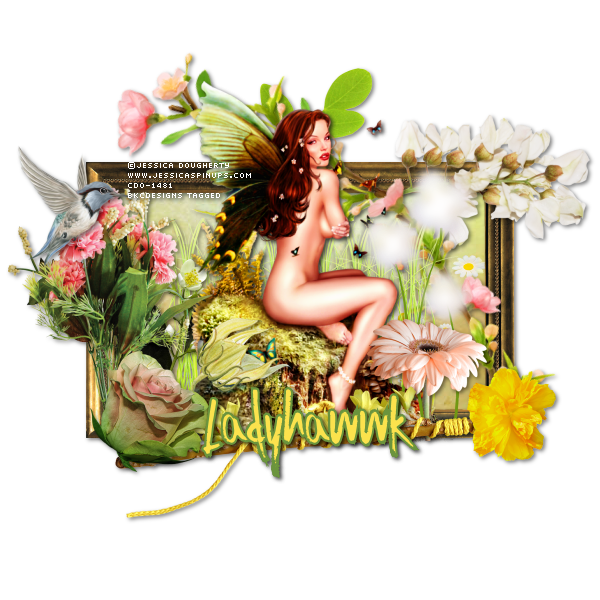
I am using the artwork of Jessica Dougherty. You need a license to use this tube. You can buy the tube at CDO
I am using the PTU kit IB Jessica Dougherty 21-1 by Ladyhawwk Designs. You can find this kit at CDO
Open new image 600 x 600
Edit, Copy Frame 1
Edit, paste, paste as new layer
Image, resize 50%
With your magic wand click inside of the frame
Selections, Modify, Expand by 8
Edit, copy Paper 6
Edit, paste, paste as new layer
Layers, arrange, send to bottom
Selections, Invert
Edit, Clear
Edit, copy Ele23
Edit, paste, paste as new layer
Image, resize 60%
Edit, Clear
Selections, Select None
Select Raster 2
Effects, 3D Effects, Drop Shadow, Settings of:
Vertical : 2
Horizontal: 2
Opacity: 50
Blur: 6
Color: Black
Shadow on new layer NOT Checked
Edit, copy Tube
Edit, paste, paste as new layer
Image, resize to fit your tag
Effects, 3D Effects, Drop Shadow, Same Settings
Edit, Copy Ele18
Edit, paste, paste as new layer
Image, resize 40%
Move behind the tube and to the left
Effects, 3D Effects, Drop Shadow, Same Settings
Layers, Duplicate
Image, Mirror
Select Raster 2
Edit, copy Ele17
Edit, paste, paste as new layer
Image, resize 50%
Image, rotate, free rotate, right 20
Effects, 3D Effects, Drop Shadow, Same Settings
Edit, copy Ele12
Edit, paste, paste as new layer
Layers, arrange, bring to top
Image, resize 40%
Move to the bottom left of the frame
Effects, 3D Effects, Drop Shadow, Same Settings
Edit, copy Ele2
Edit, paste, paste as new layer
Layers, arrange, bring to top
Image,resize 30%
Move to the right side of the tube. See my tag for placement
Effects, 3D Effects, Drop Shadow, Same Settings
Select Raster 2
Edit, copy Ele28
Edit, paste, paste as new layer
Image, resize 50%
Image, Mirror
Move to the right side at the top of the frame
Effects, 3D Effects, Drop Shadow, Same settings
Edit, copy Ele6
Edit, paste, paste as new layer
Image, resize 30%
Move to the left side of the tube. See my tag for placement
Effects, 3D Effects, Drop Shadow, Same settings
Edit, copy Ele3
Edit, paste, paste as new layer
Image, resize 40%
Layers, arrange, bring to top
Move to bottom left and cover up the bottoms of the flower stems
Effects, 3D Effects, Drop Shadow, Same settings
Edit, copy Ele22
Edit, paste, paste as new layer
Image, resize 40%
Move to the left and place in front of the grass and beside the tube
Effects, 3D Effects, Drop Shadow, Same settings
Edit, copy Ele19
Edit, paste, paste as new layer
Image, resize 50%
Move to place at the bottom of the rock of the tube. Making sure it covers the stems of the flowers you have so far
Effects, 3D Effects, Drop Shadow, Same settings
Edit, copy Ele32
Edit, paste, paste as new layer
Image, resize 30%
Move to the left and place near the top of the flowers
Effects, 3D Effects, Drop Shadow, Same Settings
Edit, copy Ele5
Edit, paste, paste as new layer
Image, resize 30%
Move to the left and move down til it is in front of the grass
Effects, 3D Effects, Drop Shadow, Same settings
Edit, Copy Ele27
Edit, paste, paste as new layer
Image, resize 20%
Layers, arrange, bring to top
Move to the bottom right of the frame
Effects, 3D Effects, Drop Shadow, Same Settings
Remember to add your copyright info. Make sure it is plain and legible
Add your name to the tag
Save as PNG
Saturday, April 23, 2016

I am using the artwork of Monte Moore. You need a license to use this tube. You can buy this tube at CDO
I am using the PTU Kit IB Monte Moore 26-3 by Gimptastic Scraps . This kit is exclusive to CDO
Open new image 600 x 600
Edit, Copy Frame 2
Edit, paste, paste as new layer
Image, resize 70%
With your magic wand click inside of the frame
Selections, Modify, Expand by 8
Edit, copy Paper 3
Edit, paste, paste as new layer
Layers, arrange, send to bottom
Selections, Invert
Edit, Clear
Edit, copy Ele 17
Edit, paste, paste as new layer
Move over to the left just a bit
Edit, Clear
Selections, Select None
Effects, 3D Effects, Drop Shadow, Settings of:
Vertical : 2
Horizontal: 2
Opacity: 65
Blur: 5
Color: Black
Shadow on new layer NOT Checked
Edit, copy Tube
Edit, paste, paste as new layer
Image, resize to fit your tag
Effects, 3D Effects, Drop Shadow, Same settings
Edit, copy Ele 12
Edit, paste, paste as new layer
Layers, arrange, send to bottom
Move over to the right and up some
Effects, 3D Effects, Drop Shadow, Same Settings
Edit, copy Ele 11
Edit, paste, paste as new layer
Image, resize 70%
Move to the bottom of Raster 2. See my tag for placement
Effects, 3D Effects, Drop Shadow, same Settings
Select Raster 2
Edit, copy Ele 6
Edit, paste, paste as new layer
Image, resize 70%
Move to the bottom left of the frame
Effects, 3D Effects, Drop Shadow, Same Settings
Layers, Duplicate
Image, Mirror
Edit, copy Ele 21
Edit, paste, paste as new layer
Image, Resize 70%
Move to the right side of the frame on Raster 2
Effects, 3D Effects, Drop Shadow, Same settings
Edit, Copy Ele 20
Edit, paste, paste as new layer
Image, resize 70%
Image, Mirror
Image, Flip
Move to place on the boat. See my tag for placement
Effects, 3D Effects, Drop Shadow, same Settings
Edit, copy Ele 4
Edit, paste, paste as new layer
Image, resize 40%
Move to the left placing behind the fishing pole
Effects, 3D Effects, Drop Shadow, Same Settings
Edit, copy Ele 14
Edit, paste, paste as new layer
Image, resize 50%
Move to the bottom left placing in front of the greenery
Effects, 3D Effects, Drop Shadow, Same Settings
Edit, copy Ele 8
Edit, paste, paste as new layer
Move down to above the spray of the water on the left side
Image, rotate, free rotate, left, 20
Image, resize 50%
Effects, 3D Effects, Drop Shadow, Same Settings
Remember to add your copyright info. Make sure it is plain and legible
Add your name to the tag
Save as PNG
Wednesday, April 20, 2016

I am using the artwork of Enys Guerrero. You need a license to use this tube. You can buy this tube at CDO
I am using the PTU Kit IB Enys Guerrero 21-2 by Gimptastic Scraps . This kit is exclusive to CDO
Open new image 600 x 600
Edit, Copy Frame 1
Edit, paste, paste as new layer
Image, resize 75%
With your magic wand click inside of the frame
Selections, Modify, Expand by 8
Edit, copy Paper 6
Edit, paste, paste as new layer
Layers, arrange, send to bottom
Selections, Invert
Edit, Clear
Selections, Select None
Effects, 3D Effects, Drop Shadow, Settings of:
Vertical : 2
Horizontal: 2
Opacity: 65
Blur: 5
Color: Black
Shadow on new layer NOT Checked
Edit, copy Tube
Edit, paste, paste as new layer
Image, resize 60%
Effects, 3D Effects, Drop Shadow, Same settings
Select Raster 2
Layers, Duplicate
Layers, arrange, bring to top
Using your eraser tool erase the top of the frame from around the tube
Than go to the tube layer and eraser the tube at the bottom that you can see it hanging below the frame in the back
Edit, copy Ele 15
Edit, paste, paste as new layer
Layers, arrange, send to bottom
Move over to the left some and up
Effects, 3D Effects, Drop Shadow, Same Settings
Layers, Duplicate
Image, Mirror
Edit, copy Ele 12
Edit, paste, paste as new layer
Image, resize 60%
Layers, arrange, bring to top
Move to bottom left of the frame
Effects, 3D Effects, Drop Shadow, same Settings
Layers, Duplicate
Image, Mirror
Edit, copy Ele 5
Edit, paste, paste as new layer
Image, resize 60%
Move to the bottom of the frame
Effects, 3D Effects, Drop Shadow, Same Settings
Edit, copy Ele 22
Edit, paste, paste as new layer
Image, Mirror
Move to the right side of the frame placing behind the copied frame. See my tag for placement
Effects, 3D Effects, Drop Shadow, Same settings
Edit, Copy Ele 9
Edit, paste, paste as new layer
Image, resize 60%
Image, Flip
Move behind the flowers at the bottom of the frame
Effects, 3D Effects, Drop Shadow, same Settings
Edit, copy Ele 8
Edit, paste, paste as new layer
Layers, arrange, send to bottom
Move to the left and move down
Effects, 3D Effects, Drop Shadow, Same Settings
Layers, Duplicate
Image, Mirror
Edit, copy Ele 17
Edit, paste, paste as new layer
Layers, arrange, bring to top
Move to the far right placing on one of the branches
Image, resize 40%
Effects, 3D Effects, Drop Shadow, Same Settings
Edit, copy Ele 21
Edit, paste, paste as new layer
Move down to raster 2
Effects, 3D Effects, Drop Shadow, Same Settings
Edit, copy Ele 1
Edit, paste, paste as new layer
Move to the bottom left
Layers, arrange, send to bottom
Move below the flowers
Effects, 3D Effects, Drop Shadow, Same Settings
Layers, Duplicate
Image, Mirror
Remember to add your copyright info. Make sure it is plain and legible
Add your name to the tag
Save as PNG
Tuesday, April 19, 2016

I am using the artwork of Dirk Richter. You need a license to use this tube. You can buy this tube at CDO
I am using the PTU Kit IB Dirk Richter 18-3 by Gimptastic Scraps . This kit is exclusive to CDO
Open new image 600 x 600
Edit, Copy Frame 1
Edit, paste, paste as new layer
Image, resize 70%
With your magic wand click inside of the frame
Selections, Modify, Expand by 8
Edit, copy Paper 6
Edit, paste, paste as new layer
Layers, arrange, send to bottom
Selections, Invert
Edit, Clear
Selections, Select None
Select Raster 2
Effects, 3D Effects, Drop Shadow, Settings of:
Vertical : 2
Horizontal: 2
Opacity: 65
Blur: 5
Color: Black
Shadow on new layer NOT Checked
Edit, Copy Tube
Edit, paste, paste as new layer
Image, resize to fit your tag
Effects, 3D Effects, Drop Shadow, Same settings
Select Raster 2
Edit, copy Ele 3
Edit, paste, paste as new layer
Move to the bottom left of the frame
Image, resize 60%
Effects, 3D Effects, Drop Shadow, Same Settings
Edit, copy Ele 18
Edit, paste, paste as new layer
Image, resize 60%
Layers, arrange, bring to top
Move to place in front of the tube
Effects, 3D Effects, Drop Shadow, same Settings
Edit, copy Ele 4
Edit, paste, paste as new layer
Image, resize 50%
Move to the left side and place it on the box
Effects, 3D Effects, Drop Shadow, Same Settings
Edit, copy Ele 19
Edit, paste, paste as new layer
Image, resize 70%
Move to the bottom right placing on Raster 2
Effects, 3D Effects, Drop Shadow, Same settings
Edit, Copy Ele 16
Edit, paste, paste as new layer
Image, resize 40%
Move to the left side placing in front of the box on the left side
Effects, 3D Effects, Drop Shadow, same Settings
Edit, copy Ele 5
Edit, paste, paste as new layer
Image, resize 60%
Move to the left placing behind the box and tube
Effects, 3D Effects, Drop Shadow, Same Settings
Select Raster 2
Edit, copy Ele 21
Edit, paste, paste as new layer
Move to the bottom right of the frame and move over
Image, resize 60%
Effects, 3D Effects, Drop Shadow, Same Settings
Select Raster 2
Edit, copy Ele 20
Edit, paste, paste as new layer
Image, resize 70%
Move behind the tube and a little to the right. Move below the previous element
Effects, 3D Effects, Drop Shadow, Same Settings
Edit, copy Ele 8
Edit, paste, paste as new layer
Image, resize 50%
Move down and behind the tube but move over so it is sitting on her right side
Effects, 3D Effects, Drop Shadow, Same Settings
Remember to add your copyright info. Make sure it is plain and legible
Add your name to the tag
Save as PNG
Sunday, April 17, 2016

I am using the artwork of Cartoon Pink. You need a license to use this tube. You can buy the tube at CDO
I am using the PTU kit IB Cartoon Pink 43-1 by Ladyhawwk Designs. You can find this kit at CDO
Open new image 600 x 600
Edit, Copy Frame 3
Edit, paste, paste as new layer
Image, resize 50%
With your magic wand click inside of the frame
Selections, Modify, Expand by 8
Edit, copy Paper 1
Edit, paste, paste as new layer
Layers, arrange, send to bottom
Selections, Invert
Edit, Clear
Edit, copy Ele 28
Edit, paste, paste as new layer
Edit, Clear
Selections, Select None
Select Raster 2
Effects, 3D Effects, Drop Shadow, Settings of:
Vertical : 2
Horizontal: 2
Opacity: 50
Blur: 6
Color: Black
Shadow on new layer NOT Checked
Edit, copy Tube
Edit, paste, paste as new layer
Image, resize to fit your tag
Effects, 3D Effects, Drop Shadow, Same Settings
Edit, Copy Ele1
Edit, paste, paste as new layer
Image, resize 40%
Move to the bottom left of the frame
Effects, 3D Effects, Drop Shadow, Same Settings
Select Raster 2
Edit, copy Ele2
Edit, paste, paste as new layer
Image, resize 40%
Move to the right side of the frame
Effects, 3D Effects, Drop Shadow, Same Settings
Select Raster 2
Edit, copy Ele28
Edit, paste, paste as new layer
Move to the top right of the frame
Image, resize 40%
Effects, 3D Effects, Drop Shadow, Same Settings
Edit, copy Ele19
Edit, paste, paste as new layer
Layers, arrange, bring to top
Image, Mirror
Move to bottom placing in front of the cut off tube
Image, resize 50%
Effects, 3D Effects, Drop Shadow, Same Settings
Edit, copy Ele9
Edit, paste, paste as new layer
Image, resize 50%
Move to the left side of the plate. See my tag for placement
Effects, 3D Effects, Drop Shadow, Same settings
Select Raster 2
Edit, copy Ele18
Edit, paste, paste as new layer
Image, resize 60%
Move to the left side of the frame
Effects, 3D Effects, Drop Shadow, Same settings
Edit, copy Ele8
Edit, paste, paste as new layer
Image, resize 40%
Move in front of the cup of coffee
Effects, 3D Effects, Drop Shadow, Same settings
Edit, copy Ele20
Edit, paste, paste as new layer
Image, resize 40%
Move to the left and place in front of the plate
Effects, 3D Effects, Drop Shadow, Same settings
Edit, copy Ele5
Edit, paste, paste as new layer
Image, rotate, free rotate, left 40
Image, resize 80%
Layers, arrange, send to bottom
Effects, 3D Effects, Drop Shadow, Same settings
Edit, copy Ele7
Edit, paste, paste as new layer
Image, resize 40%
Move to place in front of the coffee cup but behind the kiwi
Effects, 3D Effects, Drop Shadow, Same Settings
Edit, copy Ele29
Edit, paste, paste as new layer
Image, resize 40%
Layers, arrange, bring to top
Move to place in front of the kiwi and to the right some
Effects, 3D Effects, Drop Shadow, Same settings
Edit, Copy Ele12
Edit, paste, paste as new layer
Image, resize 40%
Move to the left and place on the flower bush
Effects, 3D Effects, Drop Shadow, Same Settings
Remember to add your copyright info. Make sure it is plain and legible
Add your name to the tag
Save as PNG

I am using the artwork of Joan Pelaez. You need a license to use this tube. You can buy the tube at CDO
I am using the PTU kit IB Joan Pelaez 14-2 by Ladyhawwk Designs. You can find this kit at CDO
Open new image 600 x 600
Edit, Copy Frame 1
Edit, paste, paste as new layer
Image, resize 70%
With your magic wand click inside of the frame
Selections, Modify, Expand by 8
Edit, copy Paper 3
Edit, paste, paste as new layer
Layers, arrange, send to bottom
Selections, Invert
Edit, Clear
Edit, copy Ele 28
Edit, paste, paste as new layer
Edit, Clear
Selections, Select None
Select Raster 2
Effects, 3D Effects, Drop Shadow, Settings of:
Vertical : 2
Horizontal: 2
Opacity: 50
Blur: 6
Color: Black
Shadow on new layer NOT Checked
Edit, copy Tube
Edit, paste, paste as new layer
Image, resize to fit your tag
Effects, 3D Effects, Drop Shadow, Same Settings
Edit, Copy Ele30
Edit, paste, paste as new layer
Image, resize 75%
Layers, arrange, send to bottom
Effects, 3D Effects, Drop Shadow, Same Settings
Edit, copy Ele26
Edit, paste, paste as new layer
Layers, arrange, Send to bottom
Effects, 3D Effects, Drop Shadow, Same Settings
Select Raster 2
Edit, copy Ele9
Edit, paste, paste as new layer
Move to the left side of the frame
Image, resize 70%
Effects, 3D Effects, Drop Shadow, Same Settings
Edit, copy Ele27
Edit, paste, paste as new layer
Move to the right side of the frame
Image, resize 50%
Effects, 3D Effects, Drop Shadow, Same Settings
Edit, copy Ele22
Edit, paste, paste as new layer
Image, resize 20%
Image, Mirror
Layers, arrange, bring to top
Move to the right side of the frame placing on the edge of the previous element
Effects, 3D Effects, Drop Shadow, Same settings
Select The Frame
Layers, Duplicate
Layers, arrange, bring to top
Use your eraser tool to get rid of the excess frame. I just kept a little at the bottom of the cut off leg of the tube
Edit, copy Ele13
Edit, paste, paste as new layer
Image, resize 40%
Move to the bottom left placing at the bottom and in front of the flower
Effects, 3D Effects, Drop Shadow, Same settings
Edit, copy Ele28
Edit, paste, paste as new layer
Image, resize 50%
Move to the left and move below the other flower. Move to the right some
Effects, 3D Effects, Drop Shadow, Same settings
Edit, copy Ele1
Edit, paste, paste as new layer
Image, resize 30%
Move to the bottom right placing at the bottom of the water fountain
Effects, 3D Effects, Drop Shadow, Same settings
Select Your Tube
Edit, copy Ele24
Edit, paste, paste as new layer
Image, resize 40%
Image, mirror
Move to place a little bit on the wand. See my tag for placement
Effects, 3D Effects, Drop Shadow, Same settings
Edit, copy Ele2
Edit, paste, paste as new layer
Image, resize 40%
Move to the bottom right placing behind the water fountain
Effects, 3D Effects, Drop Shadow, Same Settings
Edit, copy Ele15
Edit, paste, paste as new layer
Image, resize 30%
Layers, arrange, bring to top
Move to the bottom right. See my tag for placement
Effects, 3D Effects, Drop Shadow, Same settings
Remember to add your copyright info. Make sure it is plain and legible
Add your name to the tag
Save as PNG
Saturday, April 16, 2016

I am using the artwork of Arthur Crowe. You must have a license to use this tube. You can buy the tube at his store HERE
I am using the kit Spring Burst by Manipulated by Magik. You can buy this kit only at the new site store found HERE
Open new image 600 x 600
Edit, Copy Shadow box
Edit, paste, paste as new layer
With your magic wand click inside each of the frames
Selections, Modify, Expand by 8
Edit, copy Paper 1
Edit, paste, paste as new layer
Layers, arrange, send to bottom
Selections, Invert
Edit, Clear
Selections, Select None
Select Raster 2
Effects, 3D Effects, Drop Shadow, Settings of:
Vertical : 2
Horizontal: 2
Opacity: 50
Blur: 6
Color: Black
Shadow on new layer NOT Checked
Edit, copy Tree
Edit, paste, paste as new layer
Image, resize 80%
Move to the left side of the frame
Effects, 3D Effects, Drop Shadow, Same Settings
Edit, copy Light Ball
Edit, paste, paste as new layer
Move to the top left of the frame moving behind the tube
Image, resize 50%
Effects, 3D Effects, Drop Shadow, Same Settings
Edit, copy Tulips
Edit, paste, paste as new layer
Move down to bottom left in front of the tree
Image, resize 50%
Effects, 3D Effects, Drop Shadow, Same Settings
Edit, copy Calla Lilies
Edit, paste, paste as new layer
Image, resize 50%
Move to the bottom right of the frame
Effects, 3D Effects, Drop Shadow, Same Settings
Edit, Copy Flower 1
Edit, paste, paste as new layer
Image, resize 40%
Move to the bottom right of the frame in front of the calla lilies
Effects, 3D Effects, Drop Shadow, Same Settings
Edit, copy Tube
Edit, paste, paste as new layer
Layers, arrange, bring to top
Image, resize to fit your tag
Move to the bottom of the frame
Effects, 3D Effects, Drop Shadow, Same Settings
Edit, copy Berry Branch
Edit, paste, paste as new layer
Image, resize 80%
Move to the bottom right of the frame
Layers, arrange, send to bottom
Effects, 3D Effects, Drop Shadow, Same Settings
Layers, Duplicate
Image, Mirror
Select Raster 2
Edit, copy Flower Bush
Edit, paste, paste as new layer
Image, resize 50%
Move to bottom right of the frame behind the other flowers. See my tag for placement
Effects, 3D Effects, Drop Shadow, Same Settings
Still on Raster 2
Edit, copy Rainbow
Edit, paste, paste as new layer
Move to the top of the frame
Image, rotate, free rotate, left, 20
Effects, 3D Effects, Drop Shadow, same settings
Edit, copy Flower 5
Edit, paste, paste as new layer
Image, resize 30%
Move down to the left placing behind the tulips
Effects, 3D Effects, Drop Shadow, Same settings
Edit, copy Balloons
Edit, Paste, paste as new layer
Image, resize 60%
Move up above the rainbow and to the right side of the frame
Image, rotate, free rotate, right, 20
Effects, 3D Effects, Drop Shadow, Same Settings
Select Raster 2
Edit, copy Butterfly Scatter
Edit, paste, paste as new layer
Move up and to the right some
Effects, 3D Effects, Drop Shadow, Same Settings
Edit, copy Flower Deco
Edit, paste, paste as new layer
Image, resize 40%
Image, Mirror
Move to the far right in front of the other flowers
Effects, 3D Effects, Drop Shadow, Same Settings
Edit, copy Flowers
Edit, paste, paste as new layer
Image, resize 40%
Move to the far left and place in front of the tulips
Effects, 3D Effects, Drop Shadow, Same Settings
Select Raster 2
Edit, copy Rose Blossoms
Edit, paste, paste as new layer
Image, resize 50%
Move to place behind the tube. See my tag for placement
Effects, 3D Effects, Drop Shadow, Same Settings
Remember to add your copyright info. Make sure it is plain and legible
Add your name to the tag
Save as PNG
Thursday, April 14, 2016

I am using the artwork of Pinuptoons. You need a license to use this tube. You can buy this tube at CDO
I am using the PTU Kit IB Pinuptoons 87-2 by Gimptastic Scraps . This kit is exclusive to CDO
Open new image 600 x 600
Edit, Copy Frame 1
Edit, paste, paste as new layer
Image, resize 70%
With your magic wand click inside of the frame
Selections, Modify, Expand by 8
Edit, copy Paper 4
Edit, paste, paste as new layer
Layers, arrange, send to bottom
Selections, Invert
Edit, Clear
Selections, Select None
Select Raster 2
Effects, 3D Effects, Drop Shadow, Settings of:
Vertical : 2
Horizontal: 2
Opacity: 65
Blur: 5
Color: Black
Shadow on new layer NOT Checked
Edit, Copy Tube
Edit, paste, paste as new layer
Image, resize to fit your tag
Effects, 3D Effects, Drop Shadow, Same settings
Edit, copy Ele 21
Edit, paste, paste as new layer
Layers, arrange, send to bottom
Move down just a little bit
Effects, 3D Effects, Drop Shadow, Same Settings
Select Raster 2
Edit, copy Ele 5
Edit, paste, paste as new layer
Image, resize 70%
Move to the left side behind the tube
Image, rotate, free rotate, right, 20
Effects, 3D Effects, Drop Shadow, same Settings
Edit, copy Ele 6
Edit, paste, paste as new layer
Image, resize 70%
Move to the right side of the frame behind the tube and move up
Effects, 3D Effects, Drop Shadow, Same Settings
Edit, copy Ele 10
Edit, paste, paste as new layer
Image, resize 60%
Layers,arrange, bring to top
Move to the bottom and place on the left side below the cut off legs of the tube
Effects, 3D Effects, Drop Shadow, Same settings
Edit, Copy Ele 15
Edit, paste, paste as new layer
Image, resize 40%
Move to the right side and down behind the other element. See my tag for placement
Effects, 3D Effects, Drop Shadow, same Settings
Edit, copy Ele 1
Edit, paste, paste as new layer
Image, resize 60%
Layers, arrange, bring to top
Move to the left placing on the edge of the package
Effects, 3D Effects, Drop Shadow, Same Settings
Select Raster 2
Edit, copy Wordart
Edit, paste, paste as new layer
Move to the top right of the frame
Image, resize 50%
Effects, 3D Effects, Drop Shadow, Same Settings
Select Raster 2
Edit, copy Ele 20
Edit, paste, paste as new layer
Image, resize 50%
Move to place beside and behind the tube on the right! See my tag for placement
Effects, 3D Effects, Drop Shadow, Same Settings
Edit, copy Ele 12
Edit, paste, paste as new layer
Image, resize 50%
Move to the far right placing at the bottom and to the right of the pop
Effects, 3D Effects, Drop Shadow, Same Settings
Select Raster 2
Edit, copy Ele 11
Edit, paste, paste as new layer
Move to the far left. See my tag for placement
Effects, 3D Effects, Drop Shadow, Same Settings
Edit, copy Ele 4
Edit, paste, paste as new layer
Image, resize 60%
Move to the left and place on the left side of the tube
Effects, 3D Effects, Drop Shadow, Same Settings
Edit, copy Ele 7
Edit, paste, paste as new layer
Move to Raster 2 and move to the bottom right of the frame
Image, resize 70%
Effects, 3D Effects, Drop Shadow, Same Settings
Edit, copy Ele 14
Edit, paste, paste as new layer
Image, resize 70%
Move to the left side of the frame
Layers, arrange, send to bottom
Effects, 3D effects, Drop Shadow, same settings
Layers, Duplicate
Image, Mirror
Image, Flip
Edit, copy Ele 18
Edit, paste, paste as new layer
Image, resize 70%
Layers, arrange, bring to top
Move to the bottom of the frame. See my tag for placement
Effects, 3D Effects, Drop Shadow, Same settings
Edit, copy Ele 22
Edit, paste, paste as new
Image, resize 40%
Place on the packages
Effects, 3D Effects, Drop Shadow, Same Settings
Remember to add your copyright info. Make sure it is plain and legible
Add your name to the tag
Save as PNG
Tuesday, April 12, 2016

I am using the artwork of Enamorte. You need a license to use this tube. You can buy this tube at CDO
I am using the PTU Kit Forgotten by Gimptastic Scraps . This kit is exclusive to CDO
Open new image 600 x 600
Edit, Copy Frame 6
Edit, paste, paste as new layer
Image, resize 70%
With your magic wand click inside of the frame
Selections, Modify, Expand by 8
Edit, copy Paper 7
Edit, paste, paste as new layer
Layers, arrange, send to bottom
Selections, Invert
Edit, Clear
Selections, Select None
Select Raster 2
Effects, 3D Effects, Drop Shadow, Settings of:
Vertical : 2
Horizontal: 2
Opacity: 65
Blur: 5
Color: Black
Shadow on new layer NOT Checked
Edit, Copy Tube
Edit, paste, paste as new layer
Image, resize to fit your tag
Effects, 3D Effects, Drop Shadow, Same settings
Select Raster 2
Edit, copy Ele 33
Edit, paste, paste as new layer
Image, resize 80%
Move to the left side of the frame and up some. See my tag for placement
Effects, 3D Effects, Drop Shadow, Same Settings
Select Raster 2
Edit, copy Ele 7
Edit, paste, paste as new layer
Image, resize 60%
Move to the bottom right of the frame
Effects, 3D Effects, Drop Shadow, same Settings
Edit, copy Ele 17
Edit, paste, paste as new layer
Image, resize 60%
Layers, arrange, bring to top
Move to the right side of the frame
Effects, 3D Effects, Drop Shadow, Same Settings
Select Raster 2
Edit, copy Ele 4
Edit, paste, paste as new layer
Image, resize 60%
Move to the right and move up some behind the birdcage
Effects, 3D Effects, Drop Shadow, Same settings
Edit, Copy Ele 1
Edit, paste, paste as new layer
Layers, arrange, bring to top
Image, resize 50%
Move to the left placing in front of the tower
Effects, 3D Effects, Drop Shadow, same Settings
Edit, copy Ele 36
Edit, paste, paste as new layer
Image, resize 60%
Move to the left placing behind the tube on the left and in front of the tower
Effects, 3D Effects, Drop Shadow, Same Settings
Edit, copy Ele 2
Edit, paste, paste as new layer
Layers, arrange, send to bottom
I used my selection tool and went around the branches sticking up at the top and bottom to delete them so they would not be sticking out
Effects, 3D Effects, Drop Shadow, Same Settings
Edit, copy Ele 41
Edit, paste, paste as new layer
Image, resize 40%
Move to the place on the tower near the top to look like it is on the ledge
Effects, 3D Effects, Drop Shadow, Same Settings
Edit, copy Ele 26
Edit, paste, paste as new layer
Image, resize 60%
Layers,arrange, bring to top
Image, mirror
Move to put at the bottom of the tube
Effects, 3D Effects, Drop Shadow, Same Settings
Remember to add your copyright info. Make sure it is plain and legible
Add your name to the tag
Save as PNG
Monday, April 11, 2016

This tutorial was written by me. Any resemblance to any other tutorial is pure coincidence. Please DO NOT claim this tutorial as your own. It was written in PSP 9 but should be compatible with any version of PSP.
I am using the artwork of Michael Landefeld. You need a license to use this tube. You can buy this tube at CDO
I am using the PTU Kit IB Michael Landefeld 26-1 by Gimptastic Scraps . This kit is exclusive to CDO
Open new image 600 x 600
Edit, Copy Frame 1
Edit, paste, paste as new layer
Image, resize 70%
With your magic wand click inside of the frame
Selections, Modify, Expand by 8
Edit, copy Paper 4
Edit, paste, paste as new layer
Layers, arrange, send to bottom
Selections, Invert
Edit, Clear
Selections, Select None
Select Raster 2
Effects, 3D Effects, Drop Shadow, Settings of:
Vertical : 2
Horizontal: 2
Opacity: 50
Blur: 6
Color: Black
Shadow on new layer NOT Checked
Edit, Copy Ele 9
Edit, paste, paste as new layer
Layers, arrange, send to bottom
Image, resize 90%
Effects, 3D Effects, Drop Shadow, Same settings
Edit, copy Tube
Edit, paste, paste as new layer
Image, resize 90%
Layers, arrange, bring to top
Effects, 3D Effects, Drop Shadow, Same Settings
Select Raster 2
Edit, copy Ele 14
Edit, paste, paste as new layer
Image, resize 50%
Move to the bottom left of the frame
Effects, 3D Effects, Drop Shadow, same Settings
Layers, Duplicate
Image, Mirror
Edit, copy Ele 1
Edit, paste, paste as new layer
Image, rotate, Rotate clockwise 90
Move to the left side of the frame on top of the grass
Effects, 3D Effects, Drop Shadow, Same Settings
Edit, copy Ele 2
Edit, paste, paste as new layer
Image, resize 50%
Move to the bottom right of the frame in front of the grass
Effects, 3D Effects, Drop Shadow, Same settings
Edit, Copy Ele 15
Edit, paste, paste as new layer
Move to the bottom left of the frame
Image, resize 50%
Effects, 3D Effects, Drop Shadow, same Settings
Edit, copy Wordart
Edit, paste, paste as new layer
Image, resize 60%
Move to the bottom of the frame placing over the cut off legs of the tube and moving behind the ball on the right and the glove on the left
Effects, 3D Effects, Drop Shadow, Same Settings
Edit, copy Ele 10
Edit, paste, paste as new layer
Image, resize 50%
Layers, arrange, bring to top
Move to the bottom right and place in front of the baseball
Effects, 3D Effects, Drop Shadow, Same Settings
Select Raster 2
Edit, copy Ele 19
Edit, paste, paste as new layer
Image, resize 70%
Move to the top of the frame and over to the right
Effects, 3D Effects, Drop Shadow, Same Settings
Layers, Duplicate
Image, Mirror
Edit, copy Ele 13
Edit, paste, paste as new layer
Image, resize 40%
Move to the top right of the frame..Moving over til you can see the word and it is behind the tubes head
Effects, 3D Effects, Drop Shadow, Same Settings
Edit, copy Ele 17
Edit, paste, paste as new layer
Image, resize 40%
Move to the right side and move down til it is above the ball and wordart
Effects, 3D Effects, Drop Shadow, Same settings
Edit, copy Ele 3
Edit, paste, paste as new layer
Image, resize 40%
Image, rotate, free rotate, right, 20
Move down to the bottom left placing behind the bat
Effects, 3D Effects, Drop Shadow, Same Settings
Remember to add your copyright info. Make sure it is plain and legible
Add your name to the tag
Save as PNG
Saturday, April 9, 2016

I am using the artwork of Alena Lazareva. You need a license to use this tube. You can buy the tube at CDO
I am using the PTU kit IB Alena Lazareva 18-1 by Tasha's Playground. You can find this kit at CDO
Open new image 600 x 600
Edit, Copy Frame 01
Edit, paste, paste as new layer
Image, resize 70%
With your magic wand click inside of the frame
Selections, Modify, Expand by 8
Edit, copy Paper 03
Edit, paste, paste as new layer
Layers, arrange, send to bottom
Selections, Invert
Edit, Clear
Edit, copy e07
Edit, paste, paste as new layer
Edit, clear
Selections, Select None
Select Raster 2
Effects, 3D Effects, Drop Shadow, Settings of:
Vertical : 2
Horizontal: 2
Opacity: 50
Blur: 6
Color: Black
Shadow on new layer NOT Checked
Edit, Copy Tube
Edit, paste, paste as new layer
Image, resize to fit your tag
Image, Mirror
Effects, 3D Effects, Drop Shadow, same Settings
Edit, Copy e09
Edit, paste, paste as new layer
Move to the bottom of the frame covering up the cutoff of the tube
Effects, 3D Effects, Drop Shadow, Same Settings
Edit, copy e03
Edit, paste, paste as new layer
Move to place above the arbor behind the tube
Effects, 3D Effects, Drop Shadow, Same Settings
Edit, copy e04
Edit, paste, paste as new layer
Image, resize 80%
Move to the far left of the frame behind the tube
Effects, 3D Effects, Drop Shadow, same Settings
Layers, Duplicate
Image, Mirror
Edit, copy e15
Edit, paste, paste as new layer
Image, resize 70%
Move to the bottom left placing above the glittery element
Effects, 3D Effects, Drop Shadow, Same Settings
Layers, Duplicate
Image, Mirror
Edit, Copy E12
Select Raster 2
Edit, paste, paste as new layer
Move to the top right of the frame. See my tag for placement
Effects, 3D Effects, Drop Shadow, Same Settings
Edit, copy e01
Edit, paste, paste as new layer
Layers, arrange, bring to top
Move to the bottom left in front of the grassy flowers
Effects, 3D Effects, Drop Shadow, Same Settings
Edit, copy e10
Edit, paste, paste as new layer
Image, resize 50%
Move to the bottom right. See my tag for placement
Effects, 3D Effects, Drop Shadow, Same Settings
Edit, copy e14
Edit, paste, paste as new layer
Image, resize 50%
Image, mirror
Move to the right and place in front of the birdhouse
Remember to add your copyright info. Make sure it is plain and legible
Add your name to the tag
Save as PNG
Wednesday, April 6, 2016

I am using the artwork of Maryline Cazenave. You need a license to use this tube. You can buy this tube at CDO
I am using the PTU Kit IB Maryline Cazenave 3-3 by Gimptastic Scraps . This kit is exclusive to CDO
Open new image 600 x 600
Edit, Copy Frame 1
Edit, paste, paste as new layer
Image, resize 70%
With your magic wand click inside of the frame
Selections, Modify, Expand by 8
Edit, copy Paper 2
Edit, paste, paste as new layer
Layers, arrange, send to bottom
Selections, Invert
Edit, Clear
Selections, Select None
Select Raster 2
Effects, 3D Effects, Drop Shadow, Settings of:
Vertical : 2
Horizontal: 2
Opacity: 50
Blur: 6
Color: Black
Shadow on new layer NOT Checked
Edit, Copy Tube
Edit, paste, paste as new layer
Move to the bottom of the frame
Effects, 3D Effects, Drop Shadow, Same settings
Edit, copy Ele 1
Edit, paste, paste as new layer
Image, resize 50%
Move to the bottom right side of the tube
Effects, 3D Effects, Drop Shadow, Same Settings
Edit, copy Ele 9
Edit, paste, paste as new layer
Move to Raster 2 than move to bottom left behind the tube. See my tag for placement
Effects, 3D Effects, Drop Shadow, same Settings
Edit, copy Wordart
Edit, paste, paste as new layer
Move to the top of the frame. See my tag for placement
Image, resize 90%
Effects, 3D Effects, Drop Shadow, Same Settings
Edit, copy Ele 5
Edit, paste, paste as new layer
Image, resize 50%
Move to the right and place in front of the tube on the left side of the pin cushion
Effects, 3D Effects, Drop Shadow, Same settings
Edit, Copy Ele 2
Edit, paste, paste as new layer
Layers, arrange, send to bottom
Image, rotate, free rotate, right 39
Move to the top some. See my tag for placement
Effects, 3D Effects, Drop Shadow, same Settings
Edit, copy Ele 7
Edit, paste, paste as new layer
Image, resize 40%
Move to the bottom placing in front of the gift but behind the tube
Effects, 3D Effects, Drop Shadow, Same Settings
Edit, copy Ele 19
Edit, paste, paste as new layer
Image, rotate, free rotate, right, 90
Layers, arrange, bring to top
Move down to the right placing in front of pincushion and tube
Image, resize 50%
Effects, 3D Effects, Drop Shadow, Same Settings
Edit, copy Ele 11
Edit, paste, paste as new layer
Image, resize 50%
Move down to place on the left of the thread you added and behind the scissors
Effects, 3D Effects, Drop Shadow, Same Settings
Edit, copy Ele 13
Edit, paste, paste as new layer
Image, resize 40%
Layers, arrange, bring to top
Move to the left. See my tag for placement
Remember to add your copyright info. Make sure it is plain and legible
Add your name to the tag
Save as PNG
Monday, April 4, 2016

I am using the artwork of Anna Liwanag. You need a license to use this tube. You can buy this tube at CDO
I am using the PTU Kit Morning Moment-mini by Gimptastic Scraps . This kit is exclusive to CDO
Open new image 600 x 600
Edit, Copy Frame 1
Edit, paste, paste as new layer
Image, resize 70%
With your magic wand click inside each of the frames
Selections, Modify, Expand by 8
Edit, copy Paper 5
Edit, paste, paste as new layer
Layers, arrange, send to bottom
Selections, Invert
Edit, Clear
Edit, copy Ele 40
Edit, paste, paste as new layer
Edit, Clear
Selections, Select None
Select Raster 2
Effects, 3D Effects, Drop Shadow, Settings of:
Vertical : 2
Horizontal: 2
Opacity: 50
Blur: 6
Color: Black
Shadow on new layer NOT Checked
Edit, Copy Ele 18
Edit, paste, paste as new layer
Move to the bottom right side of the frame
Effects, 3D Effects, Drop Shadow, Same settings
Layers, Duplicate
Image, Mirror
Duplicate
Image, resize 70%
Move to the right of the duplicate
Keep duplicating til you have them all across the bottom of the frame
Edit, copy Ele 10
Edit, paste, paste as new layer
Image, resize 60%
Move to the bottom left side of the frame
Effects, 3D Effects, Drop Shadow, Same Settings
Layers, Duplicate
Image, Mirror
Layers, arrange, bring to top
Edit, copy Ele 35
Edit, paste, paste as new layer
Move to the right side of the frame
Place behind the flower but in front of the grass
Effects, 3D Effects, Drop Shadow, same Settings
Edit, copy Tube
Edit, paste, paste as new layer
Layers, arrange, bring to top
Image, resize to fit your tag
Effects, 3D Effects, Drop Shadow, Same Settings
Edit, copy Ele 1
Edit, paste, paste as new layer
Image, resize 50%
Move to the left side and place in front of the flowers
Effects, 3D Effects, Drop Shadow, Same settings
Edit, Copy Ele 34
Edit, paste, paste as new layer
Image, resize 30%
Image, mirror
Move to the left side placing near the flower in the middle of the bunch of flowers
Effects, 3D Effects, Drop Shadow, same Settings
Edit, copy Ele 2
Edit, paste, paste as new layer
Image, resize 40%
Layers, arrange, bring to top
Move to the right and place in front of the tube. See my tag for placement
Effects, 3D Effects, Drop Shadow, Same Settings
Edit, copy Ele 22
Edit, paste, paste as new layer
Move to the right side of the frame to place on the far side. See my tag for placement
Image, resize 50%
Effects, 3D Effects, Drop Shadow, Same Settings
Edit, copy Ele 5
Edit, paste, paste as new layer
Image, resize 40%
Move to the right and place in front of the flowers but behind the tubes hand
Effects, 3D Effects, Drop Shadow, Same Settings
Remember to add your copyright info. Make sure it is plain and legible
Add your name to the tag
Save as PNG
Saturday, April 2, 2016

I am using the artwork of Anna Liwanag. You need a license to use this tube. You can buy this tube at CDO
I am using the PTU kit Go Your Own Way by Sweet Cravings Scraps. You can buy the kit at TKO Scraps and Scraps and Tubes
Open new image 600 x 600
Edit, copy Frame 6
Edit, paste, paste as new layer
Image, resize 50%
With your magic wand click inside of the frame
Selections, Modify, Expand by 8
Edit, copy Paper 3
Edit, paste, paste as new layer
Layers, arrange, send to bottom
Selections, Invert
Edit, Clear
Edit, copy Rain
Edit, paste, paste as new layer
Edit, clear
Selections, Select None
Select Raster 2
Effects, 3D Effects, Drop Shadow, Settings of:
Vertical : 2
Horizontal: 2
Opacity: 50
Blur: 6
Color: Black
Shadow on new layer NOT Checked
Edit, copy Doodle Flowers
Edit, paste, paste as new layer
Image, resize 40%
Move to the bottom of the frame and move to the left
Effects, 3D Effects, Drop Shadow, Same Settings
Layers, Duplicate
Image, Mirror
Edit, Copy Tube
Edit, paste, paste as new layer
Image, resize to fit your tag
Move to the bottom of the frame
Effects, 3D Effects, Drop Shadow, same Settings
Edit, Copy Basket
Edit, paste, paste as new layer
Image, resize 30%
Move to bottom right of the frame behind the tube but in front of the flowers
Effects, 3D Effects, Drop Shadow, Same Settings
Edit, copy Butterfly 1
Edit, paste, paste as new layer
Image, resize 10%
Move place above the rain in the left side
Image, rotate, free rotate, right 30
Effects, 3D Effects, Drop Shadow, Same Settings
Select Raster 2
Edit, copy Umbrella
Edit, paste, paste as new layer
Image, resize 40%
Move to the right side behind the tube and pull up to look like it is over the head of the tube
Effects, 3D Effects, Drop Shadow, same Settings
Edit, Copy Vine 1
Edit, paste, paste as new layer
Move to the left side of the frame
Image, resize 50%
Image, Mirror
Layers, arrange, send to bottom
Effects, 3D Effects, Drop Shadow, Same Settings
Layers, Duplicate
Image, Mirror
Edit, copy Birdhouse
Edit, paste, paste as new layer
Image, resize 40%
Move to the bottom right and place in front of the flowers. See my tag for placement
Effects, 3D Effects, Drop Shadow, Same Settings
Edit, copy Paper Bird
Edit, paste, paste as new layer
Image, resize 15%
Move to the left and place on the top layer of the birdhouse
Effects, 3D Effects, Drop Shadow, Same Settings
Edit, copy Paper Owl
Edit, paste, paste as new layer
Image, Resize 15%
Move to the left side of the birdhouse. See my tag for placement
Effects, 3D Effects, Drop Shadow, Same Settings
Edit, copy Doodle Flair 2
Edit, paste, paste as new layer
Image, resize 60%
Layers, arrange, send to bottom
Move up to top left some
Effects, 3D Effects, Drop Shadow, Same settings
Layers, Duplicate
Image, Mirror
Edit, copy Doodle Flair 1
Edit, paste, paste as new layer
Image, rotate, free rotate, left 90
Move to the left side of the frame
Image, resize 60%
Effects, 3D Effects, Drop Shadow, Same Settings
Layers, Duplicate
Image, Mirror
Edit, copy Flower 2
Edit, Paste, paste as new layer
Image, resize 20%
Move to the bottom right placing on the right side of the basket
Effects, 3D Effects, Drop Shadow, Same settings
Edit, copy Flower 5
Edit, paste, paste as new layer
Image, resize 20%
Move to the bottom right placing in front of the basket but behind the previous flower. Place it on the left side of the previous flower
Effects,3D Effects, Drop Shadow, Same settings
Edit, copy Cute Dog
Edit, paste, paste as new layer
Image, resize 30%
Image, Mirror
Layers, arrange, bring to top
Move to the right sitting in front of the flowers
Effects,3D Effects, Drop Shadow, Same settings
Edit, copy Butterfly 2
Edit, paste, paste as new layer
Image, rotate, free rotate, left, 30
Move to the top left in front of the rain
Effects, 3D Effects, Drop Shadow, Same Settings
Remember to add your copyright info. Make sure it is plain and legible
Add your name to the tag
Save as PNG
Subscribe to:
Posts
(Atom)