NO to AI

You will not find AI on my blog!
CT Teams


Friday, December 20, 2019

I am using the artwork of Pinuptoons. You need a license to use this tube. You can purchase this tube at CDO
I am using the PTU kit Pinuptoons Package 270 by Ladyhawwk Designs. You can find this kit at CDO
Open new image 600 x 600
Edit, copy Frame 3
Edit, paste, paste as new layer
Image, resize 70%
Edit, copy Paper 3
Edit, paste, paste as new layer
Layers, arrange, send to bottom
Selections, Invert
Edit, clear
Selections, Select none
Select Raster 2
Effects, 3D Effects, Drop Shadow, Settings of:
Vertical : 2
Horizontal: 2
Opacity: 50
Blur: 6
Color: Black
Shadow on new layer NOT Checked
Edit, copy Tube
Edit, paste, paste as new layer
Image, resize 50%
Move to the left side of the frame
Effects, 3D Effects, Drop Shadow, Same Settings
Edit, copy Ele 46
Edit, paste, paste as new layer
Image, resize 50%
Move to the left so as to cover up the tubes cut off legs
Effects, 3D Effects, Drop Shadow, Same Settings
Layers, Duplicate
Image, Mirror
Select Raster 2
Edit, copy Ele 34
Edit, paste, paste as new layer
Image, Mirror
Move to the right side of the tube placing behind the tube and over some
Effects, 3D Effects, Drop Shadow, Same Settings
Select Raster 2
Edit, copy Ele 43
Edit, paste, paste as new layer
Move over to the right side of the frame
Effect, 3D effects, Drop Shadow, Same Settings
Edit, copy Ele 32
Edit, paste, paste as new layer
Image, Resize 50%
Layers, arrange, bring to top
Move down on the left to the bottom of the flowers and move around til you have them placed the way you want
Effects, 3D Effects, Drop Shadow, Same settings
Layers, Duplicate
Image, Mirror
Select Raster 2
Edit, copy Ele 15
Edit, paste, paste as new layer
Move to the right side of the frame
Image, resize 70%
Move so you can see the bow on the candy canes
Effects, 3D Effects, Drop Shadow, Same Settings
Select Raster 2
Edit, copy Ele 19
Edit, paste, paste as new layer
Image, mirror
Image, resize 70%
Move to the left side of the frame. Move around til you can see it beside the tube some
Effects, 3D Effects, Drop Shadow, Same Settings
Remember to add your copyright info. Make sure it is plain and legible
Add your name to the tag
Save as PNG

I am using the artwork of Pinuptoons. You need a license to use this tube. You can purchase this tube at CDO
I am using the PTU kit Pinuptoons Package 270 by Ladyhawwk Designs. You can find this kit at CDO
Open new image 600 x 600
Edit, copy Frame 6
Edit, paste, paste as new layer
Image, resize 70%
Edit, copy Paper 10
Edit, paste, paste as new layer
Layers, arrange, send to bottom
Selections, Invert
Edit, clear
Edit, copy Ele 6
Edit, paste, paste as new layer
Edit, clear
Selections, Select none
Select Raster 2
Effects, 3D Effects, Drop Shadow, Settings of:
Vertical : 2
Horizontal: 2
Opacity: 50
Blur: 6
Color: Black
Shadow on new layer NOT Checked
Edit, copy Ele 20
Edit, paste, paste as new layer
Image, resize 70%
Move to the left side of the frame
Effects, 3D Effects, Drop Shadow, Same Settings
Edit, copy Ele 18
Edit, paste, paste as new layer
Move to the left side placing on the candy cane sign
Image, resize 30%
Effects, 3D Effects, Drop Shadow, Same Settings
Edit, copy Tube
Edit, paste, paste as new layer
Image, resize 70%
Effects, 3D Effects, Drop Shadow, Same Settings
Edit, copy Ele 42
Edit, paste, paste as new layer
Move to the bottom of the tag to cover up the cut off of the tube
Image, resize 90%
Effects, 3D Effects, Drop Shadow, Same Settings
Select Raster 2
Edit, copy Ele 25
Edit, paste, paste as new layer
Move to the right side of the frame
Image, resize 60%
Effect, 3D effects, Drop Shadow, Same Settings
Edit, copy Ele 38
Edit, paste, paste as new layer
Image, Resize 40%
Move to the right and place on top of the block the says Dec
Effects, 3D Effects, Drop Shadow, Same settings
Edit, copy Ele 16
Edit, paste, paste as new layer
Image, resize 60%
Move to the left and sit in front of the sign
Effects, 3D Effects, Drop Shadow, Same Settings
Edit, copy Ele 12
Edit, paste, paste as new layer
Image, resize 50%
Move to the left and place in front of the sign and behind the lantern
Effects, 3D Effects, Drop Shadow, Same Settings
Select Raster 2
Edit, copy Ele 9
Edit, paste, paste as new layer
Move to the top right of the frame. Move around til you have it placed the way you want
Effects, 3D Effects, Drop Shadow, Same Settings
Edit, copy Wordart
Edit, paste, paste as new layer
Image, resize 80%
Layers, arrange, bring to top
Move to the bottom of the tag placing on the ribbon
Effects, 3D Effects, Drop Shadow, Same Settings
Remember to add your copyright info. Make sure it is plain and legible
Add your name to the tag
Save as PNG

I am using the artwork of Pinuptoons. You need a license to use this tube. You can purchase this tube at CDO
I am using the PTU kit Pinuptoons Package 270 by Ladyhawwk Designs. You can find this kit at CDO
Open new image 600 x 600
Edit, copy Frame 5
Edit, paste, paste as new layer
Image, resize 70%
Edit, copy Paper 12
Edit, paste, paste as new layer
Layers, arrange, send to bottom
Selections, Invert
Edit, clear
Edit, copy Ele 10
Edit, paste, paste as new layer
Edit, clear
Edit, copy Ele 36
Edit, paste, paste as new layer
Move over and down on the frame some
Edit, clear
Selections, Select none
Select Raster 2
Effects, 3D Effects, Drop Shadow, Settings of:
Vertical : 2
Horizontal: 2
Opacity: 50
Blur: 6
Color: Black
Shadow on new layer NOT Checked
Edit, copy Tube
Edit, paste, paste as new layer
Image, resize 60%
Effects, 3D Effects, Drop Shadow, Same Settings
Select Raster 2
Edit, copy Ele 13
Edit, paste, paste as new layer
Image, resize 70%
Move to the right side of the frame
Effects, 3D Effects, Drop Shadow, Same Settings
Edit, copy Ele 45
Edit, paste, paste as new layer
Move to the left side of the tree making sure it is behind the tubes foot
Effects, 3D Effects, Drop Shadow, Same Settings
Edit, copy Ele 26
Edit, paste, paste as new layer
Move to the right side of the tree and behind the gift
Image, resize 60%
Effect, 3D effects, Drop Shadow, Same Settings
Select Raster 2
Edit, copy Ele 39
Edit, paste, paste as new layer
Image, Resize 60%
Move to the bottom of the frame. I placed this one behind the tubes leg and underneath the lifted up one
Effects, 3D Effects, Drop Shadow, Same settings
Select Raster 2
Edit, copy Ele 40
Edit, paste, paste as new layer
Move to the left side of the frame. Move behind the basket of letters and over to the left
Image, resize 60%
Effects, 3D Effects, Drop Shadow, Same Settings
Select Raster 2
Edit, copy Ele 11
Edit, paste, paste as new layer
Image, resize 70%
Move to the left side of the frame and move up and around til you have it placed the way you wish it to look
Effects, 3D Effects, Drop Shadow, Same Settings
Edit, copy Ele 28
Edit, paste, paste as new layer
Image, resize 30%
Move to the right and place on the tree. I moved it to the right. But you place the ornament where you feel you want it to be
Effects, 3D Effects, Drop Shadow, Same Settings
Edit, copy Ele 30
Edit, paste, paste as new layer
Image, resize 30%
Move to the left and place on the tree. I moved it to the right. But you place the ornament where you feel you want it to be
Effects, 3D Effects, Drop Shadow, Same Settings
Edit, copy Ele 29
Edit, paste, paste as new layer
Image, resize 30%
Move to the left and place on the tree. I moved it to the right. But you place the ornament where you feel you want it to be
Effects, 3D Effects, Drop Shadow, Same Settings
Edit, copy Ele 44
Edit, paste, paste as new layer
Move to the tree and move about halfway down
Image, resize 30%
Layers, duplicate
Image, resize 70%
Move the lights on up the tree and place where you wish
Effects, 3D Effects, Drop Shadow, Same Settings
Remember to add your copyright info. Make sure it is plain and legible
Add your name to the tag
Save as PNG
Monday, December 16, 2019
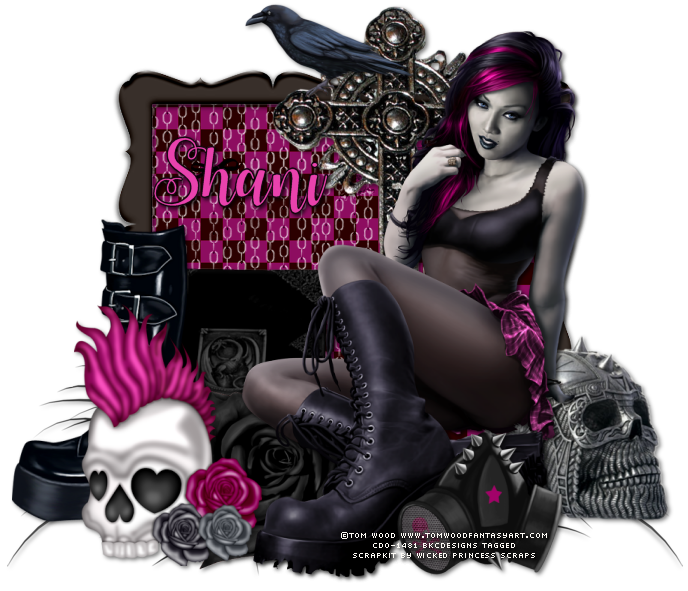
I am using the artwork of Tom Wood. You need a license to use this tube. You can purchase this tube at CDO
I am using the PTU Kit IB Tom Wood 2-1 by Wicked Princess Scraps. This kit is sold at CDO
Open new image 700 x 700
Edit, copy Frame
Edit, paste, paste as new layer
Image, rotate, free rotate, right 90
With your magic wand click inside of the frame
Selections, Modify, Expand by 8
Edit, copy Paper 4
Edit, paste, paste as new layer
Layers, arrange, send to bottom
Selections, Invert
Edit, clear
Edit, copy curtain
Edit, paste, paste as new layer
Image, resize 75%
Move over and around til you have it the way you want it
Edit, clear
Selections, Select None
Select Raster 2
Effects, 3D Effects, Drop Shadow, Settings of:
Vertical : 2
Horizontal: 2
Opacity: 65
Blur: 5
Color: Black
Shadow on new layer NOT Checked
Edit, Copy Tube
Edit, paste, paste as new layer
Image, resize 75%
Move to the right side of the frame. Her boot will be on the bottom of the frame
Effects, 3D Effects, Drop Shadow, same Settings
Select Raster 2
Edit, copy Cross
Edit, paste, paste as new layer
Image, resize 70%
Move to the left side of the tube and move up and over some. See my tag for placement
Effects, 3D Effects, Drop Shadow, Same Settings
Edit, copy Skull 2
Edit, paste, paste as new layer
Image, resize 70%
Image, mirror
Move to the bottom left of the frame
Effects, 3D Effects, Drop Shadow, Same Settings
Select Raster 2
Edit, copy Flower
Edit, paste, paste as new layer
Image, resize 60%
Move behind the skull and to the right. Move so you can see behind the tubes legs and the skull
Effects, 3D Effects, Drop Shadow, Same Settings
Select Raster 2
Edit, copy Book
Edit, paste, paste as new layer
Image, resize 70%
Move behind the skull and over to the right some. See my tag for placement
Effects, 3D Effects, Drop Shadow, Same Settings
Edit, copy Grass
Edit, paste, paste as new layer
Move to the bottom left of the frame
Layers, arrange, send to bottom
Effects, 3D Effects, Drop Shadow, Same Settings
Layers, Duplicate
Image, Mirror
Edit, copy Boot
Edit, paste, paste as new layer
Layers, arrange, bring to top
Image, resize 60%
Move to left side of the book behind the skull
Effects, 3D Effects, Drop Shadow, Same Settings
Edit, copy Bird
Edit, paste, paste as new layer
Image, resize 40%
Layers, arrange, bring to top
Move to place on the cross
Effects, 3D Effects, Drop Shadow, Same Settings
Select Raster 2
Edit, copy Skull 3
Edit, paste, paste as new layer
Image, Mirror
Image, resize 60%
Move to the right and move behind the tube and over so that you can see it
Effects, 3D Effects, Drop Shadow, Same Settings
Edit, copy Mask
Edit, paste, paste as new layer
Image, resize 60%
Layers, arrange, bring to top
Move to place in front of the feet of the tube
Effects, 3D Effects, Drop Shadow, Same Settings
Remember to add your copyright info. Make sure it is plain and legible
Add your name to the tag
Save as PNG
Saturday, December 14, 2019

I am using the artwork of Sheena Pike. You need a license to use this tube. You can purchase this tube at CDO
I am using the PTU Kit IB Sheena Pike 42-3 by Foxys Designz. This kit is sold at CDO

Open new image 600 x 600
Edit, copy Element 1
Edit, paste, paste as new layer
Image, resize 70%
With your magic wand click inside of the frame
Selections, Modify, Expand by 8
Edit, copy Paper 4
Edit, paste, paste as new layer
Layers, arrange, send to bottom
Selections, Invert
Edit, clear
Selections, Select None
Select Raster 2
Effects, 3D Effects, Drop Shadow, Settings of:
Vertical : 2
Horizontal: 2
Opacity: 65
Blur: 5
Color: Black
Shadow on new layer NOT Checked
Edit, Copy Tube
Edit, paste, paste as new layer
Image, resize 60%
Effects, 3D Effects, Drop Shadow, same Settings
Edit, copy Frame 2
Edit, paste, paste as new layer
I used my selection tool to go around the greenery that is standing straight up and deleted it
Image, resize 65%
Layers, arrange, Send to bottom
Move to frame the element
Effects, 3D Effects, Drop Shadow, Same Settings
Layers, Duplicate
Image, Mirror
Edit, copy Element 17
Edit, paste, paste as new layer
Layers, arrange, send to bottom
Effects, 3D Effects, Drop Shadow, Same Settings
Layers, Duplicate
Image, Mirror
Image, flip
Select Raster 2
Edit, copy Element 10
Edit, paste, paste as new layer
Image, resize 60%
Move to the left side of the frame and move up toward the top of the frame
Effects, 3D Effects, Drop Shadow, Same Settings
Layers, Duplicate
Image, Mirror
Select Raster 2
Edit, copy Element 5
Edit, paste, paste as new layer
Move to the bottom left of the frame
Image, resize 30%
Effects, 3D Effects, Drop Shadow, Same Settings
Layers, Duplicate
Image, Mirror
Select Raster 2
Edit, copy Element 9
Edit, paste, paste as new layer
Image, resize 40%
Move to the left side of the frame and move up and around til you have it placed how you want
Effects, 3D Effects, Drop Shadow, Same Settings
Layers, Duplicate
Image, Mirror
Edit, copy Element 6
Edit, paste, paste as new layer
Image, resize 40%
Move to the left and move down so it is behind some of the flowers and move over so it is close to the sloth
Effects, 3D Effects, Drop Shadow, Same Settings
Edit, copy Element 13
Edit, paste, paste as new layer
Image, resize 40%
Layers, arrange, bring to top
Move to the top right of the frame
Effects, 3D Effects, Drop Shadow, Same Settings
Edit, copy Element 8
Edit, paste, paste as new layer
Move to the right side of the frame
Layers, arrange, send to bottom
Than move up one spot so it is above the dots
Effects, 3D Effects, Drop Shadow, Same Settings
Layers, Duplicate
Image, mirror
Edit, copy Element 18
Edit, paste, paste as new layer
Layers, arrange, bring to top
Image, resize 40%
Move to the left side of the frame and place near where the branch is for the sloth
Effects, 3D Effects, Drop Shadow, Same Settings
Layers, Duplicate
Image, Mirror
Move down toward the bottom on the right side
Edit, copy Wordart 1
Edit, paste, paste as new layer
Image, resize 30%
Move down to the bottom of the tag. I move it so it is behind the sloths feet and moved around til I had it the way I wanted it. You can place it how you want on your tag
Effects, 3D Effects, Drop Shadow, Same Settings
Remember to add your copyright info. Make sure it is plain and legible
Add your name to the tag
Save as PNG
Wednesday, December 4, 2019

I am using the artwork of Enys Guerrero. You need a license to use this tube. You can purchase this tube at CDO
I am using the PTU Kit IB Enys Guerrero 36-3 by Wicked Princess Scraps. This kit is sold at CDO

Open new image 700 x 700
Edit, copy Frame 2
Edit, paste, paste as new layer
Image, rotate, free rotate, right 90
With your magic wand click inside of the frame
Selections, Modify, Expand by 8
Edit, copy Paper 3
Edit, paste, paste as new layer
Layers, arrange, send to bottom
Selections, Invert
Edit, clear
Selections, Select None
Select Raster 2
Effects, 3D Effects, Drop Shadow, Settings of:
Vertical : 2
Horizontal: 2
Opacity: 65
Blur: 5
Color: Black
Shadow on new layer NOT Checked
Edit, Copy Grass 1
Edit, paste, paste as new layer
Move to the bottom of the frame. Move toward the left some
Effects, 3D Effects, Drop Shadow, same Settings
Layers, Duplicate
Image, Mirror
Edit, copy Log
Edit, paste, paste as new layer
Image, resize 75%
Move down to place on the grass in the middle of it
Effects, 3D Effects, Drop Shadow, Same Settings
Edit, copy Tube
Edit, paste, paste as new layer
Image, resize 70%
Move the tube to look like it is sitting on the log
Effects, 3D Effects, Drop Shadow, Same Settings
Edit, copy Tree
Edit, paste, paste as new layer
Image, resize 85%
Move behind the log and over to the left. Move til you have it placed the way you want it to be placed
Effects, 3D Effects, Drop Shadow, Same Settings
Edit, copy Bird 1
Edit, paste, paste as new layer
Layers, arrange, bring to top
Image, Mirror
Image, resize 40%
Move to the left and place on a tree branch
Effects, 3D Effects, Drop Shadow, Same Settings
Edit, copy Branch
Edit, paste, paste as new layer
Image, Mirror
Move behind the log but in front of the tree
Image, resize 60%
Move to the left in front of the tree
Effects, 3D Effects, Drop Shadow, Same Settings
Edit, copy Lantern
Edit, paste, paste as new layer
Image, resize 60%
Move to the right side of the tag. Move behind the log and move on over on the grass
Effects, 3D Effects, Drop Shadow, Same Settings
Edit, copy Candle 1
Edit, paste, paste as new layer
Image, resize 60%
Move to the right side of the tag, moving behind the lantern and moving on over to the right
Effects, 3D Effects, Drop Shadow, Same Settings
Edit, copy Fox 1
Edit, paste, paste as new layer
Image, resize 60%
Move to the left and move behind the tags legs and move over to the left
Effects, 3D Effects, Drop Shadow, Same Settings
Select Raster 2
Edit, copy Flower 2
Edit, paste, paste as new layer
Image, resize 60%
Move to the right side of the frame and move around til you have it the way you want it
Effects, 3D Effects, Drop Shadow, Same Settings
Edit, copy Mushroom 1
Edit, paste, paste as new layer
Image, resize 50%
Move to the left, placing behind the fox and log
Effects, 3D Effects, Drop Shadow, Same Settings
Edit, Copy Letters 1
Edit, paste, paste as new layer
Image, Resize 40%
Move to the right placing behind the tube and in front of the log
Effects, 3D Effects, Drop Shadow, Same Settings
Edit, copy Candy
Edit, paste, paste as new layer
Image, resize 40%
Move to the right of the letters
Effects, 3D Effects, Drop Shadow, Same Settings
Remember to add your copyright info. Make sure it is plain and legible
Add your name to the tag
Save as PNG
Subscribe to:
Posts
(Atom)