NO to AI

You will not find AI on my blog!
CT Teams


Thursday, February 27, 2014

I am using the artwork of Lidia Misfit. You need a license to use these tubes. You can purchase the tube at The PSP Project
I am using the PTU kit Envy by Gimptastic Scraps . This kit is exclusive to The PSP Project
Open new image 600 x 600
Edit, Copy Frame 3
Edit, paste, paste as new layer
Image, resize 70%
With your magic wand click inside of the frames
Selections, Modify, Expand by 8
Edit, copy Paper 2
Edit, paste, paste as new layer
Layers, arrange, send to bottom
Selections, Invert
Edit, Clear
Edit, copy Light Beam
Edit, paste, paste as new layer
Edit, Clear
Selections, Select None
Select Raster 2
Effects, 3D Effects, Drop Shadow, Settings of:
Vertical : -3
Horizontal: 3
Opacity: 50
Blur: 10
Color: Black
Shadow on new layer NOT Checked
Effects, 3D Effects, Drop Shadow, Same Settings
Edit, Copy Tube
Edit, paste, paste as new layer
Image, resize 48%
So that you can fit the tube into the frame since she has a cut off top of the head and body
Effects, 3D Effects, Drop Shadow, Same Settings
Edit, copy Stamp
Edit, paste, paste as new layer
Image, resize 85%
Layers, arrange, send to bottom
Effects, 3D Effects, Drop Shadow, Same Settings
Edit, Copy Blood
Edit, paste, paste as new layer
Effects, 3D Effects, Drop Shadow, same settings
Edit, copy Wire
Edit, paste, paste as new layer
Effects, 3D Effects, Drop Shadow, Same Settings
Edit, copy Coffin
Edit, paste, paste as new layer
Layers, arrange, bring to top
Image, Mirror
Move to bottom of the frame and place at the bottom of the tube
Effects, 3D Effects, Drop Shadow, Same settings
Edit, Copy Mushrooms
Edit, paste, paste as new layer
Image, resize 70%
Move to the right and than down behind the coffin
Effects, 3D Effects, Drop Shadow, Same Settings
Edit, copy Toxic Drum
Edit, paste, paste as new layer
Image, resize 50%
Move to the left of the frame behind the coffin
Effects, 3D Effects, Drop Shadow, Same Settings
Edit, Copy Pills
Edit, Paste, paste as new layer
Image, resize 50%
Move to the left and place in front of the barrel and behind the coffin some
Effects, 3D Effects, Drop Shadow, Same Settings
Edit, copy Vial
Edit, Paste, Paste as new layer
Move to bottom left and place in front of the pills
Effects, 3D Effects, Drop Shadow, Same Settings
Edit, Copy Crow
Edit, paste, paste as new layer
Move to the right and place on the mushroom
Image, resize 50%
Effects, 3D Effects, Drop Shadow, same Settings
Edit, copy Bottle
Edit, paste, paste as new layer
Image, resize 60%
Move to the left and place behind the barrel
Effects, 3d Effects, Drop Shadow, Same Settings
Edit, Copy Deco 2
Edit, paste, paste as new layer
Move to the top of the frame
Layers, arrange, send to bottom
Effects, 3D Effects, Drop Shadow, Same Settings
Edit, copy Evil Eye
Edit, paste, paste as new layer
Move to the bottom left of the coffin
Image, resize 60%
Effects, 3D Effects, Drop Shadow, Same Settings
Edit, Copy Dagger
Edit, paste, paste as new layer
Layers, arrange, bring to top
Move to the top left of the frame
Effects, 3D Effects, Drop Shadow, same Settings
Remember to add your copyright info. Make sure it is plain and legible
Add your name to the tag
Save as PNG
Monday, February 24, 2014

I am using the artwork of FTU artist Lia
I am using the PTU kit Dats Mardi Gras by Gimptastic Scraps . This kit is exclusive to The PSP Project and Thrifty Scraps
Open new image 600 x 600
Edit, Copy Frame 4
Edit, paste, paste as new layer
Image, resize 80%
With your magic wand click inside of the frame
Selections, Modify, Expand by 8
Edit, copy Paper 7
Edit, paste, paste as new layer
Layers, arrange, send to bottom
Selections, Invert
Edit, Clear
Edit, copy Sparkles
Edit, paste, paste as new layer
Edit, Clear
Edit, copy Confetti 1
Edit, paste, paste as new layer
Move to the right of the frame
Edit, Clear
Selections, Select None
Layers, Duplicate
Image, Mirror
Select Raster 2
Effects, 3D Effects, Drop Shadow, Settings of:
Vertical : -3
Horizontal: 3
Opacity: 50
Blur: 10
Color: Black
Shadow on new layer NOT Checked
Effects, 3D Effects, Drop Shadow, Same Settings
Edit, Copy Background
Edit, paste, paste as new layer
Layers, arrange, send to bottom
Image, resize 85%
Effects, 3D Effects, Drop Shadow, Same Settings
Edit, copy Music Notes
Edit, paste, paste as new layer
Image, resize 90%
Effects, 3D Effects, Drop Shadow, Same Settings
Edit, Copy Bricks
Layers, arrange, send to bottom
Move up above the top of the frame
Layers, Duplicate
Image, Flip
Image, Mirror
Edit, copy Fireworks
Edit, paste, paste as new layer
Layers, arrange, bring to top
Effects, 3D Effects, Drop Shadow, Same Settings
Edit, copy Wrought Iron
Edit, paste, paste as new layer'
Move to bottom of the frame
Effects, 3D Effects, Drop Shadow, Same settings
Edit, Copy Beads 2
Edit, paste, paste as new layer
Image, resize 85%
Move to the top of the frame
Effects, 3D Effects, Drop Shadow, Same Settings
Edit, Copy Tube
Edit, paste, paste as new layer
Image, resize 85%
Effects, 3D Effects, Drop Shadow, Same Settings
Edit, copy Label
Edit, paste, paste as new layer
Move to the bottom of the cut off legs of the tube to cover them up
Effects, 3D Effects, Drop Shadow, Same Settings
Edit, Copy Mask 2
Edit, Paste, paste as new layer
Image, resize 50%
Move to the top right of the frame
Effects, 3D Effects, Drop Shadow, Same Settings
Edit, copy King Cake
Edit, Paste, Paste as new layer
Image, resize 60%
Move to bottom right of the frame and lay on top of the label. See my tag for placement
Effects, 3D Effects, Drop Shadow, Same Settings
Edit, Copy Beads 3
Edit, paste, paste as new layer
Move to the top right and place beneath the mask
Image, resize 50%
Effects, 3D Effects, Drop Shadow, same Settings
Edit, copy Beads 1
Edit, paste, paste as new layer
Image, resize 50%
Move to the right and place on top of the other beads
Effects, 3d Effects, Drop Shadow, Same Settings
Edit, Copy Horn 1
Edit, paste, paste as new layer
Image, resize 45%
Move to the left and place on the label to the left. See my tag for placement
Effects, 3D Effects, Drop Shadow, Same Settings
Edit, copy Bead
Edit, paste, paste as new layer
Move to the top left of the frame
Effects, 3D Effects, Drop Shadow, Same Settings
Edit, Copy Fleur_de_Lis
Edit, paste, paste as new layer
Image, resize 60%
Move to the left and place it on the frame
Effects, 3D Effects, Drop Shadow, same Settings
Remember to add your copyright info. Make sure it is plain and legible
Add your name to the tag
Save as PNG
Saturday, February 22, 2014

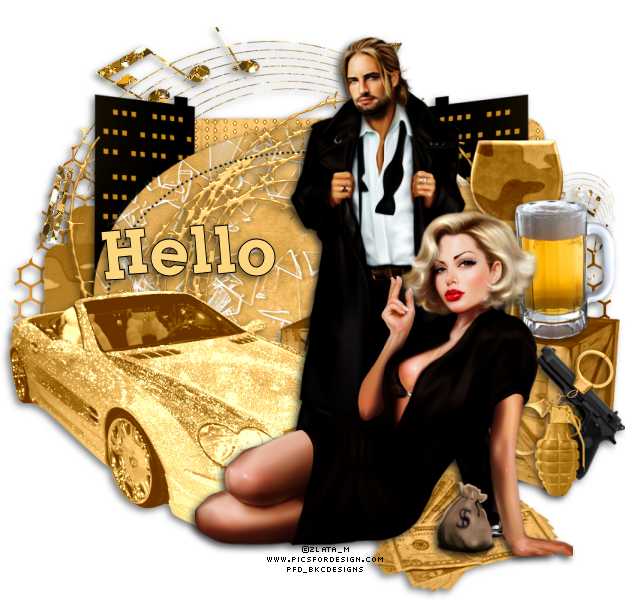
I am using the FTU Kit Gangster Glam by Gimptastic Scrap. Amy sales exclusively at The PSP Project and Thrifty Scraps. I am using the artwork of Zlata_M From PicsForDesign. I believe this was a tube that was giving away one month for buying three or more tubes or kits at the store. To get these extras click on the tag to see full size version. Please DO NOT alter these in anyway!


Friday, February 21, 2014

I am using the artwork of Keith Garvey. You need a license to use this tube. I bought this tube when hew was saling at PTE. You can now buy his tubes at his store HERE
I am using the PTU kit Shamrock Shuffle by Tasha's Playground. This kit is now free and can be found HERE
Open new image 600 x 600
Edit, Copy Frame 3
Edit, paste, paste as new layer
Image, resize 80%
With your magic wand click inside of the frame
Selections, Modify, Expand by 8
Edit, copy Paper 2
Edit, paste, paste as new layer
Layers, arrange, send to bottom
Selections, Invert
Edit, Clear
Edit, copy Sparkles
Edit, paste, paste as new layer
Edit, Clear
Edit, copy splatter
Edit, paste, paste as new layer
Move up toward the top of the frame some
Edit, Clear
Selections, Select None
Select Raster 2
Effects, 3D Effects, Drop Shadow, Settings of:
Vertical : -3
Horizontal: 3
Opacity: 50
Blur: 10
Color: Black
Shadow on new layer NOT Checked
Effects, 3D Effects, Drop Shadow, Same Settings
Edit, Copy Dots
Edit, paste, paste as new layer
Layers, arrange, send to bottom
Effects, 3D Effects, Drop Shadow, Same Settings
Edit, copy Swirl
Edit, paste, paste as new layer
Move to the left side of the frame
Effects, 3D Effects, Drop Shadow, Same Settings
Layers, Duplicate
Image, Mirror
Edit, copy Clover Rope
Edit, paste, paste as new layer
Layers, arrange, bring to top
Image, resize 80%
Move to the top of the Frame
Effects, 3D Effects, Drop Shadow, Same Settings
Edit, copy Pot of Gold
Edit, paste, paste as new layer'
Image, resize 60%
Move to bottom right of the frame
Effects, 3D Effects, Drop Shadow, Same settings
Edit, Copy Beer 2
Edit, paste, paste as new layer
Image, resize 70%
Move to the left bottom of the frame
Effects, 3D Effects, Drop Shadow, Same Settings
Edit, Copy Beer
Edit, paste, paste as new layer
Image, resize 60%
Move to the left of Beer 2
Effects, 3D Effects, Drop Shadow, Same Settings
Edit, copy Charm
Edit, paste, paste as new layer
Image, resize 70%
Move to the bottom left and place in front of the beers
Effects, 3D Effects, Drop Shadow, Same Settings
Edit, Copy Shamrock 1
Edit, Paste, paste as new layer
Image, resize 50%
Move to the top left of the frame and place over the bow
Effects, 3D Effects, Drop Shadow, Same Settings
Layers, Duplicate
Image, Mirror
Edit, copy Tube
Edit, Paste, Paste as new layer
Image, mirror
Image, resize 85%
Move down some so part of the cut off leg is behind the pot of gold
Effects, 3D Effects, Drop Shadow, Same Settings
Edit, Copy Ribbon 2
Edit, paste, paste as new layer
Move down to the bottom of the frame to cover up the cut off legs of the tube
Image, resize 80%
Effects, 3D Effects, Drop Shadow, same Settings
Edit, copy Hat
Edit, paste, paste as new layer
Image, resize 40%
Layers, arrange, bring to top
Move to the right and place to the right of the pot of gold
Effects, 3d Effects, Drop Shadow, Same Settings
Edit, Copy Horse Shoe 1
Edit, paste, paste as new layer
Image, resize 40%
Move to the right of the frame and place it in the middle of the frame
Effects, 3D Effects, Drop Shadow, Same Settings
Edit, copy Games
Edit, paste, paste as new layer
Image, resize 70%
Move to the bottom right of the frame and place in front of the pot of gold but behind the hat some
Effects, 3D Effects, Drop Shadow, Same Settings
Edit, Copy Scribble
Edit, paste, paste as new layer
Move down til it is above Raster 2
Effects, 3D Effects, Drop Shadow, same Settings
Remember to add your copyright info. Make sure it is plain and legible
Add your name to the tag
Save as PNG
Shamrock Shuffle FTU Cluster Frame using the PTU Kit Shamrock Shuffle by Tasha's Playground. Tasha no longer sales kits.

Thursday, February 20, 2014

I am using the artwork of Eugene Rzhevskii You need a license to use this tubes. You can buy the tube at PFD
I am using the PTU kit Kiss My Irish Ass by Freek's Creations. You can buy the kit at Mystical Scraps
Open new image 600 x 600
Edit, Copy Frame
Edit, paste, paste as new layer
Image, resize 65%
With your magic wand click inside of the frame
Selections, Modify, Expand by 8
Edit, copy Paper 6
Edit, paste, paste as new layer
Layers, arrange, send to bottom
Selections, Invert
Edit, Clear
Edit, copy Sparkles
Edit, paste, paste as new layer
Move up some to the top
Edit, Clear
Edit, copy light burst
Edit, paste, paste as new layer
Move down toward the bottom right
Edit, Clear
Selections, Select None
Select Raster 2
Effects, 3D Effects, Drop Shadow, Settings of:
Vertical : -3
Horizontal: 3
Opacity: 50
Blur: 10
Color: Black
Shadow on new layer NOT Checked
Effects, 3D Effects, Drop Shadow, Same Settings
Edit, Copy Splash
Edit, paste, paste as new layer
Image, resize 80%
Layers, arrange, send to bottom
Effects, 3D Effects, Drop Shadow, Same Settings
Edit, copy Pot of Gold
Edit, paste, paste as new layer
Layers, arrange, bring to top
Image, resize 60%
Move to the bottom right of the frame
Effects, 3D Effects, Drop Shadow, Same Settings
Edit, copy Harp
Edit, paste, paste as new layer
Move to the left side of the frame
Image, resize 70%
Effects, 3D Effects, Drop Shadow, Same Settings
Select Raster 2
Edit, Copy Banner
Edit, paste, paste as new layer
Image, resize 70%
Move to the top of the frame
Effects, 3D Effects, Drop Shadow, Same settings
Edit, Copy Tube
Edit, paste, paste as new layer
Image, resize to fit your tag
Effects, 3D Effects, Drop Shadow, Same Settings
Edit, Copy Flask
Edit, paste, paste as new layer
Image, resize 30%
Move to the left and move behind the tube but in front of the harp. See my tag for placement
Effects, 3D Effects, Drop Shadow, Same Settings
Edit, copy Beer
Edit, paste, paste as new layer
Image, Mirror
Image, resize 30%
Move to the left side of the flask
Effects, 3D Effects, Drop Shadow, Same Settings
Edit, Copy Bouquet
Edit, Paste, paste as new layer
Move to the right and place behind the pot of gold. Move up toward the top of the frame some
Effects, 3D Effects, Drop Shadow, Same Settings
Edit, copy Cupacke
Edit, Paste, Paste as new layer
Image, resize 30%
Move to the left and place in front of the flask and beer
Effects, 3D Effects, Drop Shadow, Same Settings
Edit, Copy Hat
Edit, paste, paste as new layer
Image, resize 40%
Move to the right and place in front of the pot of gold
Effects, 3D Effects, Drop Shadow, same Settings
Edit, copy Kiss Mark
Edit, paste, paste as new layer
Image, resize 20%
Move to the top right and place on the top of the bouquet
Effects, 3d Effects, Drop Shadow, Same Settings
Remember to add your copyright info. Make sure it is plain and legible
Add your name to the tag
Save as PNG
Wednesday, February 19, 2014

I am using the artwork of Caron Vinson. You need a license to use this tube. I purchased this tube at CILM when it was open. You can purchase her work at CDO
I am using the PTU kit Faerie Fantasy by Manipulated by Magik. You can buy this kit exclusively at PFD and Mystical Scraps
Open new image 600 x 600
Edit, Copy Frame 4
Edit, paste, paste as new layer
Image, resize 80%
With your magic wand click inside of the frame
Selections, Modify, Expand by 8
Edit, copy Paper 11
Edit, paste, paste as new layer
Layers, arrange, send to bottom
Selections, Invert
Edit, Clear
Edit, copy Sparkles
Edit, paste, paste as new layer
Move to the right some
Edit, Clear
Edit, copy light effect
Edit, paste, paste as new layer
Move up toward the top of the frame some
Edit, Clear
Selections, Select None
Select Raster 2
Effects, 3D Effects, Drop Shadow, Settings of:
Vertical : -3
Horizontal: 3
Opacity: 50
Blur: 10
Color: Black
Shadow on new layer NOT Checked
Effects, 3D Effects, Drop Shadow, Same Settings
Edit, Copy Tree
Edit, paste, paste as new layer
Image, resize 80%
Move to the left side of the frame
Effects, 3D Effects, Drop Shadow, Same Settings
Edit, copy Mushroom Home
Edit, paste, paste as new layer
Move to the bottom left of the frame. see my tag for placement
Effects, 3D Effects, Drop Shadow, Same Settings
Edit, copy Venus
Edit, paste, paste as new layer
Move to the left of the mushroom house
Image, resize 60%
Effects, 3D Effects, Drop Shadow, Same Settings
Edit, copy Bird 2
Edit, paste, paste as new layer'
Image, resize 50%
Move to place at the top of the tree
Effects, 3D Effects, Drop Shadow, Same settings
Select Raster 2
Edit, Copy Flower Wreath
Edit, paste, paste as new layer
Effects, 3D Effects, Drop Shadow, Same Settings
Edit, Copy Doodle
Edit, paste, paste as new layer
Image, Mirror
Layers, arrange, send to bottom
Image, resize 85%
Move to the right
Layers, arrange, send to bottom
Effects, 3D Effects, Drop Shadow, Same Settings
Layers, Duplicate
Image, Mirror
Edit, copy Tube
Edit, paste, paste as new layer
Layers, arrange, bring to top
Effects, 3D Effects, Drop Shadow, Same Settings
Edit, Copy Faery Dust
Edit, Paste, paste as new layer
Image, resize 60%
Move to the right and place to the right and behind the tag. See my tag for placement
Effects, 3D Effects, Drop Shadow, Same Settings
Edit, copy Jar
Edit, Paste, Paste as new layer
Image, resize 50%
Move to the right and behind the faery dust and to the right of that
Effects, 3D Effects, Drop Shadow, Same Settings
Edit, Copy Dandelion
Edit, paste, paste as new layer
Move to the right side of the frame and move behind the jar
Effects, 3D Effects, Drop Shadow, same Settings
Edit, copy Pom Pom Flower
Edit, paste, paste as new layer
Image, mirror
Image, resize 70%
Move to the right and in front of the dandelions
Effects, 3d Effects, Drop Shadow, Same Settings
Edit, Copy Deco
Edit, paste, paste as new layer
Move toward the top
Layers, arrange, send to the bottom
Effects, 3D Effects, Drop Shadow, Same Settings
Edit, copy Flower Scatter
Edit, paste, paste as new layer
Edit, Copy Unicorn
Edit, paste, paste as new layer
Image, resize 50%
Move to the right and place in front of the faery dust
Effects, 3D Effects, Drop Shadow, same Settings
Remember to add your copyright info. Make sure it is plain and legible
Add your name to the tag
Save as PNG
Tuesday, February 18, 2014

I am using the artwork of Eugene Rzhevskii. You need a license to use these tubes. You can purchase the tube at PFD
I am using the PTU kit Gothic Rose by Gimptastic Scraps . This kit is exclusive to The PSP Project
Open new image 600 x 600
Edit, Copy Frame 1
Edit, paste, paste as new layer
Image, resize 80%
With your magic wand click inside of the frame
Selections, Modify, Expand by 8
Edit, copy Paper 10
Edit, paste, paste as new layer
Layers, arrange, send to bottom
Selections, Invert
Edit, Clear
Selections Select None
Select Raster 2
Effects, 3D Effects, Drop Shadow, Settings of:
Vertical : -3
Horizontal: 3
Opacity: 50
Blur: 10
Color: Black
Shadow on new layer NOT Checked
Effects, 3D Effects, Drop Shadow, Same Settings
Edit, Copy Frame 5
Edit, paste, paste as new layer
Layers, arrange, send to bottom
Image, resize 80%
Effects, 3D Effects, Drop Shadow, Same Settings
Edit, copy Lawn
Edit, paste, paste as new layer
Layers, arrange, bring to top
Move to the bottom of the frame
Effects, 3D Effects, Drop Shadow, Same Settings
Edit, copy Cloud
Edit, paste, paste as new layer
Move to the top of the frame
Effects, 3D Effects, Drop Shadow, Same Settings
Edit, copy Moon
Edit, paste, paste as new layer
Move to the top right of the frame
Effects, 3D Effects, Drop Shadow, Same settings
Edit, Copy Casket
Edit, paste, paste as new layer
Image, resize 75%
Move to the right and place on the lawn and in front of the moon
Effects, 3D Effects, Drop Shadow, Same Settings
Edit, Copy Heart Cross
Edit, paste, paste as new layer
Move to the right and place on the coffin
Image, resize 80%
Effects, 3D Effects, Drop Shadow, Same Settings
Edit, copy Birds
Edit, paste, paste as new layer
Image, Mirror
Move down to place on the moon and clouds
Effects, 3D Effects, Drop Shadow, Same Settings
Edit, Copy Tube
Edit, Paste, paste as new layer
Image, resize to the size to fit your tag
Effects, 3D Effects, Drop Shadow, Same Settings
Edit, copy Lantern
Edit, Paste, Paste as new layer
Move to the left side of the frame
Effects, 3D Effects, Drop Shadow, Same Settings
Edit, Copy Fountain
Edit, paste, paste as new layer
Image, resize 60%
Move to the right side of the frame and than move behind the casket and to the right some
Effects, 3D Effects, Drop Shadow, same Settings
Select Raster 3
Selections, Select All, Float, Defloat
Edit, copy Spider
Edit, paste, paste as new layer
Move to the left so you can see it beside the tube
Selections, Invert
Edit, Clear
Selections, Select None
Effects, 3d Effects, Drop Shadow, Same Settings
Edit, Copy Poison
Edit, paste, paste as new layer
Layers, arrange, bring to top
Move to the left and place to the left of the lantern
Image, resize 70%
Effects, 3D Effects, Drop Shadow, Same Settings
Edit, copy Bottle
Edit, paste, paste as new layer
Image, resize 70%
Move to the left and than down and to the right behind the poison
Edit, Copy Candles
Edit, paste, paste as new layer
Image, resize 60%
Move to the right and place in front of the cross
Effects, 3D Effects, Drop Shadow, same Settings
Edit, copy Umbrella
Edit, paste, paste as new layer
Move to the left and move til below the lantern
Image, rotate, free rotate, left 20
Effects, 3D Effects, Drop Shadow, Same Settings
Edit, copy Owl
Edit, paste, paste as new layer
Image, resize 50%
Move to the right and set on the fountain
Effects, 3D Effects, Drop Shadow, Same Settings
Remember to add your copyright info. Make sure it is plain and legible
Add your name to the tag
Save as PNG

I am using the artwork of Anna Liwanag. You need a license to use this tube. You can purchase this tube at CDO
I am using the PTU kit One Fine Day by Tasha's Playground. You can find where to purchase the kit HERE
Open new image 600 x 600
Edit, Copy Frame 4
Edit, paste, paste as new layer
Image, resize 80%
With your magic wand click inside of the frame
Selections, Modify, Expand by 8
Edit, copy Paper 1
Edit, paste, paste as new layer
Layers, arrange, send to bottom
Selections, Invert
Edit, Clear
Selections Select None
Edit, copy Sparkles
Edit, paste, paste as new layer
Edit, Clear
Edit, copy Swirl
Edit, paste, paste as new layer
Move down some in the frame
Edit, Clear
Selections, Select None
Select Raster 2
Effects, 3D Effects, Drop Shadow, Settings of:
Vertical : -3
Horizontal: 3
Opacity: 50
Blur: 10
Color: Black
Shadow on new layer NOT Checked
Effects, 3D Effects, Drop Shadow, Same Settings
Edit, Copy Frame 5
Edit, paste, paste as new layer
Layers, arrange, send to bottom
Image, resize 80%
Effects, 3D Effects, Drop Shadow, Same Settings
Edit, copy Branch 1
Edit, paste, paste as new layer
Layers, arrange, bring to top
Image, resize 80%
Move to the right side of the frame
Effects, 3D Effects, Drop Shadow, Same Settings
Layers, Duplicate
Image, Mirror
Edit, copy Branch 2
Edit, paste, paste as new layer
Move Below Branch 1 on the left of the frame
Effects, 3D Effects, Drop Shadow, Same Settings
Edit, copy Leaves 5
Edit, paste, paste as new layer
Move to the left of the frame
Layers, arrange, send to bottom
Effects, 3D Effects, Drop Shadow, Same settings
Layers, Duplicate
Image, Mirror
Edit, Copy Tube
Edit, paste, paste as new layer
Layers, arrange, bring to top
Image, resize 90%
Effects, 3D Effects, Drop Shadow, Same Settings
Edit, Copy Flower Scatter
Edit, paste, paste as new layer
Move to the bottom of the tag. This way it will cover up the cut off legs
Effects, 3D Effects, Drop Shadow, Same Settings
Edit, copy flowers
Edit, paste, paste as new layer
Image, flip
Image, resize 80%
Move down to place on top of flower scatter
Effects, 3D Effects, Drop Shadow, Same Settings
Edit, Copy Birds
Edit, Paste, paste as new layer
Image, resize 60%
Move to the left of the frame toward the top. See my tag for placement
Effects, 3D Effects, Drop Shadow, Same Settings
Edit, copy Butterfly 1
Edit, Paste, Paste as new layer
Image, resize 60%
Layers, arrange, bring to top
Move to the right side of the frame
Effects, 3D Effects, Drop Shadow, Same Settings
Edit, Copy Butterfly 2
Edit, paste, paste as new layer
Image, resize 60%
Move to the left side of the frame. See my tag for placement
Effects, 3D Effects, Drop Shadow, same Settings
Remember to add your copyright info. Make sure it is plain and legible
Add your name to the tag
Save as PNG
One Fine Day FTU Cluster Frame using the PTU Kit One Fine Day by Tasha's Playground.
You can go HERE to see where Tasha sells her kits!

Sunday, February 16, 2014

I am using the FTU artist NoFlutter.
I am using the PTU kit Carnival by Manipulated by Magik. You can buy this kit exclusively at PFD and Mystical Scraps and Thrifty Scraps
Open new image 600 x 600
Edit, Copy Frame 6
Edit, paste, paste as new layer
Image, resize 75%
With your magic wand click inside of the frame
Selections, Modify, Expand by 8
Edit, copy Paper 2
Edit, paste, paste as new layer
Layers, arrange, send to bottom
Selections, Invert
Edit, Clear
Selections Select None
Edit, copy Sparkles
Edit, paste, paste as new layer
Move to the top of the frame
Edit, Clear
Selections, Select None
Layers, Duplicate
Image, Flip
Select Raster 2
Effects, 3D Effects, Drop Shadow, Settings of:
Vertical : -3
Horizontal: 3
Opacity: 50
Blur: 10
Color: Black
Shadow on new layer NOT Checked
Effects, 3D Effects, Drop Shadow, Same Settings
Edit, Copy Street Lamp
Edit, paste, paste as new layer
Move to the right side of the frame. See my tag for placement
Effects, 3D Effects, Drop Shadow, Same Settings
Edit, copy Balloons
Edit, paste, paste as new layer
Move to the top left of the frame
Image, resize 75%
Effects, 3D Effects, Drop Shadow, Same Settings
Edit, copy Eye Mask
Edit, paste, paste as new layer
Move to the bottom left of the frame
Image, resize 75
Image, rotate, free rotate, left 25
Effects, 3D Effects, Drop Shadow, Same Settings
Edit, copy Party Tiara
Edit, paste, paste as new layer
Image, resize 60%
Move to the bottom left of the frame
Effects, 3D Effects, Drop Shadow, Same settings
Select Raster 2
Edit, Copy Beads 2
Edit, paste, paste as new layer
Effects, 3D Effects, Drop Shadow, Same Settings
Edit, Copy Beads 3
Edit, paste, paste as new layer
Move to the right and place in front of the sign
Image, resize 60%
Effects, 3D Effects, Drop Shadow, Same Settings
Edit, copy Tube
Edit, paste, paste as new layer
Image, resize 85%
Effects, 3D Effects, Drop Shadow, Same Settings
Edit, Copy Champagne FLutes
Edit, Paste, paste as new layer
Image, resize 60%
Move to the left of the frame
Effects, 3D Effects, Drop Shadow, Same Settings
Edit, copy Champagne
Edit, Paste, Paste as new layer
Image, resize 60%
Place in front of the champagne flutes
Effects, 3D Effects, Drop Shadow, Same Settings
Edit, Copy Dubloons
Edit, paste, paste as new layer
Image, resize 50%
Move to the right and and place below the beads
Effects, 3D Effects, Drop Shadow, same Settings
Edit, Copy Feather 2
Edit, paste, paste as new layer
Move to the right of the frame
Layers, arrange, send to bottom
Move over to the left some
Effects, 3D Effects, Drop Shadow, Same Settings
Layers, Duplicate
Image, Mirror
Select Raster 2
Edit, copy Music 2
Edit, paste, paste as new layer
Image, resize 80%
Bring to the top of the frame
Effects, 3D Effects, Drop Shadow, Same settings
Edit, Copy Crystal Ball
Edit, paste, paste as new layer
Image, resize 40%
Move to the right and place behind the dubloons and beads
Effects, 3D Effects, Drop Shadow. Same Settings
Remember to add your copyright info. Make sure it is plain and legible
Add your name to the tag
Save as PNG
Friday, February 14, 2014

I am using the artwork of Tiffany Toland Scott. You need a license to use this tube. You can purchase this tube at CDO
I am using the PTU kit Release Me by Tasha's Playground. You can find where to purchase the kit HERE
Open new image 600 x 600
Open Frame 1
Image, rotate, Rotate clockwise 90
Edit, Copy Frame 1
Edit, paste, paste as new layer
Image, resize 85%
With your magic wand click inside of the frame
Selections, Modify, Expand by 8
Edit, copy Paper 2
Edit, paste, paste as new layer
Layers, arrange, send to bottom
Selections, Invert
Edit, Clear
Selections Select None
Edit, copy Sparkle
Edit, paste, paste as new layer
Edit, Clear
Selections, Select None
Select Raster 2
Effects, 3D Effects, Drop Shadow, Settings of:
Vertical : -3
Horizontal: 3
Opacity: 50
Blur: 10
Color: Black
Shadow on new layer NOT Checked
Effects, 3D Effects, Drop Shadow, Same Settings
Edit, copy Flowers
Edit, paste, paste as new layer
Image, resize 85%
Move to the top of the frame
Effects, 3D Effects, Drop Shadow, Same Settings
Edit, Copy Cluster
Edit, paste, paste as new layer
Move to the top and place on the flowers
Image, resize 85%
Effects, 3D Effects, Drop Shadow, Same Settings
Edit, copy Beads
Edit, paste, paste as new layer
Move down to Raster 2
Move to the top of the frame
Image, resize 70%
Effects, 3D Effects, Drop Shadow, Same Settings
Edit, copy Lights
Edit, paste, paste as new layer
Move to to the top of the frame
Image, rotate, free rotate, left 15
Effects, 3D Effects, Drop Shadow, Same Settings
Edit, copy Tube
Edit, paste, paste as new layer
Image, resize 85%
Move down til the tube is sitting on the frame
Effects, 3D Effects, Drop Shadow, Same settings
Edit, Copy Clocks
Edit, paste, paste as new layer
Move Behind the tube. Move down til it is above Raster 2. Move toward the bottom. See my tag for placement
Effects, 3D Effects, Drop Shadow, Same Settings
Edit, Copy Wand
Edit, paste, paste as new layer
Move to the left and move to place behind the tube. Move up to the top of the frame some. See my tag for placement
Effects, 3D Effects, Drop Shadow, Same Settings
Edit, copy Buttons
Edit, paste, paste as new layer
Move down toward the clocks
Image, rotate, free rotate, left 15
Effects, 3D Effects, Drop Shadow, Same Settings
Edit, Copy Rose
Edit, Paste, paste as new layer
Image, rotate, free rotate, 45, left
Image, resize 85%
Move to the right of the frame. See my tag for placement
Effects, 3D Effects, Drop Shadow, Same Settings
Layers, duplicate
Image, resize 85%
Move to the left of the rose
Layers, Duplicate
Move duplicate to the right side of the rose
Move the original rose up above the other two roses
Edit, copy Key 2
Edit, Paste, Paste as new layer
Image, resize 50%
Layers, arrange, bring to top
Move to the left and place next to the clock
Effects, 3D Effects, Drop Shadow, Same Settings
Edit, Copy Dragonfly
Edit, paste, paste as new layer
Layers, arrange, bring to top
Image, resize 60%
Move to the right and place on the stems of the roses
Effects, 3D Effects, Drop Shadow, same Settings
Select Raster 2
Edit, Copy Flowers 2
Edit, paste, paste as new layer
Image, resize 80%
Move down to the bottom of the frame
Effects, 3D Effects, Drop Shadow, Same Settings
Edit, copy Glitter Spray
Edit, paste, paste as new layer
Move down
Remember to add your copyright info. Make sure it is plain and legible
Add your name to the tag
Save as PNG
Release Me FTU Cluster Frame using the PTU Kit Release Me by Tasha's Playground. Tasha no longer sales kits.

Tuesday, February 11, 2014

This tutorial was written by me. Any resemblance to any other tutorial is pure coincidence. Please DO NOT claim this tutorial as your own. It was written in PSP 9 but should be compatible with any version of PSP.
I am using the artwork of Elias Chatzoudis You need a license to use this tube. I bought this tube at PTE. You can now buy his work at his store HERE. **Just a note I do NOT see this tube I am using at his store**
I am using the PTU kit Irish Kiss by Tasha's Playground. You can find where to purchase the kit HERE
Open new image 600 x 600
Edit, Copy Frame 1
Edit, paste, paste as new layer
Image, resize 80%
With your magic wand click inside of the frame
Selections, Modify, Expand by 8
Edit, copy Paper 3
Edit, paste, paste as new layer
Layers, arrange, send to bottom
Selections, Invert
Edit, Clear
Selections Select None
Edit, copy Sparkle
Edit, paste, paste as new layer
Edit, Clear
Selections, Select None
Select Raster 2
Effects, 3D Effects, Drop Shadow, Settings of:
Vertical : -3
Horizontal: 3
Opacity: 50
Blur: 10
Color: Black
Shadow on new layer NOT Checked
Effects, 3D Effects, Drop Shadow, Same Settings
Edit, copy Tube
Edit, paste, paste as new layer
Image, resize 85%
Move to bottom of the frame some
Effects, 3D Effects, Drop Shadow, Same Settings
Edit, Copy Wordart
Edit, paste, paste as new layer
Move to bottom of the frame and place on top of the cut off legs of the tube
Image, resize 70%
Effects, 3D Effects, Drop Shadow, Same Settings
Edit, copy Pot of Gold
Edit, paste, paste as new layer
Move to the left and place behind the I in Irish. This way the rainbow will be behind the tube
Image, resize 70%
Edit, copy Money Bag
Edit, paste, paste as new layer
Image, resize 40%
Move to the left and place it to the right of the pot of gold
Effects, 3D Effects, Drop Shadow, Same Settings
Edit, copy Harp
Edit, paste, paste as new layer
Move to the right of the frame. Place on the H in Irish
Image, resize 60%
Effects, 3D Effects, Drop Shadow, Same settings
Edit, Copy Beer
Edit, paste, paste as new layer
Image, resize 40%
Move to the left and place beside and on the I in Irish some
Effects, 3D Effects, Drop Shadow, Same Settings
Edit, Copy Beer 2
Edit, paste, paste as new layer
Image, Resize 50%
Move to the left and place behind and to the left of beer
Effects, 3D Effects, Drop Shadow, Same Settings
Edit, copy Bag
Edit, paste, paste as new layer
Image, resize 40%
Move to the right and place beside the H in irish
Effects, 3D Effects, Drop Shadow, Same Settings
Edit, Copy Harps
Edit, Paste, paste as new layer
Image, resize 70%
Move toward the top left of the frame
Layers, arrange, send to bottom
Effects, 3D Effects, Drop Shadow, Same Settings
Select Raster 2
Edit, copy Music
Edit, Paste, Paste as new layer
Effects, 3D Effects, Drop Shadow, Same Settings
Edit, Copy Pipe
Edit, paste, paste as new layer
Layers, arrange, bring to top
Image, resize 60%
Move to the bottom left and move to place in front of the beer some. See my tag for placement
Effects, 3D Effects, Drop Shadow, same Settings
Edit, Copy Clover Pop
Edit, paste, paste as new layer
Image, resize 50%
Move to the left and move below the Beer 2 and to the left some
Effects, 3D Effects, Drop Shadow, Same Settings
Edit, copy Hat
Edit, paste, paste as new layer
Move to the right and place behind the bag
Remember to add your copyright info. Make sure it is plain and legible
Add your name to the tag
Save as PNG
Irish Kiss FTU Cluster Frame using the PTU Kit Irish Kiss by
Tasha's Playground. Tasha no longer sales kits.

Saturday, February 8, 2014

This tutorial was written by me. Any resemblance to any other tutorial is pure coincidence. Please DO NOT claim this tutorial as your own. It was written in PSP 9 but should be compatible with any version of PSP.
I am using the artwork of Isobel Van Finklestein. You need a license to use these tubes. You can purchase the tube at The PSP Project(this store is now CLOSED)
I am using the FTU kit Martini Love by Gimptastic Scraps . This kit can be found HERE
Open new image 600 x 600
Edit, Copy Frame 4
Edit, paste, paste as new layer
Image, resize 80%
With your magic wand click inside of the frame
Selections, Modify, Expand by 8
Edit, copy Paper 4
Edit, paste, paste as new layer
Layers, arrange, send to bottom
Selections, Invert
Edit, Clear
Selections Select None
Edit, copy Bubbles
Edit, paste, paste as new layer
Layers, Duplicate
Edit, copy Heart Bubbles
Edit,paste, paste as new layer
Layers, Duplicate
Select Raster 2
Effects, 3D Effects, Drop Shadow, Settings of:
Vertical : -3
Horizontal: 3
Opacity: 50
Blur: 10
Color: Black
Shadow on new layer NOT Checked
Edit, copy Mask
Edit, paste, paste as new layer
Layers, arrange, send to bottom
Image, resize 90%
Edit, Copy Swirl
Edit, paste, paste as new layer
Move to the top of the frame some
Effects, 3D Effects, Drop Shadow, Same Settings
Layers, Duplicate
Layers, merge, merge down
Layers, Duplicate
Image, Flip
Image, Mirror
Edit, copy Scatter
Edit, paste, paste as new layer
Layers, arrange, bring to top
Edit, copy Star 3
Edit, paste, paste as new layer
Move to the top of the frame
Image, resize 80%
Effects, 3D Effects, Drop Shadow, Same Settings
Edit, copy Banner
Edit, paste, paste as new layer
Move to the top and place under the stars
Than what I did was erase the banner that was inside of each frame
Effects, 3D Effects, Drop Shadow, Same settings
Edit, Copy Balloon
Move the top left of the frame
Effects, 3D Effects, Drop Shadow, Same Settings
Edit, Copy Tube
Edit, paste, paste as new layer
Image, Resize 65%
Effects, 3D Effects, Drop Shadow, Same Settings
Edit, copy Clock
Edit, paste, paste as new layer
Image, resize 70%
Move to the top right of the frame. Below behind the tubes head
Effects, 3D Effects, Drop Shadow, Same Settings
Edit, Copy Shoes
Edit, Paste, paste as new layer
Image, resize 70%
Move to the lower right hand bottom of the frame
Effects, 3D Effects, Drop Shadow, Same Settings
Edit, copy Deco 2
Edit, Paste, Paste as new layer
Move down til it is below the clock
Effects, 3D Effects, Drop Shadow, Same Settings
Edit, Copy WA
Edit, paste, paste as new layer
Image, resize 75%
Move to the bottom of the tag. Place at the bottom. See my tag for placement
Effects, 3D Effects, Drop Shadow, same Settings
Edit, Copy Key
Edit, paste, paste as new layer
Image, resize 60%
Move to the left and make it look like it is Deco 2
Image, rotate, free rotate, 20, right
Effects, 3D Effects, Drop Shadow, Same Settings
Edit, copy Wire Hearts
Edit, paste, paste as new layer
Move to the right and place on Raster 2
Image, resize 70%
Effects, 3D Effects, Drop Shadow, Same Settings
Edit, Copy Heart Gem
Edit, Paste, paste as new layer
Layers, arrange, bring to top
Image, resize 50%
Move to the left and place beside the letter L
Effects, 3D Effects, Drop Shadow, Same Settings
Remember to add your copyright info. Make sure it is plain and legible
Add your name to the tag
Save as PNG
Wednesday, February 5, 2014

I am using the artwork of PinupToons. You need a license to use this tube. You can buy this tube at CDO
I am using the PTU kit Love Fool by Sweet Cravings Scraps. You can buy the kit at TKO Scraps, Exquisite Scraps, and Scraps & Tubes
Open new image 600 x 600
Edit, Copy Frame 2
Edit, paste, paste as new layer
Image, resize 60%
With your magic wand click inside of the frame
Selections, Modify, Expand by 8
Edit, copy Paper 12
Edit, paste, paste as new layer
Layers, arrange, send to bottom
Selections, Invert
Edit, Clear
Edit, copy Bubbles
Edit, paste, paste as new layer
Move over to the left some
Image, resize 85%
Edit, Clear
Edit, Copy Sparkles
Edit, paste, paste as new layer
Edit, Clear
Edit, Copy Scattered Hearts
Edit, Paste, paste as new layer
Image, resize 85%
Move down and to the right some
Edit, Clear
Selections Select None
Select Raster 2
Effects, 3D Effects, Drop Shadow, Settings of:
Vertical : -3
Horizontal: 3
Opacity: 50
Blur: 10
Color: Black
Shadow on new layer NOT Checked
Edit, copy Frame 1
Edit, paste, paste as new layer
Layers, arrange, send to bottom
Image, resize 65%
Effects, 3D Effects Drop Shadow, same settings
Edit, Copy Heart Tree
Edit, paste, paste as new layer
Move to the right side of the frame. See my tag for placement
Image, resize 70%
Effects, 3D Effects, Drop Shadow, Same Settings
Edit, copy Grass 2
Edit, paste, paste as new layer
Move to the right side of the frame and move behind the heart tree
Image, resize 40%
Effects, 3D Effects, Drop Shadow, Same Settings
Edit, copy Balloons
Edit, paste, paste as new layer
Layers, arrange, bring to top
Image, resize 50%
Move to the top left side of the frame
Effects, 3D Effects, Drop Shadow, Same Settings
Edit, copy Flower 9
Edit, paste, paste as new layer
Image, resize 50%
Move to the left and place on the far edge of the frame
Effects, 3D Effects, Drop Shadow, Same settings
Layers, Duplicate
Image, resize 80%
Move down below the original. See my tag for placement
Effects, 3D Effects, Drop Shadow, Same Settings
Edit, Copy Flower 10
Edit, Paste, Paste as new layer
Image, resize 50%
Image, Mirror
Move to place to the right side of Flower 9
Effects, 3D Effects, Drop Shadow, Same Settings
Layers, Duplicate
Image, resize 80%
Line up with the original
Edit, Copy Lovebirds
Edit, paste, paste as new layer
Image, Resize 40%
Move to the left and place at the bottom of the frame to cover up the stems of the flowers
Effects, 3D Effects, Drop Shadow, Same Settings
Edit, copy Caterpillar
Edit, paste, paste as new layer
Image, resize 30%
Move to the right and place in front of the heart tree at the bottom
Effects, 3D Effects, Drop Shadow, Same Settings
Edit, Copy Tube
Edit, Paste, paste as new layer
Since my tube looks like it is crouching some I move it over to look like she is sitting on the heart tree
Effects, 3D Effects, Drop Shadow, Same Settings
Edit, copy Hot Air Balloon
Edit, Paste, Paste as new layer
Image, resize 40%
Move to the right and move below the tree
Image, rotate, free rotate, right, 20
Effects, 3D Effects, Drop Shadow, Same Settings
Edit, Copy Wordart
Edit, paste, paste as new layer
Image, resize 30%
Move to the top left and place on the balloons
Effects, 3D Effects, Drop Shadow, same Settings
Remember to add your copyright info. Make sure it is plain and legible
Add your name to the tag
Save as PNG
Tuesday, February 4, 2014

I am using the artwork of Zindy. You need a license to use this tubes. You can buy the tube at her store HERE
I am using the PTU kit Tickle Me Pink by Freek's Creations. You can buy the kit at Mystical Scraps
Open new image 600 x 600
Edit, Copy Window
Edit, paste, paste as new layer
Image, resize 30%
With your magic wand click inside of the frame
Selections, Modify, Expand by 8
Edit, copy Paper 12
Edit, paste, paste as new layer
Layers, arrange, send to bottom
Image, resize 30%
Edit, repeat resize
Selections, Invert
Edit, Clear
Edit, copy Swirl 2
Edit, Paste, Paste as new layer
Image, resize 20%
Edit, Clear
Selections Select None
Select Raster 2
Effects, 3D Effects, Drop Shadow, Settings of:
Vertical : -3
Horizontal: 3
Opacity: 50
Blur: 10
Color: Black
Shadow on new layer NOT Checked
Edit, copy Tree
Edit, paste, paste as new layer
Move to the right side of the window
Image, resize 30%
Effects, 3D Effects Drop Shadow, same settings
Edit, Copy Picnic
Edit, paste, paste as new layer
Image, resize 15%
Move to place at the bottom of the tree
Effects, 3D Effects, Drop Shadow, Same Settings
Edit, copy Branch
Move to Raster 2 and place in the middle of the window
Edit, paste, paste as new layer
Image, resize 30%
Effects, 3D Effects, Drop Shadow, Same Settings
Edit, copy Bouquet
Edit, paste, paste as new layer
Image, rotate,free rotate, left, 50
Move to the right and place behind picnic but in front of the tree
Effects, 3D Effects,Drop Shadow, Same Settings
Edit, copy Tube
Edit, paste, paste as new layer
Layers, arrange, bring to top
Image, resize 85%
Move to the left of the tag some. With the tube I am using it looks like she is kneeling on the picnic element
Effects, 3D Effects, Drop Shadow, Same Settings
Edit, copy Bear
Edit, paste, paste as new layer
Image, resize 20%
Move to the right of the frame and place at the bottom right of the picnic. see my tag for placement
Effects, 3D Effects, Drop Shadow, Same settings
Edit, copy Pillow
Edit, paste, paste as new layer
Move to left and place behind the tube
Image, resize 15%
Effects, 3D Effects, Drop Shadow, Same Settings
Edit, Copy Butterfly
Edit, Paste, Paste as new layer
Image, resize 25%
Move to the right and place on the bouquet
Effects, 3D Effects, Drop Shadow, Same Settings
Remember to add your copyright info. Make sure it is plain and legible
Add your name to the tag
Save as PNG

I am using the artwork of ChrisPastel. You need a license to use these tubes. You can purchase the tube at PFD
I am using the PTU kit My Birthstone Series: Amethyst by Gimptastic Scraps . Amy no longer sells kits.
This is the start of a series of kits by Gimptastic Scraps & Tasha's Playground
Open new image 600 x 600
Edit, Copy Frame 4
Edit, paste, paste as new layer
Image, resize 75%
With your magic wand click inside of the frame
Selections, Modify, Expand by 8
Edit, copy Paper 1
Edit, paste, paste as new layer
Layers, arrange, send to bottom
Selections, Invert
Edit, Clear
Selections Select None
Select Raster 2
Effects, 3D Effects, Drop Shadow, Settings of:
Vertical : -3
Horizontal: 3
Opacity: 50
Blur: 10
Color: Black
Shadow on new layer NOT Checked
Edit, copy Gem Brooch
Edit, paste, paste as new layer
Effects, 3D Effects Drop Shadow, same settings
Edit, Copy Ribbon
Edit, paste, paste as new layer
Move below the Gem Brooch
Effects, 3D Effects, Drop Shadow, Same Settings
Edit, copy Deco 2
Edit, paste, paste as new layer
Move to the left side of the frame
Layers, arrange, send to bottom
Effects, 3D Effects, Drop Shadow, Same Settings
Layers, Duplicate
Image, Mirror
Image, Flip
Select Raster 3
Selections, Select All, Float, Defloat
Edit, copy Tube
Edit, paste, paste as new layer
Move to the right and place so you can see her face. See my tag for placement
Selections, Invert
Edit, Clear
Selections, Select None
Change the blend mode of this layer to Luminance(L)
Layers, Duplicate
Image, Mirror
Edit, copy Swan
Edit, paste, paste as new layer
Layers, arrange, bring to top
Image, resize 60%
Move to the right side of the frame and place near the bottom. See my tag for placement
Effects, 3D Effects, Drop Shadow, Same Settings
Edit, copy Gem Flower
Edit, paste, paste as new layer
Image, resize 50%
Move to the right of the frame and place on the ribbon and gem brooch
Effects, 3D Effects, Drop Shadow, Same settings
Layers, Duplicate
Image, Mirror
Edit, copy Branch
Edit, paste, paste as new layer
Image, Flip
Move to top of the frame on Raster 2
Image, rotate, free rotate, right, 20
Move to the top of the frame
Effects, 3D Effects, Drop Shadow, Same Settings
Layers, Duplicate
Image, Flip
Edit, Copy Beads
Edit, Paste, Paste as new layer
Image, resize 85%
Move down toward the bottom of the frame. See my tag for placement
Effects, 3D Effects, Drop Shadow, Same Settings
Edit, Copy Dragonfly
Edit, paste, paste as new layer
Image, Resize 85%
Move to the left and place at the top of the frame
Effects, 3D Effects, Drop Shadow, Same Settings
Layers, Duplicate
Image, Mirror
Than you will have to move it down so the wing is under the tubes shoulder
Remember to add your copyright info. Make sure it is plain and legible
Add your name to the tag
Save as PNG
Monday, February 3, 2014

I am using the artwork of Di_Halim. You need a license to use this tube. You can buy this tube at PFD
I am using the PTU kit Birthstone Series: Amethyst by Tasha's Playground. Tasha no longer sells kits.
This kit is going to be a series between Tasha and Gimptastic Scraps.
Open new image 600 x 600
Edit, Copy Frame 2
Edit, paste, paste as new layer
Image, resize 80%
With your magic wand click inside of the frame
Selections, Modify, Expand by 8
Edit, copy Paper 1
Edit, paste, paste as new layer
Layers, arrange, send to bottom
Selections, Invert
Edit, Clear
Edit, copy Sparkle
Edit, paste, paste as new layer
Move down to the bottom of the frame
Edit, Clear
Selections Select None
Layers, Duplicate
Image, Flip
Image, Mirror
Select Raster 2
Effects, 3D Effects, Drop Shadow, Settings of:
Vertical : -3
Horizontal: 3
Opacity: 50
Blur: 10
Color: Black
Shadow on new layer NOT Checked
Edit, copy Swirl
Edit, paste, paste as new layer
Layers, arrange, send to bottom
Move around til it looks to surround all the back of the frame
Effects, 3D Effects Drop Shadow, same settings
Edit, Copy Tube
Edit, paste, paste as new layer
Image, resize to fit your tag
Effects, 3D Effects, Drop Shadow, Same Settings
Edit, copy Clock
Edit, paste, paste as new layer
Image, resize 75%
Move to the top of the frame. Move down behind the tube and to the left some
Effects, 3D Effects, Drop Shadow, Same Settings
Edit, copy Jewel 2
Edit, paste, paste as new layer
Image, resize 75%
Move up than move down to the bottom of the frame to cover up the cut off legs
Effects, 3D Effects, Drop Shadow, Same Settings
Edit, copy Scatter
Edit, paste, paste as new layer
Move to the left of the frame
Layers, arrange, send to bottom
Effects, 3D Effects, Drop Shadow, Same settings
Layers, Duplicate
Image, Mirror
Edit, copy String
Edit, paste, paste as new layer
Layers, arrange, bring to top
Image, resize 75%
Image, rotate, free rotate, left 10
Move to the bottom of the frame and place below the jewel
Effects, 3D Effects, Drop Shadow, Same Settings
Edit, Copy Key
Edit, Paste, Paste as new layer
Image, resize 65%
Move to place on the left side of the frame in the middle of the frame. see my tag for placement
Effects, 3D Effects, Drop Shadow, Same Settings
Edit, Copy Leaves 2
Edit, paste, paste as new layer
Image, Mirror
Move to the right and move down below the tube. See my tag for placement
Effects, 3D Effects, Drop Shadow, Same Settings
Edit, Copy Butterflies
Edit, Paste, Paste as new layer
Image, resize 70%
Move to right and place on the leaves
Image, rotate, free rotate, right 10
Effects, 3D Effects, Drop Shadow, Same Settings
Edit, Copy Locket
Edit, paste, paste as new layer
Image, resize 40%
Move to the right of the jewel
Effects, 3D Effects, Drop Shadow, Same Settings
Layers, duplicate
Image, Mirror
Edit, Copy Deco
Edit, paste, paste as new layer
Image, resize 75%
Move to Raster 2
Effects, 3D Effects, Drop Shadow, Same Settings
Remember to add your copyright info. Make sure it is plain and legible
Add your name to the tag
Save as PNG
Amethyst FTU Cluster Frame using the PTU Kit Birthstone Series: Amethyst by Tasha's
Playground. Tasha no longer sells kits.

Sunday, February 2, 2014

I am using the artwork of Zlata M. You need a license to use this tube. You can purchase this tube at The PSP Project
I am using the PTU kit Irish Charm by Manipulated by Magik. You can buy this kit exclusively at PFD and Mystical Scraps and Thrifty Scraps
Open new image 600 x 600
Edit, Copy Frame 2
Edit, paste, paste as new layer
Image, resize 70%
With your magic wand click inside of the frame
Selections, Modify, Expand by 8
Edit, copy Paper 5
Edit, paste, paste as new layer
Layers, arrange, send to bottom
Selections, Invert
Edit, Clear
Edit, copy Sparkles 1
Edit, paste, paste as new layer
Move over to the left some
Edit, Clear
Edit, copy Sparkles 2
Edit, paste, paste as new layer
Edit, Clear
Selections Select None
Select Raster 2
Effects, 3D Effects, Drop Shadow, Settings of:
Vertical : -3
Horizontal: 3
Opacity: 50
Blur: 10
Color: Black
Shadow on new layer NOT Checked
Edit, copy Scatter
Edit, paste, paste as new layer
Layers, arrange, send to bottom
Move to the middle of the frame at the back
Effects, 3D Effects Drop Shadow, same settings
Edit, Copy Clover Swirl
Edit, paste, paste as new layer
Layers, arrange, bring to top
Move to the right side of the frame.
Effects, 3D Effects, Drop Shadow, Same settings
Edit, Copy Clovers
Edit, paste, paste as new layer
Image, resize 75%
Move to the right and move down til the stems are touching the bottom of the frame at the bottom
Effects, 3D Effects, Drop Shadow, Same Settings
Edit, copy Pot of Gold
Edit, paste, paste as new layer
Image, resize 50%
Move to the right and place at the bottom right of the frame in front of the clovers
Effects, 3D Effects, Drop Shadow, Same Settings
Edit, copy Tube
Edit, paste, paste as new layer
Image, resize 75%
Move to the bottom and over to the right some. Make sure her leg is in front of the pot of gold
Effects, 3D Effects, Drop Shadow, Same Settings
Edit, copy Beer
Edit, paste, paste as new layer
Image, resize 50%
Move to the left and down behind the tube next to the frame
Effects, 3D Effects, Drop Shadow, Same settings
Edit, copy Pint
Edit, paste, paste as new layer
Image, resize 60%
Image, Mirror
Move to the right and place behind the Beer
Effects, 3D Effects, Drop Shadow, Same Settings
Edit, Copy Chain
Edit, Paste, Paste as new layer
Image, resize 80%
Move to the very top of the frame
Effects, 3D Effects, Drop Shadow, Same Settings
Edit, Copy Banner
Edit, paste, paste as new layer
Move to the top of the frame and move down below the Chain
Effects, 3D Effects, Drop Shadow, Same Settings
Edit, Copy Glitter Trail
Edit, Paste, Paste as new layer
Image, resize 90%
Move to the top of the frame
Layers, arrange, send to bottom
Effects, 3D Effects, Drop Shadow, Same Settings
Edit, Copy St Patty's Pop
Edit, paste, paste as new layer
Layers, arrange, bring to top
Image, resize 50%
Move to the left and place in front of the beer and pint
Effects, 3D Effects, Drop Shadow, Same Settings
Edit, Copy Mouse
Edit, paste, paste as new layer
Image, resize 50%
Image, mirror
Move to the bottom right and place to the right side of the pot of gold
Effects, 3D Effects, Drop Shadow, Same Settings
Remember to add your copyright info. Make sure it is plain and legible
Add your name to the tag
Save as PNG
Subscribe to:
Posts
(Atom)