Sunday, September 15, 2013
10:17 AM | Edit Post
This tutorial was written by me. Any resemblance to any other tutorial is pure coincidence. Please DO NOT claim this tutorial as your own. It was written in PSP 9 but should be compatible with any version of PSP.
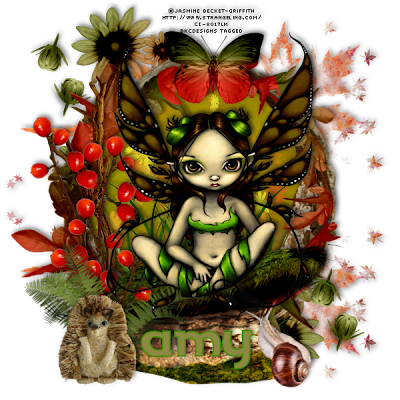
I am using the artwork of Jasmine Becket-Griffith. You need a license to use her tubes. I purchased this tube while at CILM. You can now purchase her tubes at CDO
I am using the PTU kit Woodland Pixie by Gimptastic Scraps . This kit is exclusive to Thrifty Scraps
Flowerflow Font found HERE
Open new image 600 x 600
Edit, Copy Frame 3
Edit, paste, paste as new layer
Image, resize 80%
With your magic wand click inside the frame
Selections, Modify, Expand by 8
Edit, copy Paper 3
Edit, paste, paste as new layer
Layers, arrange, send to bottom
Selections, Invert
Edit, clear
Edit, Copy Scatter
Edit, Paste, paste as new layer
Edit, clear
Selections, Select None
Select Raster 2
Effects, 3D Effects, Drop Shadow, Settings of:
Vertical : -3
Horizontal: 3
Opacity: 50
Blur: 10
Color: Black
Shadow on new layer NOT Checked
Edit, Copy Hill
Edit, Paste, Paste as new layer
Move to the bottom of the frame
Image, resize 80%
Effects, 3D Effects, Drop Shadow, Same Settings
Edit, Copy Fern
Edit, paste, paste as new layer
Move to the left of the hill
Image, resize 80%
Effects, 3D Effects, Drop Shadow, Same settings
Edit, Copy Grass
Edit, Paste, Paste as new layer
Move down til it is above Raster 4
Move over to the left
Effects, 3D Effects, Drop Shadow, Same Settings
Layers, Duplicate
Image, Mirror
Edit, copy Branch
Edit, paste, paste as new layer
Move up and to the left til it above Raster 2
Effects, 3D Effects, Drop Shadow, Same Settings
Select Berry 1
Image, rotate, rotate clockwise 90
Image, Mirror
Edit, copy Berry 1
Edit, paste, paste as new layer
Move to the left and place in front of the branch
Effects, 3D Effects, Drop Shadow, Same Settings
Select Raster 2
Edit, copy Frame 1
Edit, paste, paste as new layer
Image, resize 90%
Effects, 3D Effects, Drop Shadow, Same Settings
Edit, Copy Flower Scatter
Edit, Paste, Paste as new layer
Layers, arrange, send to bottom
Move to the left some
Effects, 3D Effects, Drop Shadow, Same Settings
Layers, Duplicate
Image, Mirror
Image, Flip
Edit, Copy Snail
Edit, Paste, Paste as new layer
Layers, arrange, bring to top
Image, resize 85%
Move to place on the right of the hill. See my tag for placement
Effects, 3D Effects, Drop Shadow, Same settings
Edit, Copy Hedgehog
Edit, Paste, paste as new layer
Image, resize 60%
Move to place in front of the fern
Effects, 3D Effects, Drop Shadow, Same Settings
Edit, Copy Tube
Edit, Paste, paste as new layer
Place on the hill
Image, resize 85%
Effects, 3D Effects, Drop Shadow, Same Settings
Edit, Copy Butterfly
Edit, Paste, Paste as new layer
Move to the top of the frame
Effects, 3D Effects, Drop Shadow, Same Settings
Edit, copy Mask
Edit, paste, paste as new layer
Layers, arrange, send to bottom
Pull to the top of the frame some
Effects, 3D Effects, Drop Shadow, Same Settings
Layers, Duplicate
Image, Flip
Remember to add your copyright info. Make sure it is plain and legible
Add your name to the tag
Save as PNG
Labels:Amy(Gimptastic),PTU,Tutorial
Subscribe to:
Post Comments
(Atom)
Categories
- Amy(Gimptastic) (433)
- Amy(Gimptastic) Tutorial (4)
- Artistic Tag Passions Exclusive Tut (2)
- Barbara Jensen (24)
- Berry (1)
- Birthstone (36)
- CDO (651)
- Christmas (70)
- Cluster frame (106)
- Color Palette (2)
- Creative Addiction Exclusive (17)
- Creative Crazy Scraps (1)
- Crystals Creations (1)
- Curious Creative Dreams (10)
- Designs by Sarah Bryan (1)
- Diamond Creations (44)
- emo (2)
- Foxys Designz (62)
- Frames (4)
- Freek's Creations CT (22)
- FTU (300)
- FTU Tutorial (38)
- Halloween (10)
- Keith Garvey (5)
- Lady Mishka (1)
- Ladybug (2)
- Ladyhawwk (224)
- Magik (206)
- Manipulated by Magic Forum Exclusive (3)
- Manipulated by Magik (182)
- Masks (1)
- Mellie Beans (1)
- Michael Calandra (1)
- Michael Landefeld (1)
- Monti's Scraps (17)
- Mystical Scraps (7)
- Naughty Angelz Creationz (5)
- Ocean (3)
- Old School (8)
- Pammers Passions (1)
- Paper Pack (5)
- Pimpin' PSPers Warehouse (5)
- Pinup Toons (3)
- PTU (1248)
- PTU Now FTU (2)
- PTU Tutorial (699)
- Purple (1)
- Purple's CT (16)
- Schnegge's Scraps (49)
- Scrap-A-Licious CT (20)
- Snags (32)
- Steampunk (1)
- Summer (1)
- Sweet Cravings Scraps (80)
- tag show off (5)
- Tasha's Playground (188)
- Template (24)
- Textures (2)
- Thanksgiving (3)
- Treasured Scraps (4)
- Tutorial (1298)
- Valentine (11)
- Wallpaper (21)
- Whisprd Designz Store (9)
- Wicked Princess Scraps (101)
- Wordart (16)
Blog Archive
-
▼
2013
(196)
-
▼
September
(23)
- Mummy's Curse PTU Tutorial
- PinkWeen PTU Tutorial
- PinkWeen FTU Cluster Frame
- Under My Spell PTU Tutorial
- Voodoo Goddess PTU Tutorial
- Hope 4 A Cure PTU Tutorial
- Antique Autumn PTU Tutorial
- Antique Autumn FTU Cluster Frame
- Fabulous Fall PTU Tutorial
- Cursed PTU Tutorial
- Cursed FTU Cluster Frame
- Fairy On The Hill PTU Tutorial
- Queen Of The Night PTU Tutorial
- Trapped in Autumn 3 (Synkka) PTU Tutorial
- Trapped In Autumn 2 (Valoisa) PTU Tutorial
- Trapped In Autumn 1 (Lisaetu) PTU Tutorial
- Gimptastic Scraps Is Having a Birthday Sale
- Love Fall Forever PTU Tutorial
- Denim Girl PTU Tutorial
- Autumn In The Vineyard PTU Tutorial
- Time For Autumn Festival PTU Tutorial
- Happy That It Is Autumn PTU Tutorial
- Happy Autumn FTU Cluster Frame
-
▼
September
(23)


0 comments:
Post a Comment